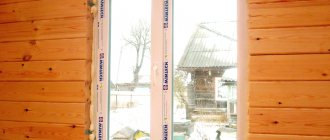
Hello everybody! Recently good friends contacted me for advice. They are building a house from a bar and have reached the stage of installing plastic windows. They are built, of course, not by themselves, but by hired brigades.
But you still need to control. They asked me to tell you about the nuances of installing double-glazed windows in the house, what to look for, etc., so as not to drain the money into the pipe and then not redo it after six months. We sat with them over a cup of coffee, I told them everything in detail and, at the same time, outlined in this article. Suddenly, this information will be useful to you. Read on!
Okosyachka for plastic windows
Structures and buildings made of natural wood tend to move, that is, shrinkage. This characteristic imposes restrictions on the installation of windows and doors in skylights.
If you do not use special techniques in the form of a casing, or a window, then the delivered window or door will be deformed, broken, and gaps will appear between the frame and the wall.
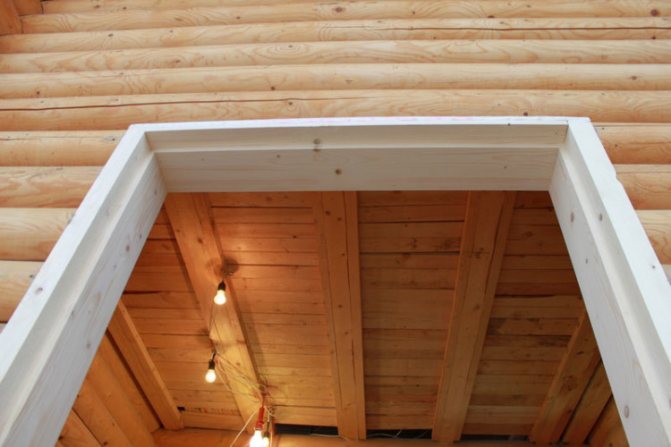
To avoid such problems, an additional framing of the skylight is widely used, which is called casing. In fact, this structure is a product made of wood - a box, which is planted on the walls and to which the profiles of windows and doors are attached.
Such a simple design provides an independent position of windows and doors relative to the walls, and therefore, when the house begins to sag, the cage becomes mobile - it moves along the opening, moving the frames with it without deforming them.
There are two options for making a window, or rather its profile. Allocate
- thorn-groove - where grooves and spikes are cut out in the fastened parts for joining and fastening;
- monolithic, or finishing, which also have a thorn and a groove, but the counterpart of the bar is made of solid timber. In this case, glued laminated timber is not even recommended due to the peculiarities of the reaction of the glue to changes in humidity.
It is important that in the manufacture of this or that type of casing, in any case, it should not sit tightly on the walls of the house, since in this case mobility will not be ensured.
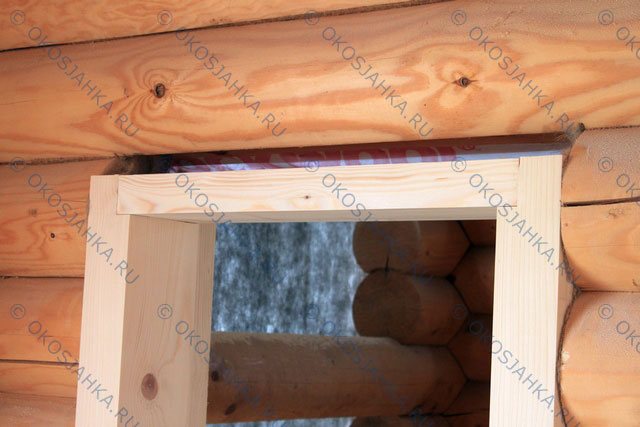
Since the jamb consists of sidewalls, a top and a bottom (or a threshold), it is very important to leave a larger gap between the top and the wall - up to 12 cm, which is intended to compensate for the shrinkage of a wooden house. Such gaps, of course, are processed: they are insulated and closed with platbands.
In order for the cage to serve for a long time and reliably, before installing it, it is important to treat it with an antiseptic and follow the installation procedure: first the bottom, then the sidewalls and finally the top with insulation and platbands.
Types of okosyachki:
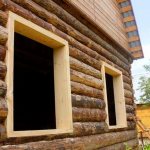
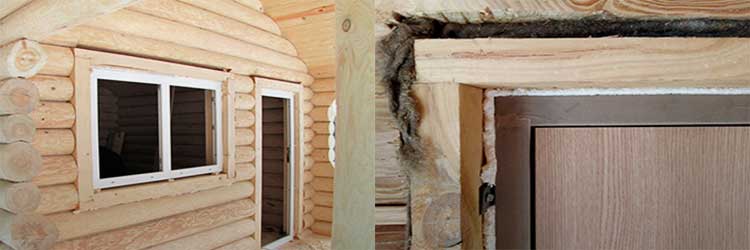
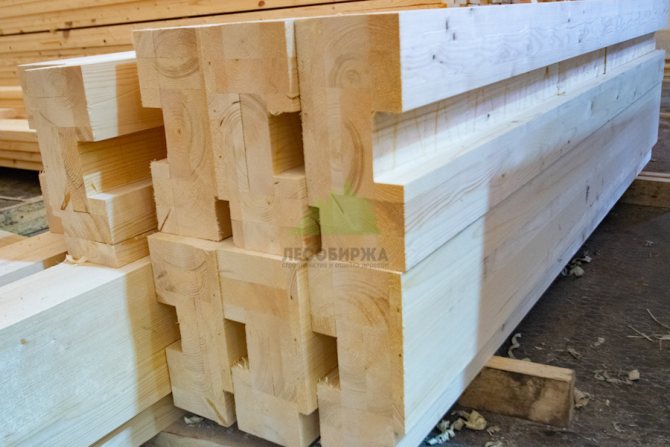
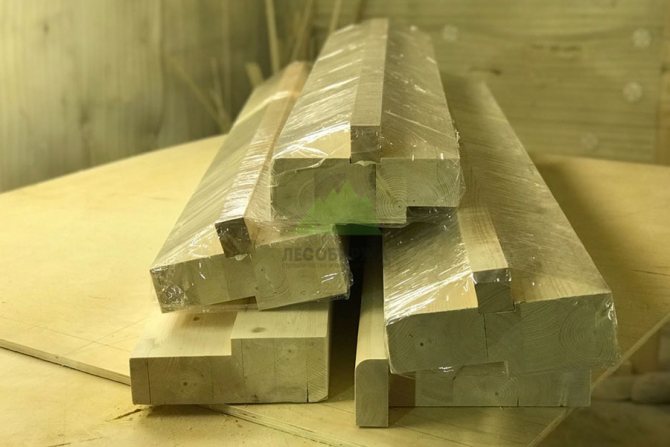
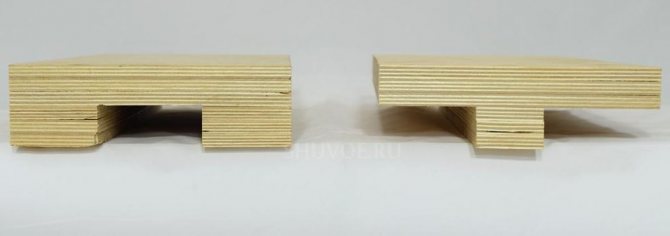
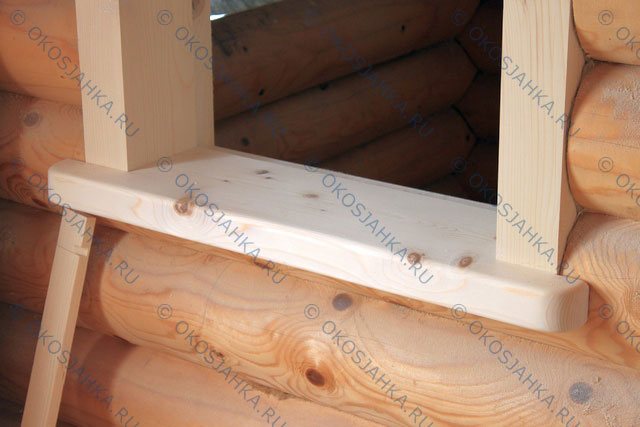
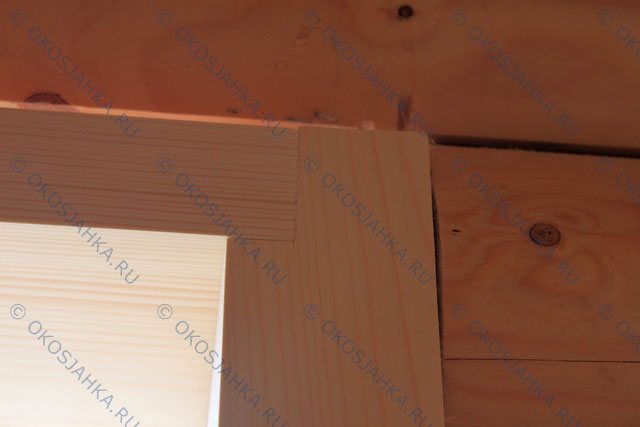
- Photo 1 - Finishing (with a quarter).
- Photo 2 - Power "SHIP" or "PAZ".
The difference between the two options is a slope for a PVC window
Vocabulary and material for okosyachka:
Carriage (side racks) - timber material, according to the thickness of the timber of the house (deck):
- Minimum 150mm * 150mm (100);
- Maximum 360mm * 150mm (100);
The vertex (the upper part of the window) - 150 mm * 50 mm;
Insulation:
- linen-batting (jute);
- mineral wool;
Antiseptic - protection of wood from the effects of atmospheric and biological factors;
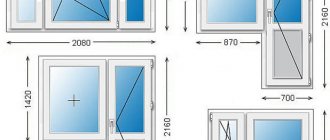
Measurement of the window (wall thickness of the house is 150 mm.) And PVC (plastic) windows.
- Distance from the floor 80-90 cm.
- The width of the casing is 12-14 cm larger than the width of the window.
- The height of the casing is 14-18 cm higher than the height of the window.
- Installation of a window and a plastic window.
- Preparing the opening for the size of the window.
- I saw through "SHIP" or "PAZ".
- Antiseptic treatment.
- Roll sealant (linen-batting (jute)).
- Installation of LAFETA (side parts of the window) is carried out without fasteners (self-tapping screw, nail)
- The top (upper part) is worn on the side elements.
- The upper clearance of the window is 8-12 cm. At the rate of 10 cm per 1 r / m window.
- Insulation laying (mineral wool) + vapor-waterproofing on both sides.
- Installation of a PVC window as in a box (the gap is filled with foam).
Source: plastikovokna.ru
Types of squash in a log house
The design can be performed in 2 main versions:
- Rough, if additional finishing is provided. A good example is the subsequent installation of ventilated facades, which completely hide the detail. Usually, the perimeter of the opening from above and from the sides is made of non-planed materials, and the visible part, the threshold or window sill, is made of glued bars or furniture boards.
- Finishing, made of planed and sanded material with further coating with paint and varnish composition. Usually, expensive and high-quality processed types of wood are used for manufacturing.
By manufacturing methods, the following types are distinguished:
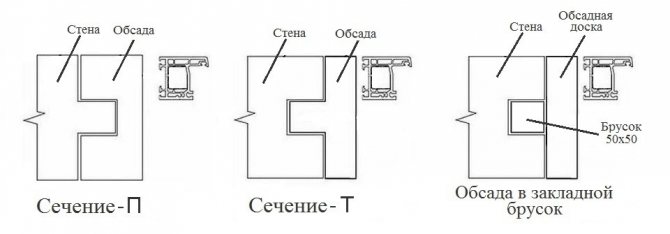
- In the mortgage bar... For installation on the inner sides of the opening, a groove is arranged in which a square bar is placed. The bar is not fixed, but simply hammered into the groove, which allows it to move along the groove. Finishing boards are attached to the bar with self-tapping screws. The casing is fastened in the lower part with filling of voids with soft heat insulators. The method is the cheapest and easiest to implement, but the most unreliable and requires additional finishing. Failure to ensure proper sealing will almost always require refurbishment or repairs.
- Spike monolith... The product is a T-shaped rectangular bar. The spike is inserted into special grooves made in the lumber vertical walls. The vertical part of the casing bar is also a window slope. Fastening is carried out at the bottom and top using special fasteners, and the free space is foamed on the sides. The bar can be cut out together with the jig from one common workpiece or attached with glue. The structure has good strength and functional characteristics. Often, in this way, a jar is performed in a log house for plastic windows with your own hands. Therefore, we will describe this method in more detail below.
- Siege "in the deck"... When installing a spike in the vertical beams of the opening, a spike is cut out on which a deck made in the shape of the letter "P" is mounted. From above, the structure is bursting with a vertex with fixation with self-tapping screws. Installation is carried out using sealing materials. The construct is ideal for entrance doors-safes and large-sized windows made of wood or plastic, providing high resistance to the effects of multidirectional mechanical loads. This is an expensive and difficult option for independent execution.
Shrinkage
But the most important difference between houses made of wood (does not apply to frame-panel) is the ability to shrink as a result of the drying out of the wall material (logs, beams).
And this moment is decisive in carrying out the installation of plastic windows in a wooden house, because if you install a window, as usual in a bare opening, then it will inevitably be crushed and deformed by the shrinkage process.
There is an opinion that the first two are the most active period of wood drying. But this is not the case. After the construction of the house, the shrinkage of the walls continues for tens of years. But that's not all. Wood not only gives off moisture, but also absorbs. Therefore, rigid fastening when installing windows in a wooden house is impossible in principle!
- Shrinkage in a log house - about 10 - 15 mm per log D = 250-300 mm
- Shrinkage in a house from a bar - about 7 - 10 mm for one bar with a section of 150x150 mm
- Glued laminated timber - unknown.
There are other ways to calculate the shrinkage height of log cabins as a percentage: approximately 10-15% of the original height. But in fact, the shrinkage of houses from a bar and a log depends on many factors:
- from the material (logs, rounded logs, beams, glued beams);
- from the time of harvesting the material (winter harvesting or summer);
- from the time of day (morning, evening) Yes-Yes !!! Do not be surprised - investigated this too!
- from the environment where the forest grew (swamp, field); on the degree of resinousness and density of the tree;
- on the size of the material - both its length and thickness;
- from the moisture content of the material;
- on the size of the building; on the construction technology (dowel, type of felling, etc.);
- from the material of the mezhventsovy insulation; from the type of wood;
- from the time of year when construction is underway.
The strongest shrinkage occurs in log cabins made of ordinary logs, then rounded logs, profiled beams, beams, glued beams go to the smaller side.
Even if the house is more than a dozen years old, it is still necessary, when installing windows in a wooden house, to take into account the vertical movements of the walls as a result of an increase or decrease in humidity and air temperature at different times of the year.
How is the jail structured
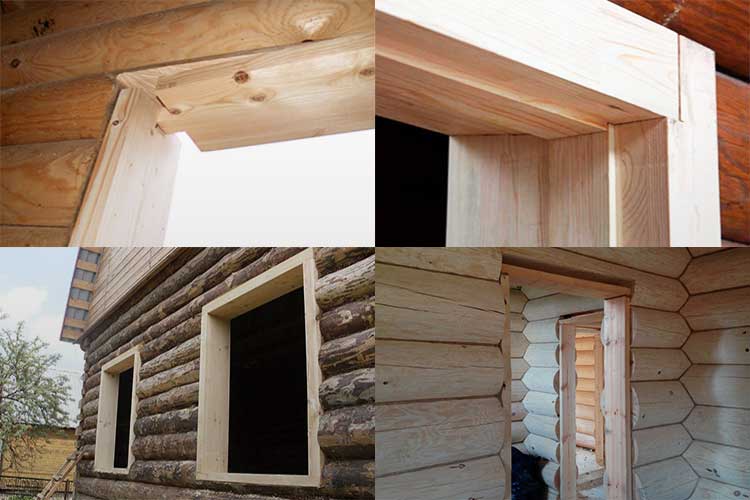
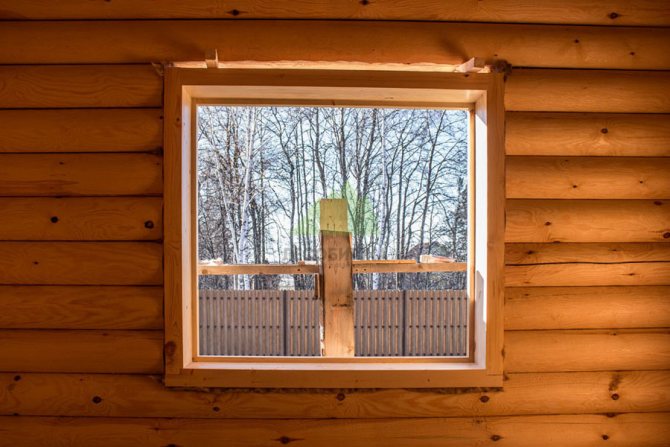
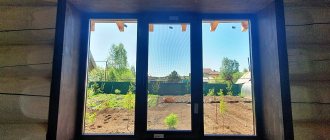
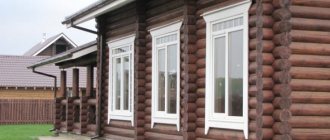
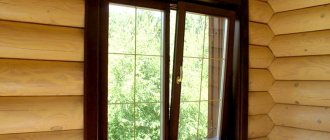
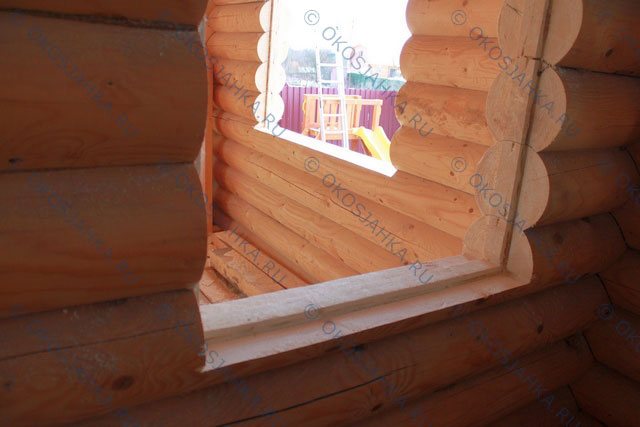
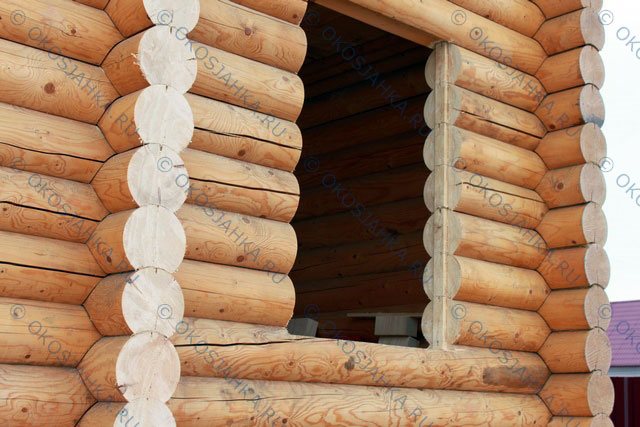
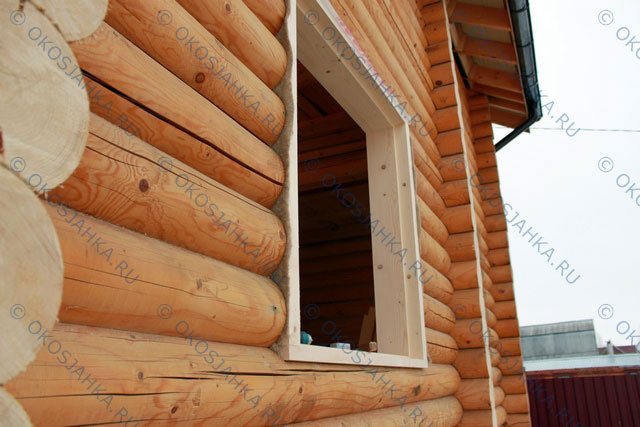
As you can see from the photo, the cage is an ordinary window box made of four, sometimes three (sides and top) thick boards, installed inside the opening.
The meaning of this design is that it is independent of the vertical movements of the wall and moves freely in the opening, since it is not attached to the logs (timber) with either nails, or self-tapping screws, or other fasteners, but is held with the help of grooves in the side posts planted on the spikes at the ends of the logs.
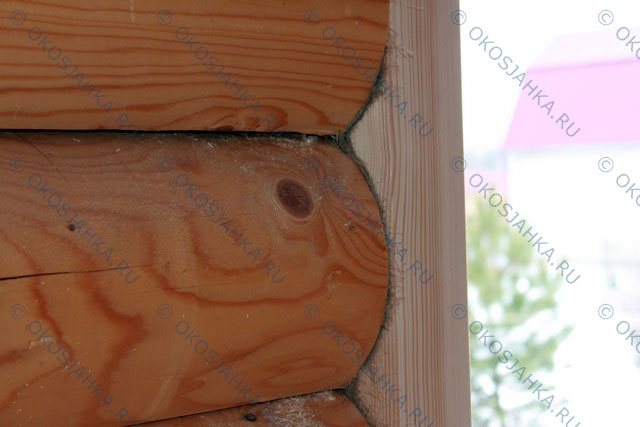
Even foam is not used to seal the gaps around the window - only tow, jute (linen) and other soft insulation.
The purpose of the casing and its varieties
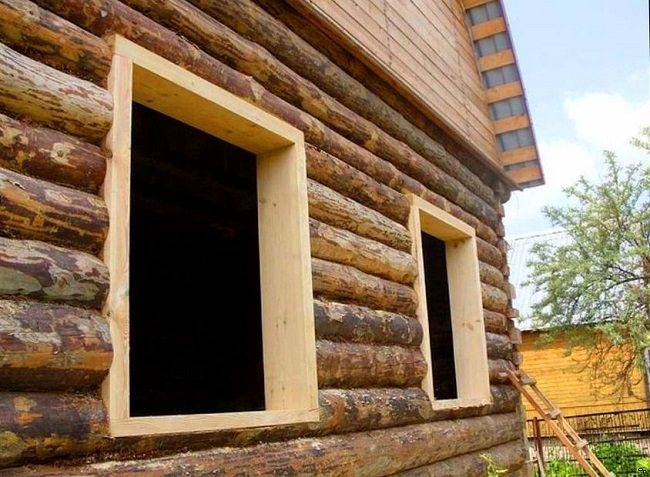
The tree reacts unevenly to drying out. Most of all, the linear dimensions change across the direction of the fibers, and the longitudinal dimensions remain almost unchanged. When a wooden house shrinks from a log or a bar, the height of the wall decreases, and, accordingly, the height of the openings (window, door). So that the window does not "shrink" and its movable sash does not jam, a rough wooden frame is installed - a casing.
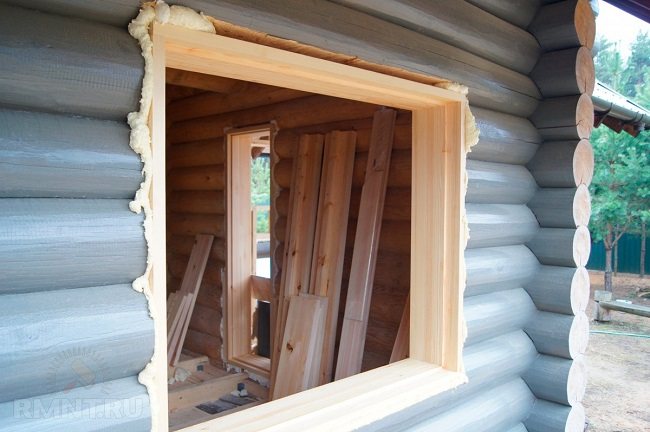

It compensates for the effect of shrinkage due to the following factors:
- sliding method of vertical fastening to the wall in the opening;
- the gap between the upper board of the rough frame and the upper crown of the opening itself;
- use for mowing exclusively dry wood, which has already passed the drying stage.
There are different types of windows that differ in the way they create a sliding mount. Although the basic principle of fixing the casing in the opening is the same - it is a "tongue and groove" connection.
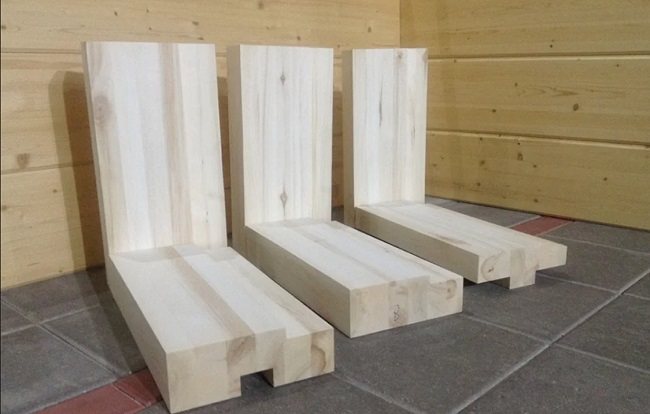

The following options can be distinguished:
- The grooves are cut at the ends of the side walls of the opening.

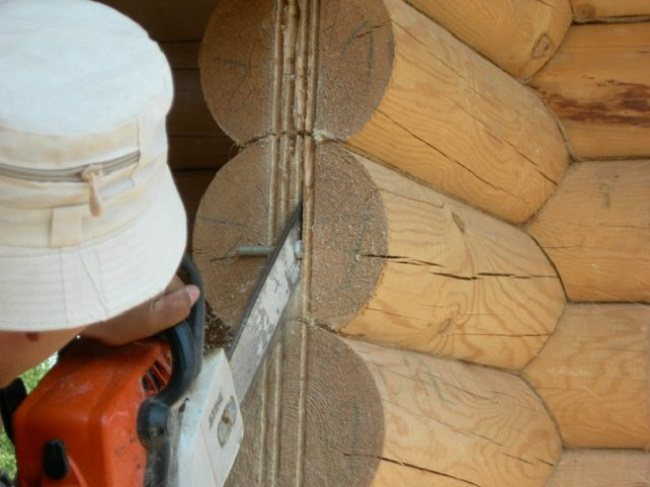
The casing frame is made in advance from a conventional planed board. Embedded bars are prepared for it, the section of which should be less than the width and depth of the groove.
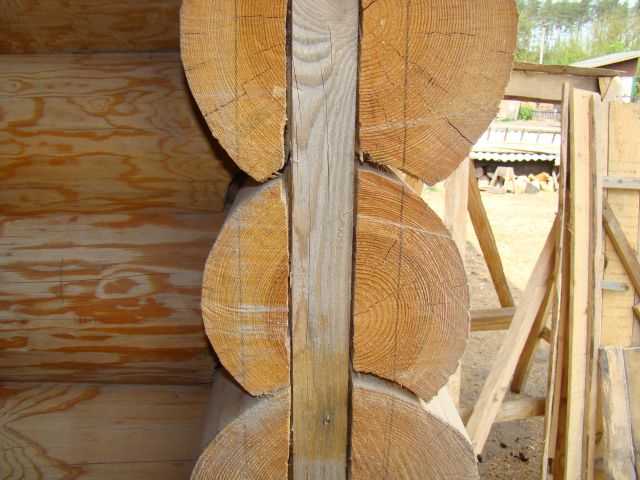
The bars are laid in the grooves so that they slide freely in them. The casing frame is attached to the bars.
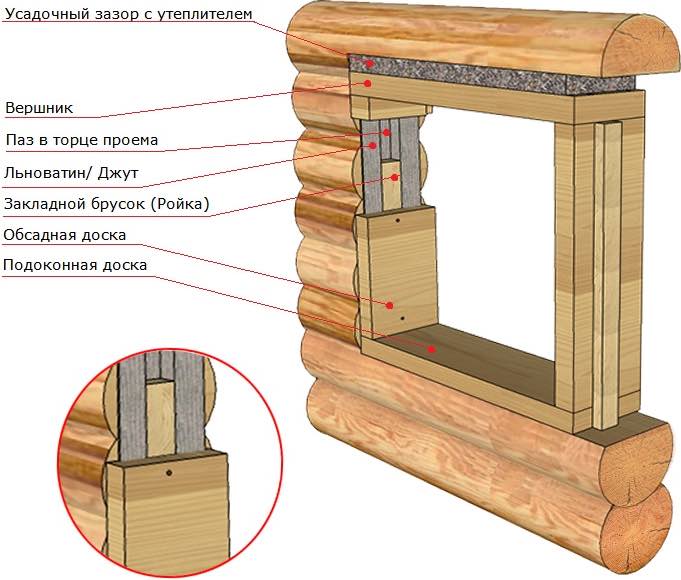
The advantage of this method is ease of manufacture. Disadvantages - the gap between the embedded bars and the casing, as well as the risk that the screws can come out from the side of the bar and jam it in the groove of the opening. - The grooves are cut in the side walls of the opening. For the side racks of the casing frame, a profiled bar with a "T-shaped" section is used.

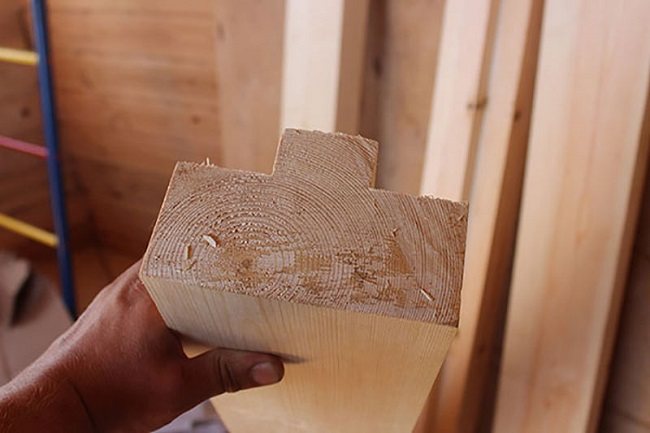
The assembly of the frame is carried out in place (in the opening itself), placing the spikes of the side struts in the grooves of the opening.
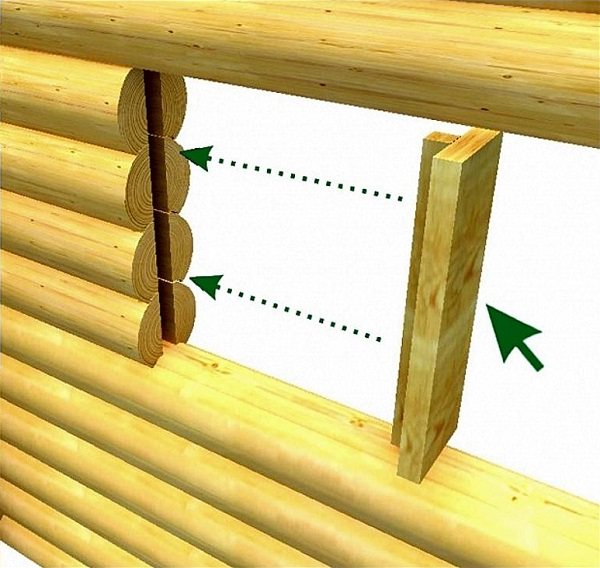
The advantage is the absence of cracks in the casing frame. The disadvantage is the complexity of the assembly. - The thorns are cut in the side walls of the opening.

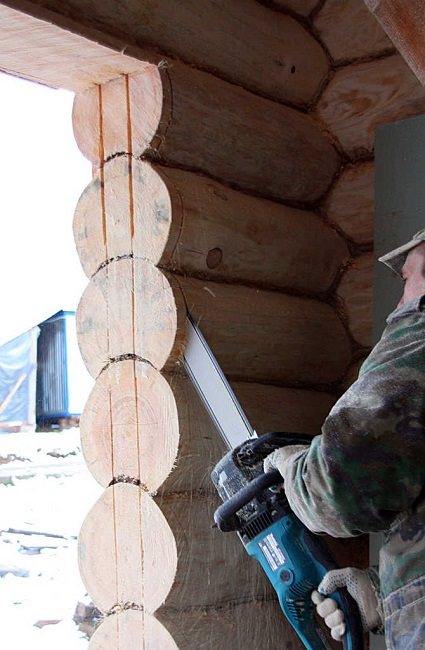
The grooves are made in the side racks of the casing frame. The assembly of the casing is carried out on site.
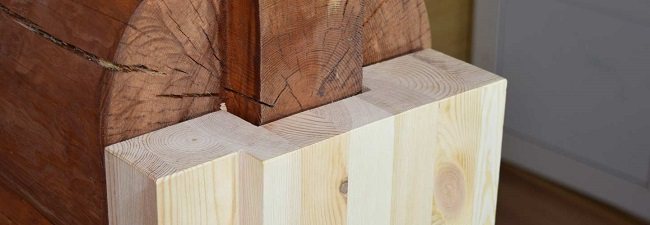
The advantages and disadvantages are the same as in the second option.
Shrinkage clearance
Please note: a large gap is specially left above the window, the size of which is designed for the maximum possible shrinkage of the logs (timber). During the first years after the construction of the house, this expansion gap will gradually decrease to a minimum, but the upper log (bar) of the opening, if correctly calculated, will not press down or deform the jamb.
Thus, the shrinkage of the house will not in any way affect the size and shape of the window, and, accordingly, will not damage the plastic window inside it.
Basic casing functions
- A window in a log house strengthens walls, piers and openings.
- Provides the impossibility of horizontal displacement of the bars.
- With vertical upsetting of the walls, it creates the independence of the door and window structures from the load-bearing walls. Slots in the sidewalls allow vertical sliding of the structure.
- Protection of openings from pressure from above with the creation of the gap necessary to compensate for shrinkage.
- Protects against the formation of cracks and drafts.
- Creation of an optimal indoor climate with savings in heating costs.
- Harmonious design of door and window openings.
Shrinkage gap size
If you decide to install windows in an old wooden house, which has long gone through the shrinkage process, then, disassembling the window blocks, you will probably notice: they are made according to the same principle as the casing construction described here, i.e. are not nailed to the logs of the opening, but are fixed in it using a simple “groove-tenon” system on the sides.
This suggests that the technology of installing windows and doors in a wooden house in a window was invented a long time ago, and is used with success to this day. We will not invent anything new and will go the same way.
There are several ways to install a window:
- t-shaped window - a groove is made at the ends of the logs of the opening, a t-shaped profile is laid in it;
- U-shaped - the spike is cut out at the ends of the opening logs, and the groove is made in the side uprights of the casing).
We make both options, as they provide the maximum strength and stability of the opening, because the window not only protects the window from shrinkage of the walls, but also ensures the stability of the wall in the place where the opening is cut.
In short, the sequence of our actions will be as follows: cut out an opening in the wall, the dimensions of which slightly exceed the dimensions of the inserted plastic window;
The main problems caused by the shrinkage of a log house
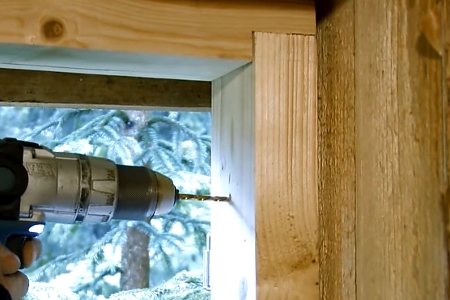

An alternating change in the moisture content of wood, coupled with shrinkage processes, leads to bending, twisting and drying of the wood. This leads to the following negative phenomena in the walls and especially openings in which the integrity of the walls is broken:
- curvature of the surface of walls and walls;
- the formation of cracks and gaps between the bars;
- drafts, dampness and significant heat loss;
- windows and doors cannot be opened without significant effort;
- distortions or breakages of window frames and door leaves;
- unsightly appearance of the entire building.
A wooden box installed in the openings will strengthen the walls and will be a good protection of door and window blocks from destructive processes, so the question of whether it is necessary to make a jamb in a log house is rhetorical. This is simply necessary. Doors and windows installed without hinges are exposed to extreme loads, leading to breakdowns of structures or the need for their constant adjustment.
Preparing the opening for the installation of a window in a wooden house
Before cutting out, we mark the window opening with a level, because the plastic window will be installed strictly according to the level in all planes, therefore, the window must also be installed in the opening as accurately as possible according to the level initially.
The lower crown in the opening must be sawed off, so that a flat horizontal platform is obtained.
The dimensions of the opening are determined based on the dimensions of the plastic window, the thickness of the casing bars and the size of the required clearances.
All calculations are performed visually.Here is an example of a scheme for calculating the size of an opening for a rough T-shaped window:
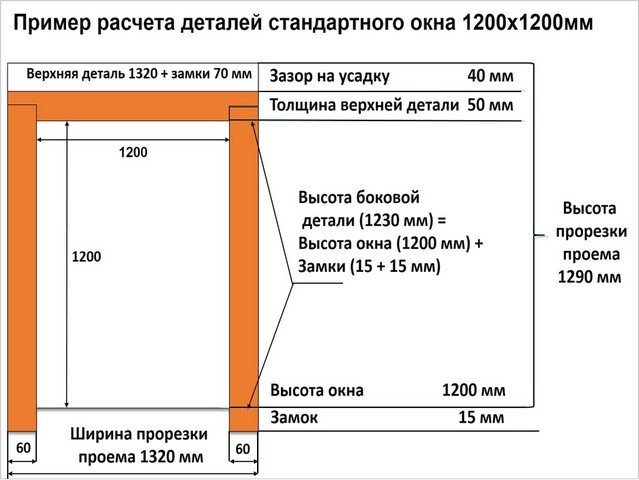

Accordingly, we take a bar with a section of 100x150 mm and cut out a T-shaped profile.
The size of the shrinkage gap (H shrinkage) is not easy to determine, since the amount of shrinkage at home, as mentioned above, depends on many factors. If, for example, we roughly calculate, taking everything to the maximum, then for a window of a standard height of 1400 mm (plus the thickness of the casing crossbars, plus mounting gaps ~ 245 mm) at 15% shrinkage, the upper gap will be 24.5 cm - a huge hole , the height of which, most likely, will end up being unnecessarily large.
To simplify the task and avoid mistakes, you should not rack your brains over GOSTs that regulate the shrinkage values of building materials of various tree species, comparing this with local climatic conditions, etc. You can do it easier, namely:
- if you are building a new house, then start installing windows in it no earlier than a year after the construction of the log house in order to wait out the period of the most active shrinkage. Then, during the manufacture and installation of a window, the size of the shrinkage gap (H shrinkage) can be safely made 60-50 mm for a log house, 50-40 mm for a log house and 40 mm for a house made of glued beams;
- if your house has stood for more than five years, then the shrinkage gap (H shrinkage) can be made minimal - 40 millimeters, just to compensate for possible seasonal changes in the geometric dimensions of the opening;
So, we calculated the size of the opening, marked it out and cut it out. Now you need to cut a thorn at the ends of the logs (timber) on the sides of the opening. The spike is also marked with a level in the center of the log (bar).
Making a jig
First, it is necessary to decide on the width of the bars of the window: it should either be equal to the thickness of the wall, or be slightly larger, so that later, when installing the outer platbands, they (platbands) fit tightly without hindrance on the window, and not on the wall. There is another option in a house made of logs - bald spots around the opening along the width of the groove.
Secondly, for the manufacture of a window, it is necessary to take a well-dried material, otherwise the assembled structure itself will be deformed soon when it dries.
First, we cut out the lower part (window sill), making it 10 cm longer than the width of the opening. At the ends of the window sill we cut a groove for a thorn 65 mm wide and 40 mm deep.
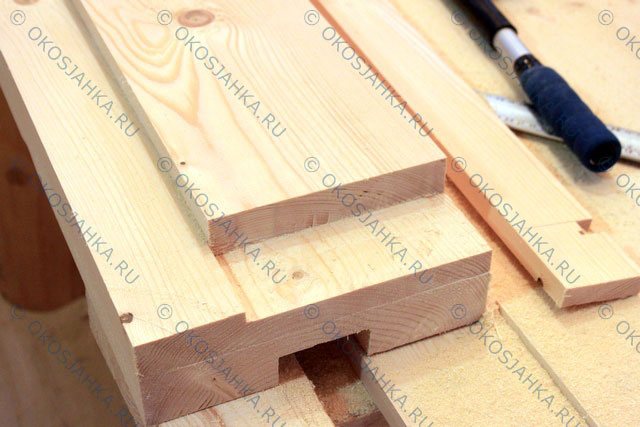
Also, at the ends of both window sills, we make small deepenings of 20 mm each for joining the crossbars with the side posts - the so-called locks.
We make the side posts with a height exceeding the height of the plastic window frame by 70 mm. On the reverse sides of the racks, using a circular saw, we cut out a groove for a spike 60 mm wide and 40 mm deep. We immediately make a lock for the upper part in the side racks.
Last but not least, we make the upper part of the jig. Based on the dimensions obtained between the two installed side pieces.
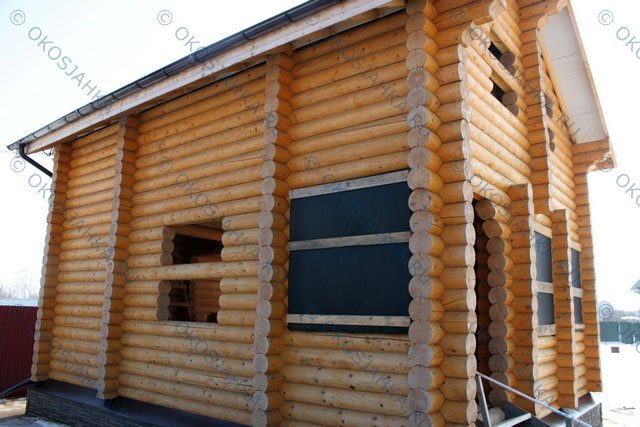
The house is made of rounded logs with a section of 240 mm. A box made of a solid bar with a section of 250x100 mm with a quarter for a window block. The object is located at Mikhalevo, Voskresensky district, Moscow region.
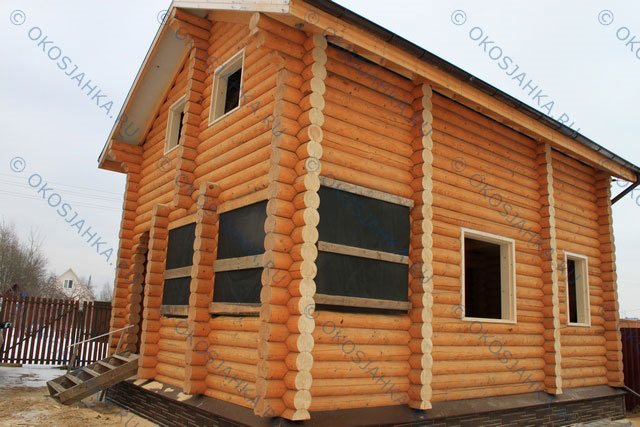

The house has withstood a year after assembly and is ready to install a window. It is not recommended to install a box earlier than a year later. This has been verified both by personal experience and by the experience of my clients. And in the literature on the construction of a wooden house, this period is also indicated.
So let's get started!

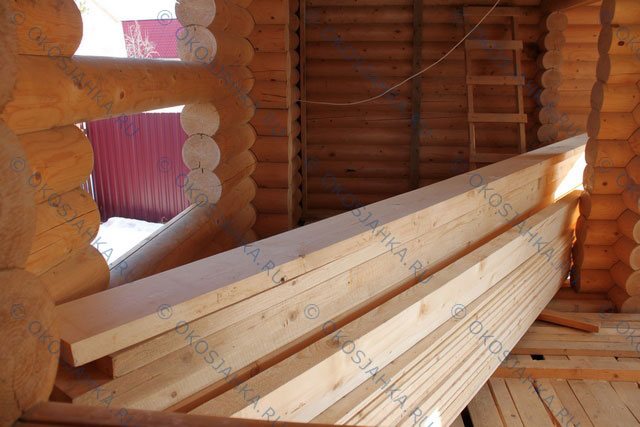
The material for the window is a chamber-drying bar with a sawmill known to me. In the Moscow region, if you search, you can find good suppliers of dry timber. The best timber that I have used was made on a circular sawmill (even timber - calibrated) from pine.

At this facility, both T-type and classic U-shaped windows were made. You can find the benefits of both in the blog post.

First, the opening is marked according to the specified dimensions.To do this, you need to know the height of the floor in order to measure the bottom of the opening - at what height the window sill will be. And also the distance from the top part to the ceiling. On the sides, the size is chosen according to the project or arbitrarily, but not more than 150-200 mm from the corner or overcut.
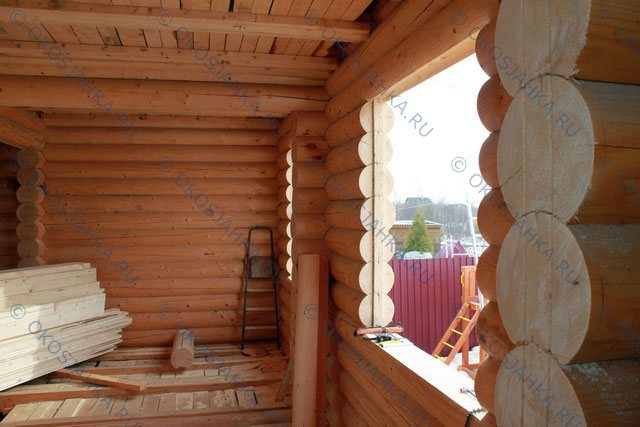

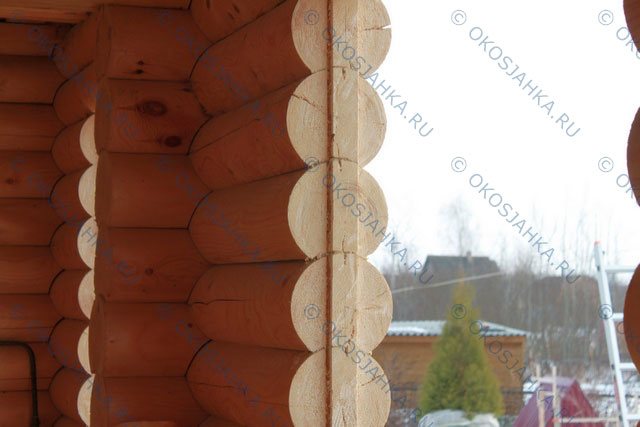
We also make a thorn on the bottom of the opening. Many people nail down a wind bar, But a spike from a monolithic log inspires more confidence.
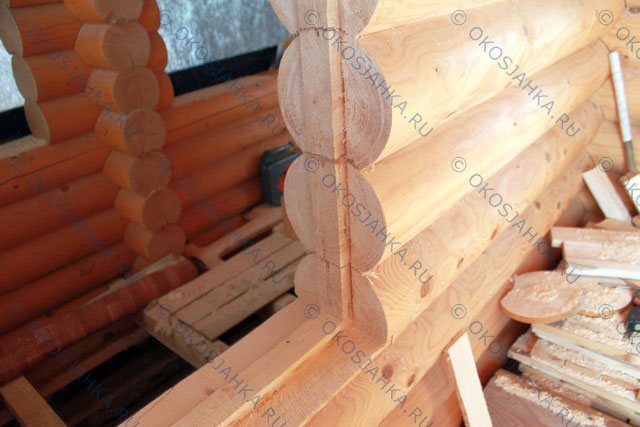

We get a spike along the perimeter of the opening, with the exception of the upper part. Once a client demanded to make a spike on the top of the opening. The okosyachka was made of a bar with a section of 250x150 mm, and in theory it could be made. Adjust so that the tenon enters the groove under the effect of shrinkage. Or, by dividing the upper part in half, bring it into the locks from the inside and outside. But I politely refused, citing authoritative sources that no one does this and has never done it.
I’m not lying, though. On YouTube I saw such a miracle with a box of trapezoidal openings. So everything can be done if you really want to and brainwash!

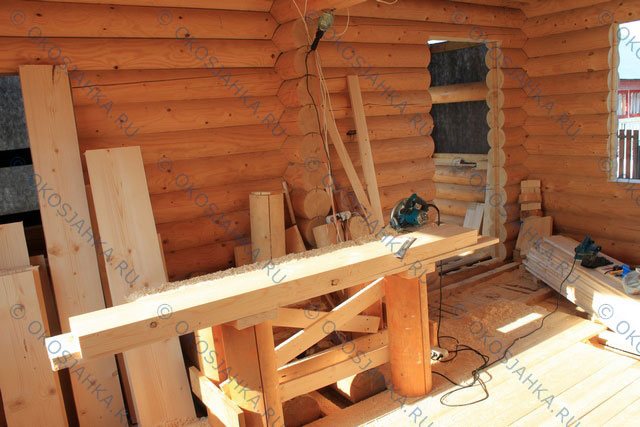
I make a workbench from scrap materials. I adjust the height of the workbench according to my height and the size of the longest part. All parts are planed and calibrated to the same size. The rectangularity and straightness of the workpieces are observed.

This is how the side detail of the classic window looks like from the back. The groove is selected using a router and circular saw. Initially made a cut for a quarter. Visible from the underside of the part.
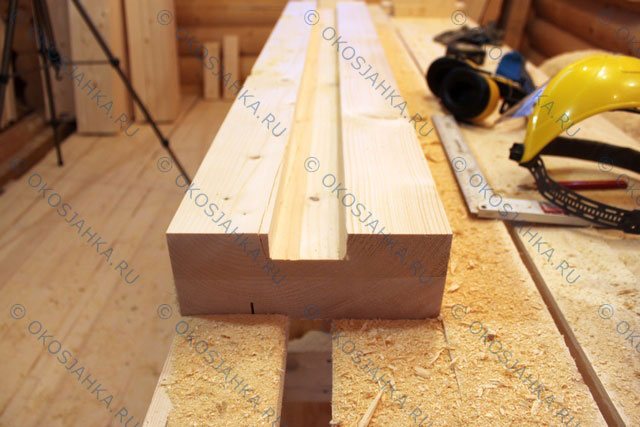

For a T-shaped box, you must first perform milling. And then cut off the sidewalls with a circular saw. It does not work at once because the maximum cutting depth of the saw is 75 mm, and a piece with a width of 240 mm has a spike of 60 mm and cheeks 90 mm wide. Here we mill these 15 mm.
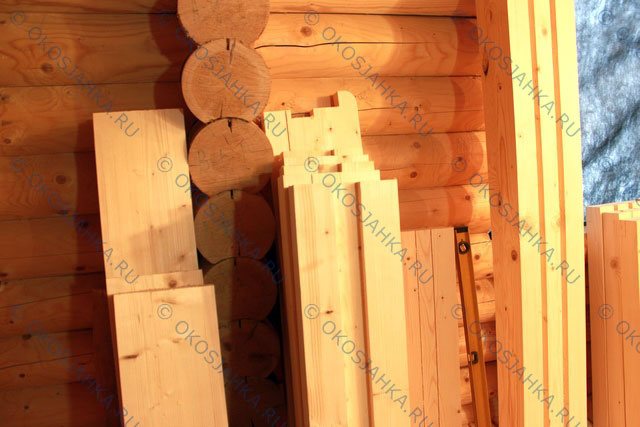

It turns out here is such a w-reverse jig. Of course, there is no such window. And from these blanks a T-shaped window will come out.
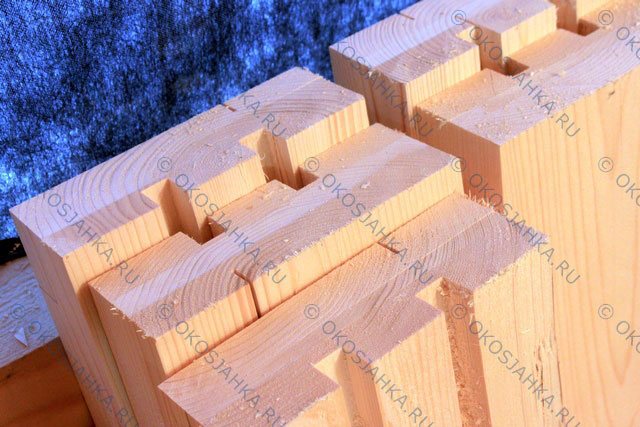

The milling cutter is a very useful tool, but very junk. The shavings fly at high speed. I do not recommend working without a mask. You can't buy eyes.
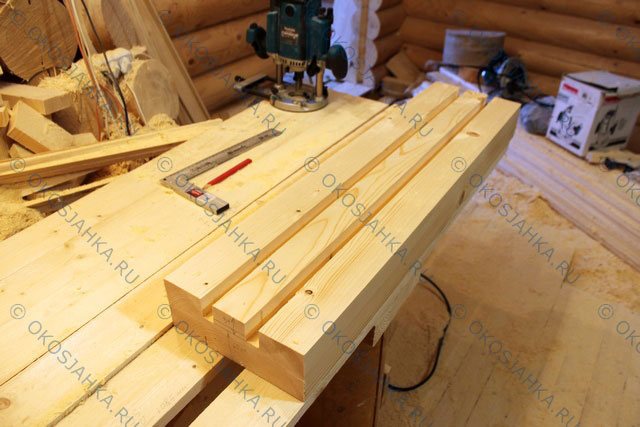

In the window sills, using a router, select the locks. There are many ways. It is possible and according to the template, you can simply press a piece of the bar with clamps. But the essence is the same. Where he used to work with a chisel and mallet, you can now practice with a milling cutter or multitool.
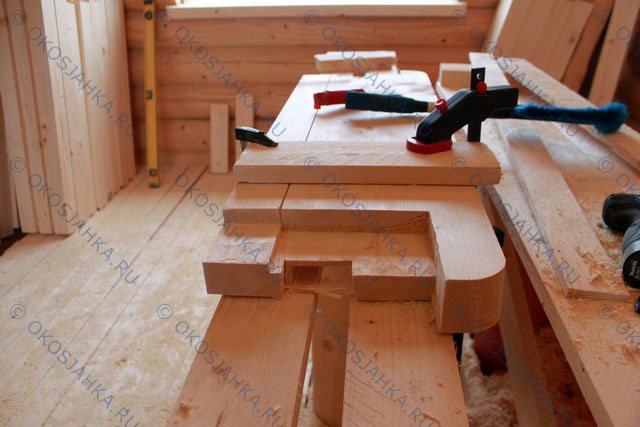

Here they are, the finished parts of the T-shaped window. One of the parts shows too deep cuts with a circular saw. This hidden defect can lead to the disintegration of the part into parts. Definitely a replacement. Making a jig is a very painstaking and precise process. A little distracted and the jamb!
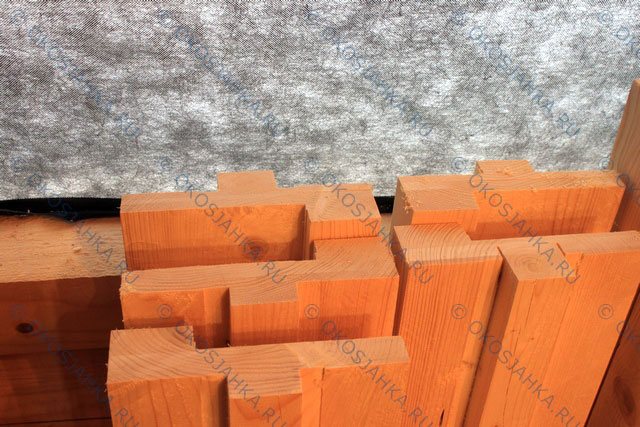

Lock for the upper part in the U-shaped window. A difference of 10 mm leads to a labyrinth and makes it difficult for air to penetrate into the connection of parts.

The openings are ready. The details are done. You can start installing the casing. Before installing the window, we treat the openings with an antiseptic for internal work, as well as the back sides of the parts. An antiseptic will certainly extend the life of the tree, but you should not overdo it with it. Chemistry is chemistry and does not add any benefits to human health.

A vapor barrier film is installed in the upper part of the opening. From the inside (in the house), after filling the gap for shrinkage with insulation, it is also closed with a vapor barrier. The outer film is installed on the inside of the outer edge before installing the window and will cover the window and insulation from moisture flowing along the wall in case of slanting rain.
At the bottom and sides, flax or jute fabric of the appropriate width is used as insulation. If the wall thickness is 240 mm, then you have to use a 150 mm wide sheet and fasten it to the end of the opening on both sides with an overlap on the spike.
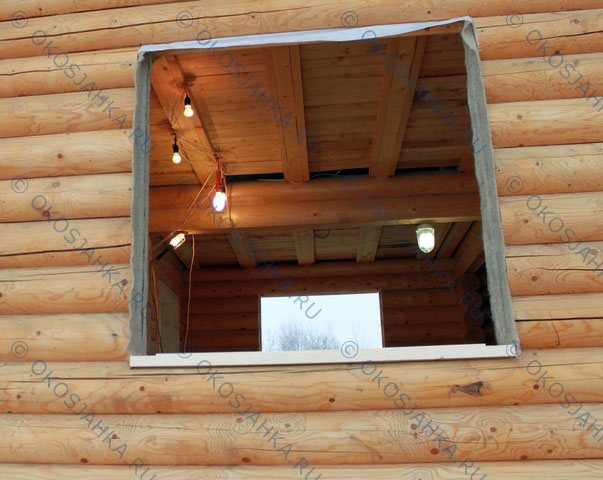

First of all, the lower part is installed. Then the side parts are placed. And last of all, the top is installed.

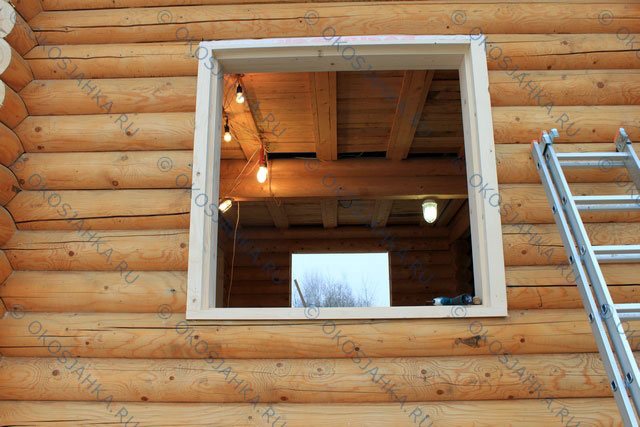
The vapor barrier film is attached to the upper part with a staple gun.

The joints in the locks can be coated with sealant at positive temperatures. But as you can see from the photo, the gaps in the details are dense and the sealant will only add a look by smoothing the protrusions, but not penetrating inside. When installing, some craftsmen apply sealant directly to the lock before installing the parts. This also has a place to be and will not damage the window.
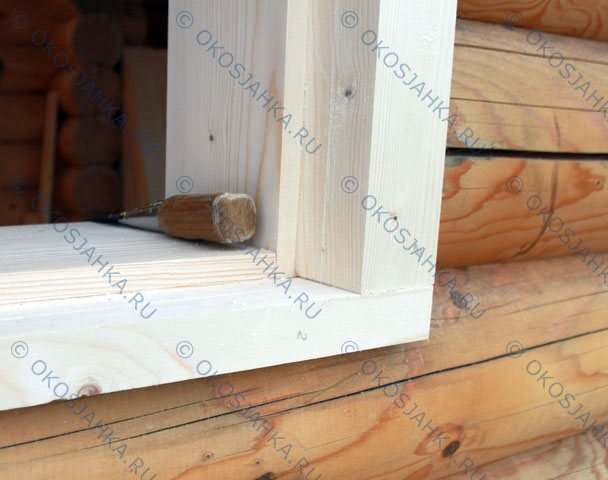

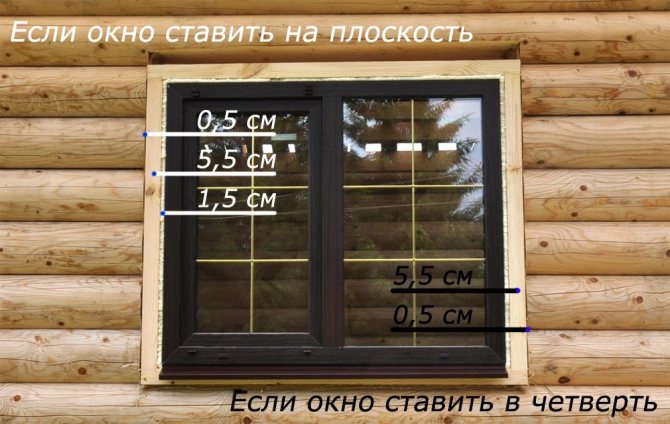
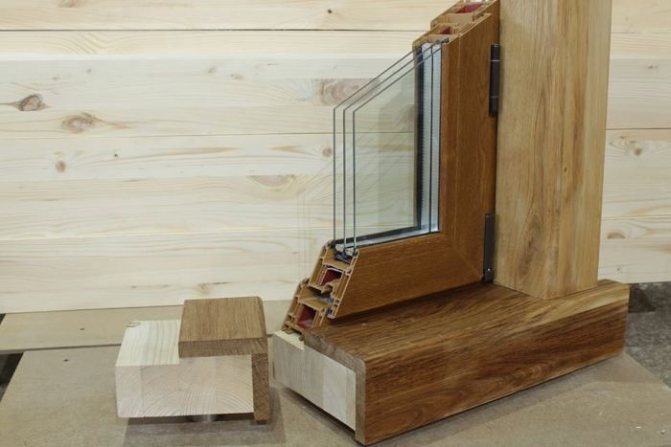
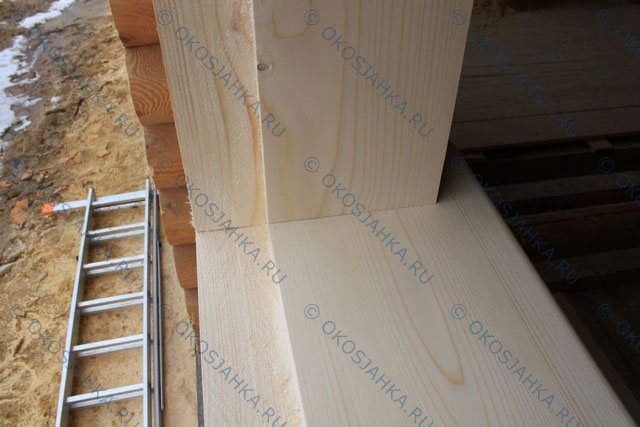
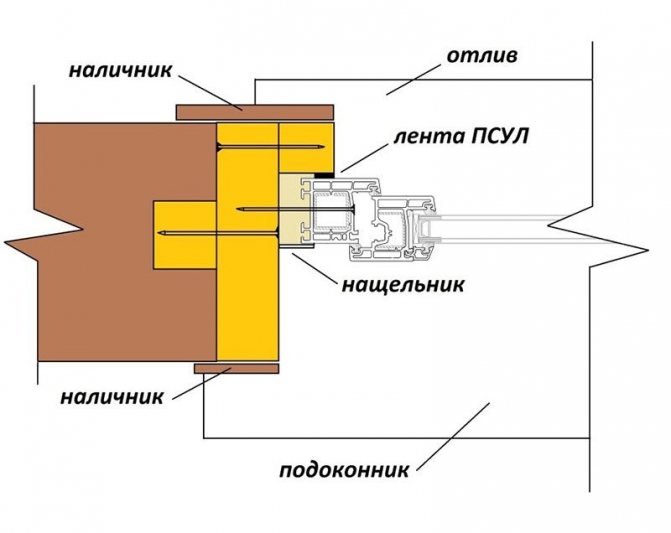
The outer side of the box has a quarter depth of 20 mm. And the width is the width of the window profile. The window engages on each side by 5 mm. The remaining 15 mm gap is filled with foam. A shallower gap will make it impossible to fill the gap evenly and continuously with foam. And a size larger than 20 mm can lead to an increase in foam volume when heated in warm weather and excessive pressure on the window block. That is, the most optimal gap is chosen.
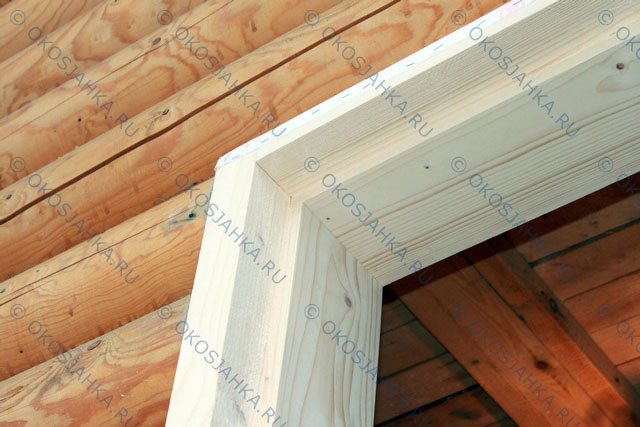

Windows are placed on the outside of the window. Why? Because this tree and unnecessary ledges will lead to unnecessary work on the water drainage device. Okosyachka was not invented yesterday. And therefore, its design is as simple and functional as possible. And to argue with time-tested logic is unreasonable. What is good in a house made of brick or concrete will not work in a house made of logs and beams.
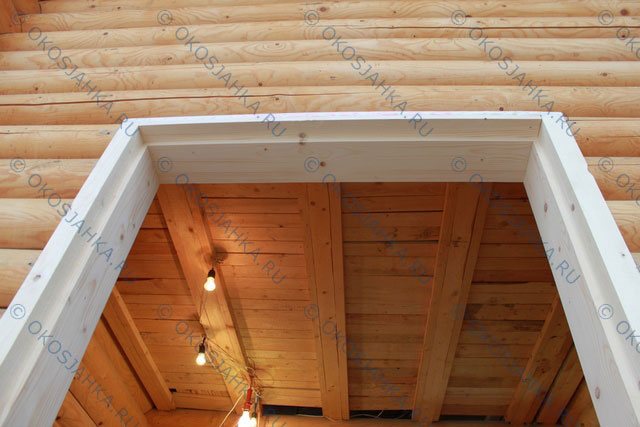

The article "The procedure for installing windows in a wooden house" describes the sequence of installing windows in a wooden house. First the window, then the windows, then the outer platbands. Next, filling the gap for shrinkage with a soft insulation, installing a vapor barrier. And last but not least, the installation of internal platbands.
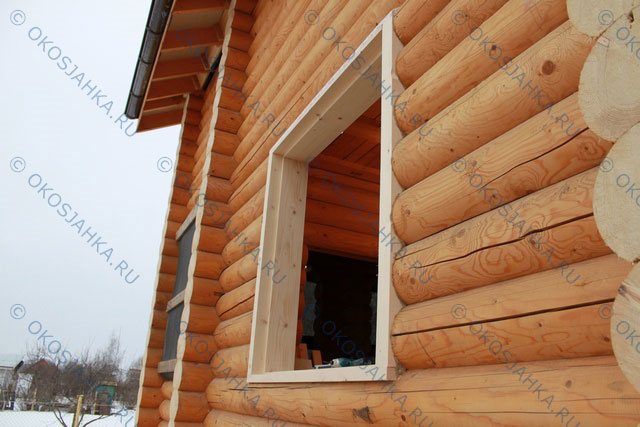

Insulation - linen from the side parts is tucked into the cracks between the parts and the log along the contour of the log. But without fanaticism. If caulked with caulk, then the parts will bend and the glass unit in the window may crack. And this is not a catchphrase. And a case from practice!
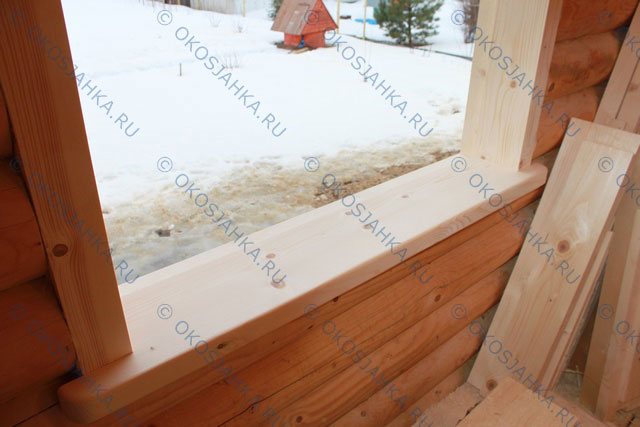

The upper part of the casing is made wide. To close the shrinkage gap. In the old days, the inner side of the house was made even. The so-called log house with hewn walls. And on the outside, the logs remained round. It is easier to frame such an opening from the inside with platbands. Now there is such an option: tweaks are made around the opening, bringing the ends of the opening into one plane with the grooves. Okosyachka turns out, as it were, recessed into the wall. And the platbands, respectively, are much more convenient to put.
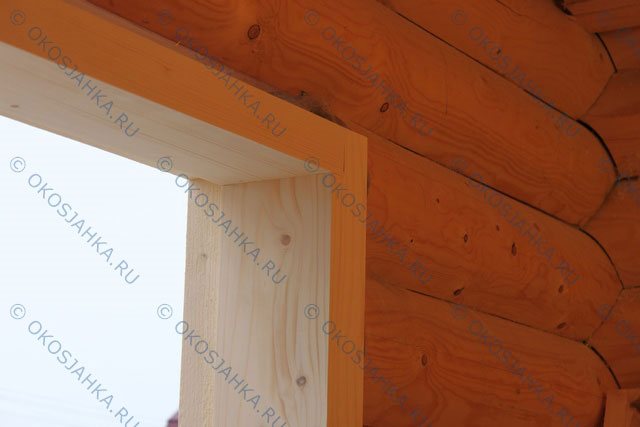

The quality of processing of parts is practically furniture. Because I am using double sanding. Finishing is done with 180 grit sandpaper with an orbital sander. Traces of abrasive remain from the grinder.
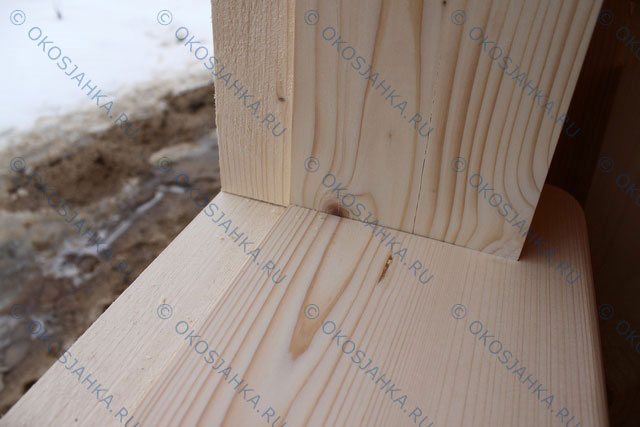

The belt machine is much better suited for fine sanding. But it can only be sanded along the grain. With transverse grinding, the marks are even worse than from the grinder. As if something was being shredded with a knife like on a cutting board. Grinding with an orbital sander avoids these disadvantages.
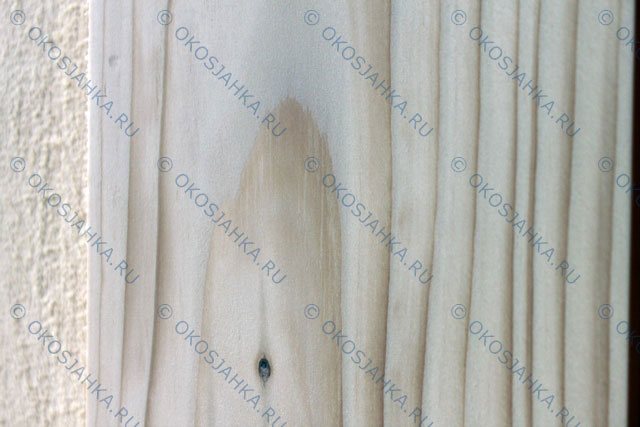

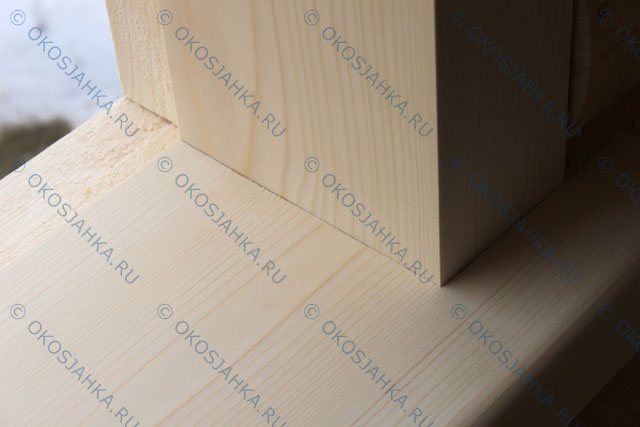
Window sills in the finishing box deserve special attention. Sometimes, especially when using pine, blanks with a very beautiful texture come across. And the ash-tree sill is generally a masterpiece. A finishing cut is not only a casing box, but also full-fledged slopes and a window sill. They look somewhat no worse than plastic ones. Wood is a living and warm material, unlike synthetic plastic and pressed sawdust with formaldehyde resins MDF.
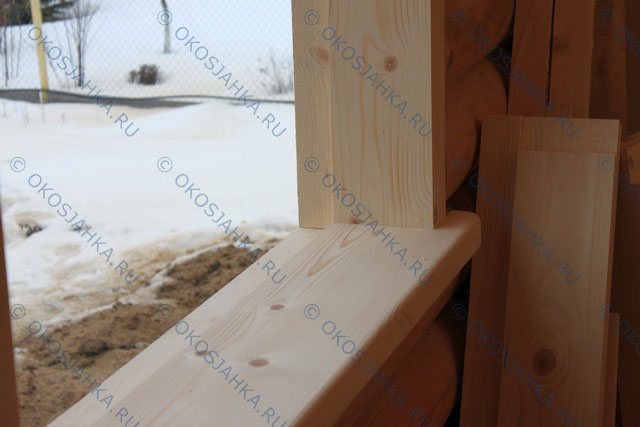

The casing of doorways is carried out in the same way as the casing of window openings. Due to their height, the walls in the doorways are subject to an even greater load than in the windows. Strengthening the doorways with a window is mandatory. If you have selected the internal doors in advance and you know their dimensions and the opening side, then you can make a quarter on the window for doorways. And if you have not chosen yet, then it is fashionable to make a window without a quarter and bring the box in the direction of opening the door flush with the edge of the window. The dimensions of interior doors and frames are standardized and do not vary much.Therefore, a gap is left for the foam, which can then be closed with a small glazing bead 20-30 mm wide.
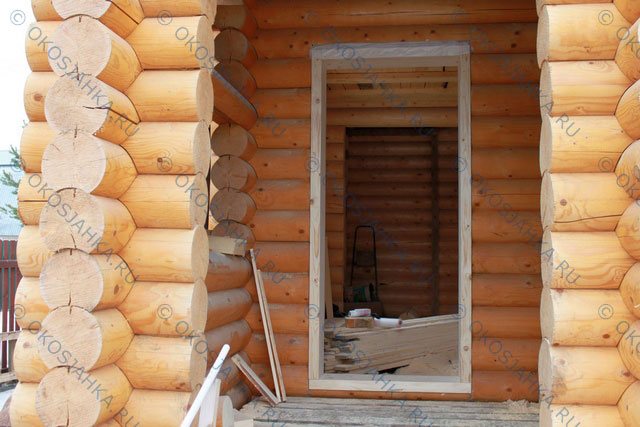

Before installing the windows, it is advisable to treat the window with paint and varnish coatings. Because after installing the windows, you will have to fiddle with molar tape and covering material to protect the glass from paint. If paint gets on the glass, it is very difficult to wash it off.
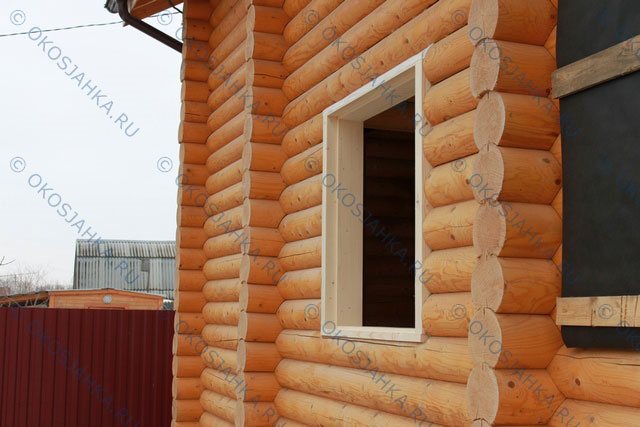

Okosyachku must be done. And it's better to finish. Since extensions and slopes are placed with gaps and internal cavities that you cannot then access. What's hidden there? Why is it blowing. Maybe the foam is gone. And in the window and a quarter, no questions will arise. Everything is open, clear and understandable.
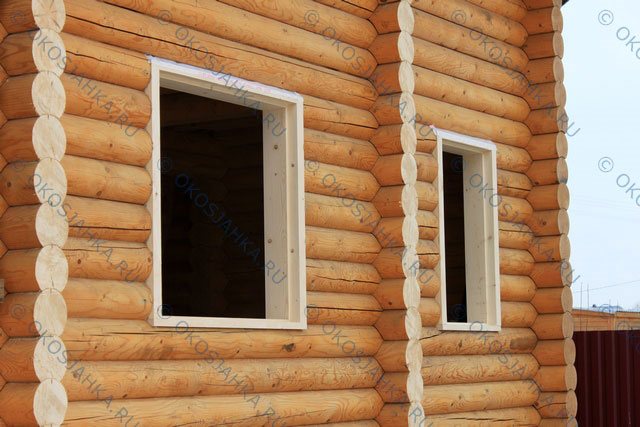

In a log house, you can install both a U-shaped and a T-shaped window. On this object, on the ground floor, a classic U-shaped window was made, and on the second, a T-shaped cage.
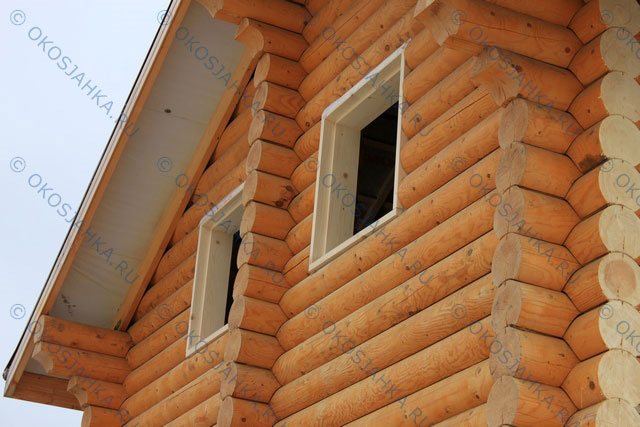

The u-shaped look is solid. But the T-shaped also looks good. And when installing platbands, you cannot distinguish them from each other. In the old days, the inner part of the window served as a casing at the same time. Russian culture and ingenuity - how to kill two birds with one stone! To do this, on the surface, the cuttings were cut out with the help of special planers, moulders and figured profiles. And every window and door was an example of ancient architecture.
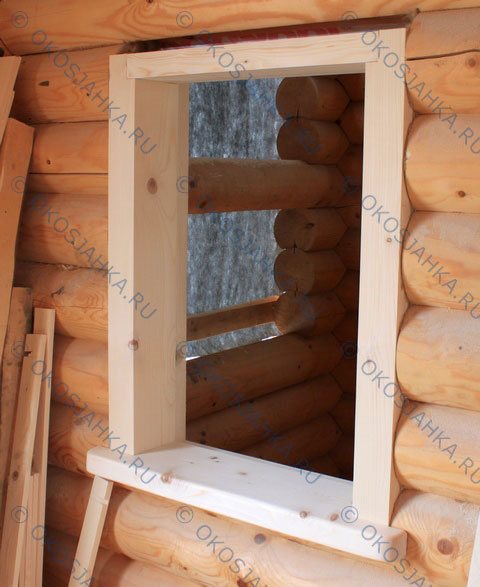

After all, there was no electricity and no machines. And the quality of performance is difficult to achieve even in modern conditions. I always admire the skill and craftsmanship of the ancients when I come to visit the old parental house of pre-revolutionary construction. And the remake is, of course, not the same calico. Still studying and studying.

I think secrets have been passed down from generation to generation. From master to apprentice. But the storm of the revolution broke this thread. One size fits all, they were herded into collective farms and workers' faculties. Individuality was replaced by a gray mass. It was only now that glimpses of a return to true mastery began to appear.

I would like to go the same way - you have been gone for 100 years, and looking at your products, people are delighted and remember with a kind word.

As a craftsman, I see a lot of shortcomings in my products. And this is a reason for further development and improvement.

Samples of ancient architecture are always remembered. And I really want to reach the level of the old masters.

With all my heart I wish you a cozy, light and warm lady, made by the hands of craftsmen in the best traditions of the Russian land. Masters were, are and always will be. If you don't see them next to you, then become yourself a master of your craft!

Installation of a window
We begin the installation of the window in the opening from the lower crossbar (window sill). Then a top is put into the opening, under which we alternately substitute the side racks, placing them on the spikes with grooves.
We fasten the jamb elements together with self-tapping screws and, if desired (not necessary), coat the joints with a sealant. We caulk the gaps around the casing with ordinary tow, but without much fanaticism, so that the parts do not bend.
We plug the upper shrinkage gap with a soft insulation such as Rocwool or holofiber. This operation is best done after installing windows and external platbands.
Now you can start installing the window.
Making a do-it-yourself window
Before creating a casing with your own hands, you need to prepare the tools for the job:
- jigsaw;
- grinder;
- drill;
- chainsaw;
- screwdriver.
The first and important point is the choice of the design of the windows (plastic double-glazed windows or wooden windows), the choice of casing depends on this... If plastic frames are installed, the manufacture of a support nut will be required. With a wooden version of the windows, such a sill is not needed.
On the sides of the opening, you need to cut a groove for the timber, which will protect the logs from sliding off. Thus, a kind of runners are obtained, along which the logs slide without pressing on the window.
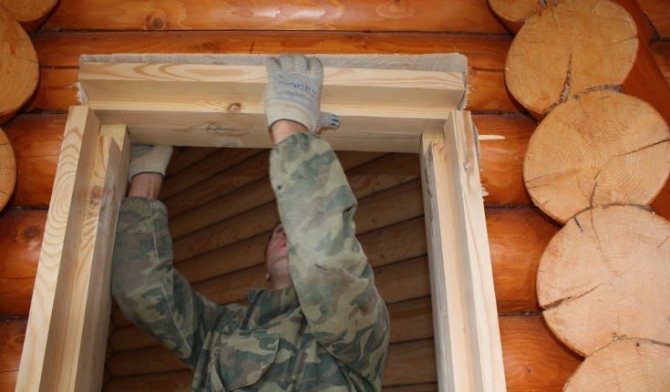

The top of the casing is installed last.
Installation is carried out as follows:
- the lower part is being installed;
- side elements are attached;
- finally, the upper part is attached.
A gap is left between the upper part of the window and the opening to compensate for the shrinkage of the structure. Insulating material is laid along the perimeter between the casing and the wall. Do not use polyurethane foam when installing the window.
After finishing the installation of the box, proceed to the installation of the frame. If the frame is plastic, then you need to cut out the wooden layer along the outer part of the opening. This will create a stop for the plastic window and will not allow it to deform.
Parts of the casing are interconnected in the following ways:
- wedge connection;
- self-tapping screws;
- studded connection.

Ossyachka in a thorn with a ready slope
If the box is connected with self-tapping screws, make sure that they do not stick into the wall logs. After completing the installation of the box, they proceed to the installation of the window and decoration outside and inside. The slopes and the window sill are made of plastic, if the frame is plastic. When installing a wooden glass unit, the slopes can be plastered. Ebb and platbands are fixed on the outer part of the window.
Installing a window in a wooden house
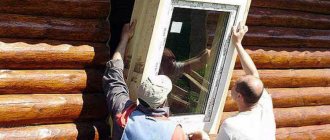
We install a wooden or plastic window by aligning it with the front edge of the window. There is no need to bring the window inward by a third of the wall thickness, as is done in a panel or brick house, due to the lower thermal conductivity of wood (less freezing depth).
Moreover, with a small thickness of the walls of a wooden house, by deepening the window into the opening, we will be forced to cut the already narrow window sill. And the ledge that forms as a result on the outside of the opening will have to be additionally closed and sealed.
And as the measurements taken with a thermal imager show, the profile itself is the main conductor of cold. For more details in the photo report taken from photographs from the thermal imager, see here.
Rough window for trim
If you calculated the dimensions of the opening and the windows as described above, then the installation gaps around the window frame when installed in a wooden house should be 15 mm at the sides, 15 mm at the top and 15 mm at the bottom (we do not make the lower gap larger, because the support profile makes it possible later, put a plastic window sill under the frame, the thickness of which is 30 mm).
It is more convenient to fasten the frame to the box with self-tapping screws of the size so that they enter the body of the box, but do not penetrate the wall. We drill holes in the frame with a drill with a diameter of 5-6 mm. It is dangerous to use self-tapping screws with a length exceeding the thickness of the box because they will pass through the box and screw into the logs (timber), which is unacceptable.
Provided that all the preparatory work was done using a level, the window frame should fit exactly along the window, i.e. the front edge of the window should be parallel to the plane of the window, without noticeable distortions.
Window of doorways
Net benefit
When ordering casing and windows from us, you get direct prices from the manufacturer and quality assurance. Calculation, production and installation of casing, windows and doors can be performed by our company's specialists without delays and overpayments.
Impeccable quality
The presence of our own production, a large selection of wood, a team of experienced, constantly improving their qualifications, specialists and a responsible approach to each project allow us to talk about an exceptionally high quality of services.
100% reliability
From the first call to the stage of delivery of work, two specialists will be assigned to your project, who will monitor compliance with quality and compliance with deadlines at each stage. The constructions that we put into operation are absolutely reliable, which is confirmed by a three-year warranty.
Waterproofing a window from the outside
Before foaming the gap between the window and the window, it is necessary to decide with what material we will waterproof the assembly seam from the street side. As you know, the two main enemies of foam are sunlight and water.
If from the sun's rays we can simply close the assembly seam with platbands or strips, then the situation with waterproofing is more complicated, because it must meet two main conditions: not to let water in and at the same time not to prevent moisture vapor from escaping from the inside to the outside.
Well, and, of course, waterproofing must be resistant to long-term weathering.
All these conditions are met by such materials as PSUL, waterproofing vapor-permeable tape and special sealant "STIZ-A".
Sealant "STIZ-A" - a one-component vapor-permeable acrylic sealant of white color for sealing the outer layer - is characterized by good adhesion to the main building materials: plastic, concrete, polymer concrete, foam concrete, plaster, brick and wood, including.
It is also resistant to UV radiation, atmospheric precipitation, temperature deformation and can be applied even at temperatures as low as -20 degrees.
More on the topic Sealant STIZ-A
The only drawback of this material is that it is difficult to find it in small containers, and it makes sense to buy a whole bucket when you install a lot of windows. If you choose "STIZ-A" as external waterproofing, then the procedure will be as follows: first we foame the window, then, after complete drying, we cut off the foam sticking out from the outside and after that we apply the sealant to the cut with a spatula.
Vapor permeable waterproofing tape (self-adhesive butyl rubber tape consisting of a vapor diffusion membrane with an adhesive sealant on one or both sides) is sold in rolls of different widths.
In our case, a tape with a width of 70 mm is suitable. Using this tape as a waterproofing tape, orient it correctly when gluing.
You can determine this by blowing into it from one side and the other (do not forget to remove the paper first). Since there is a membrane inside the tape, air passage is possible only in one direction. The side from which it is impossible to “blow through” the tape is the outside (street) side.
The sequence of actions (first the tape, then the foam or first the foam, then the tape) does not really matter, but it must be taken into account that the foam, expanding upon drying, not only pulls the tape with a bubble (it will interfere later when installing the platbands), but in general it can tear it off the window or window.
Therefore, if you first of all stick the tape, then immediately screw the platbands or rigid strips on top of it, and only then foamed. Or first foamer, wait for the foam to dry, cut off the excess and stick the tape on the same day so as not to expose the foam cut to prolonged weathering.
PSUL is a pre-compressed self-expanding sealing tape (similar to foam rubber), impregnated with a special compound, thanks to which it is waterproof and vapor-permeable. Delivered in a compressed state, rolled into rollers.
If you opt for PSUL tape, then buy one that expands more than 30 mm. You will have to glue PSUL not on the outer side of the frame profile, but to the end next to the front edge.
This should be done after fixing the frame in the opening, but before foaming. Of course, it is more convenient to glue the PSUL frame over before installation, when it lies on the floor, but then the installation will have to be done at an accelerated pace, because after a few minutes the tape will expand and interfere with work.
Foam the assembly seam only after the PSUL has fully expanded and covers the assembly gap. But here the same problem is quite possible as with the waterproofing tape: foam expanding when drying out can squeeze the PSUL outward. This can be avoided by pressing the PSUL from the street side with platbands or strips.
Internal vapor barrier of windows
On the inside, the foam should also not remain open in order to exclude moisture from the room air from entering it.
For the device of internal vapor barrier, you can use a vapor barrier tape, which has already been described in the main section of this site, or use the acrylic sealant SAZILAST-11 ("STIZ-B").
The vapor barrier tape is glued to the end of the frame with a thin adhesive strip until foaming. Immediately after foaming, the protective paper is removed from the wide glue strip, and the tape is glued to the window.
Until the foam under the tape has hardened, it is advisable to immediately install the window sill and screw the starting profile to the edges of the frame, otherwise the tape "inflated" with foam will interfere later.
Sazilast is applied to the hardened foam, more precisely, to its cut. In this case, it is no longer necessary to rush to install the window sills and the starting profile, as when using tape. Nothing prevents you from doing this later, when it is convenient.
Materials used for manufacturing
Okosyachka is made of high quality dried wood with a moisture content of about 12%. In a drier one, there may be visually invisible small cracks, which during operation will lead to partial or complete destruction of the structure. Mostly conifers are used, but it is preferable to choose hardwood that is not prone to cracking and without falling out knots.
The width of the structure is selected depending on the existing width of the walls. Beams 150 or 200 x 100 mm, edged boards can be used. A combination of various materials is often used, for example, timber for tops and risers, and a window sill from a type-setting adhesive board.
Wood is treated with antiseptics, fire retardants and varnished or painted.
Interior decoration
The interior decoration of a window in a wooden house (window sills, slopes) is not much different from the decoration in a panel or brick house.
It is even a little simpler here: you do not need to drill holes for installing slopes - we fix everything with self-tapping screws into the tree (in the window).
Also, it is not required to additionally insulate the slopes from the inside with foam or other material. To play it safe, it is enough to foam the inner surface of the casing with a narrow strip next to the assembly seam before installing the slopes. This will be enough, because the tree does not freeze as deeply as concrete or brick.
How to make slopes has already been described on the pages of this site. I want to propose a slightly different method of finishing a window in a wooden house, more precisely, to abandon the installation of a plastic window sill and any panels, and use the window itself instead.
This method is not innovative, a lot has already been said about it on the net. I want to share my experience, tell how we do it.
Okosyachka, like a window sill and slopes
This method of installing a window in a wooden house allows you to save on slopes and window sills, gain time and achieve more, in my opinion, an aesthetic effect, but for this you need a good woodworking machine to evenly cut the so-called reverse quarter on the casing elements, into which it will be install a plastic window.
What is a reverse quarter can be easily understood from the figure. This is the recess into which the window frame will be installed from the street side.
The depth of the quarter is 20 mm. The width is made exactly corresponding to the thickness of the frame, for example: for a 5-chamber VEKA, the profile thickness is 70 mm, therefore the width of the reverse quarter should be 70 mm.
It is important to accurately calculate the size of the window and the window, the accurate assembly of the window and the installation of the window in the opening exactly according to the level - the inner gap should have the shape of a regular rectangle, and all the edges of the outer edge should be located in the same plane without skewing.
In order not to make a mistake in the size, it is better to first make and install the window, and only then accurately measure and order a plastic window on site.
The main tasks solved by the window
The formation of a gap between the upper beam and the window opening, which ranges from 5 to 8 centimeters.
Organization in the area of the window of a strong connection of logs located horizontally. Organizations of structures intended for the installation of windows.
Important. Shedding in a wooden house does not rigidly tie the structure to the house; it can move freely if the house shrinks.
The installation of a casing (casing) in a wooden house is a necessary and important event that should not be neglected. By setting the window on time, you will save yourself from problems that may arise in the future.
Source: profibrus.ru/okosyachka-svoimi-rukami-v-derevyannom-dome.html
