How to insulate a wall in a brick bath
The decoration of the steam room should be carried out using heat insulators that do not emit substances harmful to the human body. For this, insulation materials that are not susceptible to moisture from fiberglass or basalt are suitable. Bath insulation should be comprehensive and include insulation of elements such as the floor, foundation, roof and walls. Let's consider in detail how to properly insulate, and what methods are used for each element.
Foundation
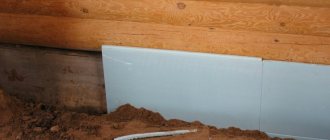
The concrete of which the foundation is made is a strong conductor of cold. Before erecting the wall, it is insulated with roofing material so that cold and moisture does not get from the ground. However, this is not enough. It is necessary to finish the walls of the foundation from the base in order to increase heat storage and minimize the subsidence of the foundation
This is important, since in winter the earth expands under the influence of cold, while cracks form in the foundation that destroy it. Of the materials, it is worth choosing penoplex, it is cheaper than polyurethane foam, but its installation takes longer
The second material is also quite good and can be collected in a day.
Bath floors
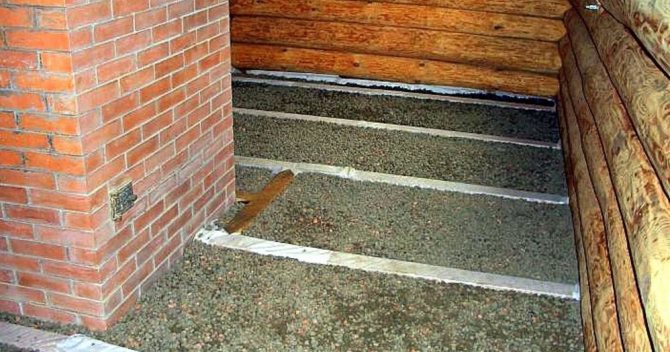
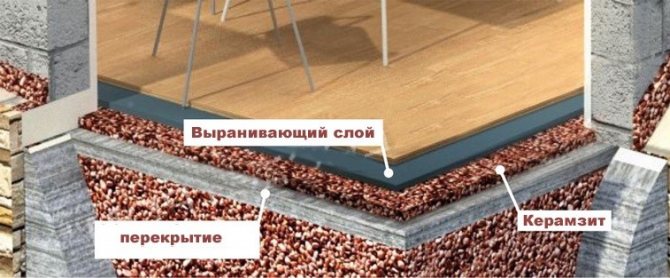
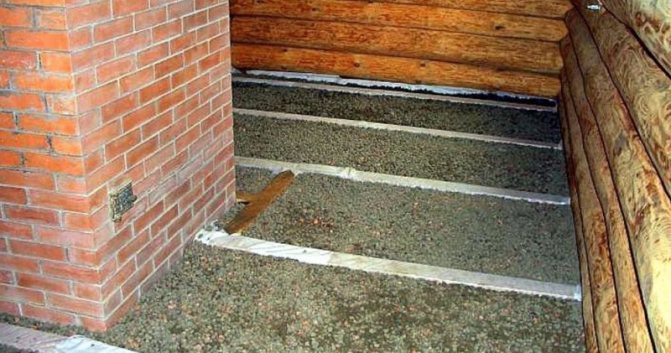
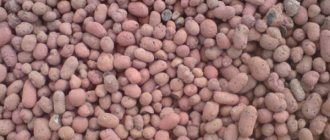
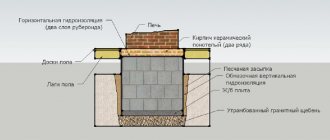
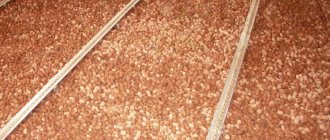
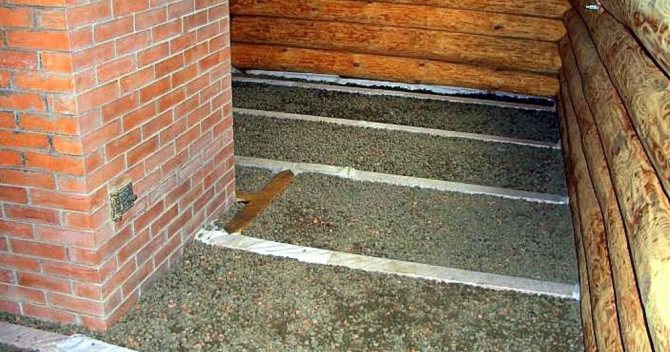
To protect the floor from ground moisture, an expanded clay pillow is required before installing the slabs. The thickness of its layer depends on the thickness of the walls, and should be twice as large. A basement is not needed for a bath, so expanded clay is filled completely over the entire inner surface of the foundation. The floor in the bath is preferably made of concrete slabs. It handles moisture better than wood.
Wall decoration
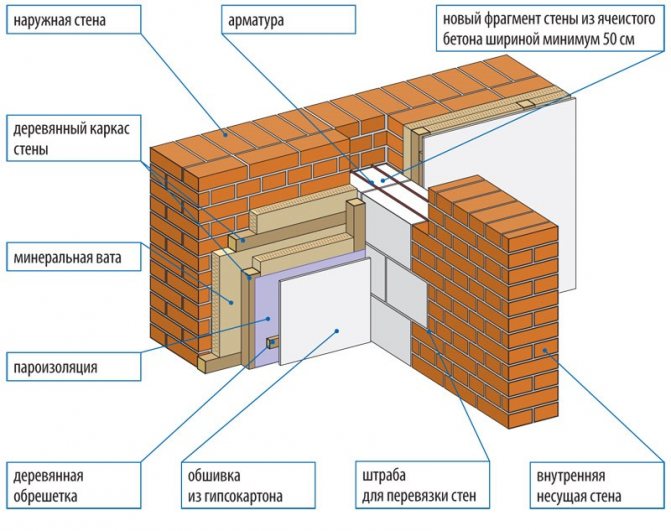
The insulation is fixed on a pre-fixed cobbled lathing, it will prevent the material from slipping, protect it from compression, while retaining its original properties. When choosing a heater, you should take into account what type is used: expanded clay, foam phone, isolon, or others. The scheme of insulation of bath walls:
- The masonry is done in several passes, the brick is periodically filled with a prepared lime solution.
- Insulation boards are located from the inside, between the load-bearing wall and the finish.
- A lining or wooden panels are attached on top of the insulation.
Roof trim
Complex insulation of a steam room in a brick bath cannot do without a ceiling. Steam primarily rises upwards, which is why the roof of the steam room is especially susceptible to high temperatures and high humidity. Therefore, he needs to be given no less attention than the walls. For the roof, experts in insulating the bath from the inside recommend using mineral wool with a double-sided waterproofing coating. Foil-clad fiberglass works well for these purposes. The use of expanded polystyrene is not recommended. At such temperatures, it releases substances hazardous to the body.
https://youtube.com/watch?v=wm1q_X5klK0
Wall sandwich scheme
You can find recommendations for warming brick baths with the help of internal masonry made of wooden beams with a section of 100 × 100 mm, on top of which a layer of mineral wool is mounted. This begs the question: why bother with brick at all, if the first layer of such insulation is a sufficiently strong wall for a one-story building? This scheme is not feasible from an economic point of view.
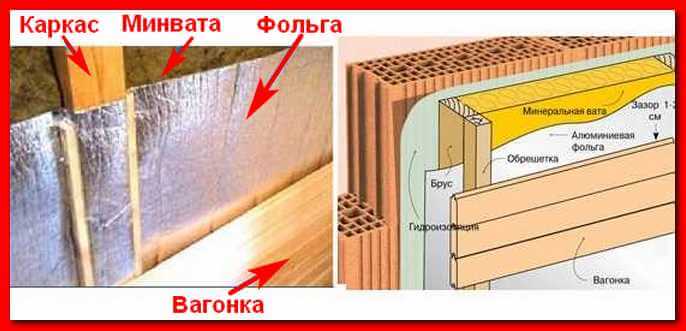
Brick bath insulation scheme
- decorative interior decoration (lining, tongue-and-groove boards, etc.);
- gap 1 - 2 cm;
- folgoizol, oriented with the reflective side inward;
- mineral wool (slabs or roll material 10 cm thick);
- waterproofing membrane.
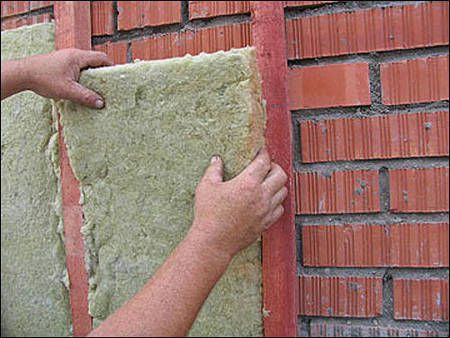
It is easy to insulate a brick bath from the inside with your own hands without the involvement of specialists. To do this, it is quite enough to confidently own a drill, stapler, hacksaw and screwdriver, as well as to have enough free time. First, a membrane is attached to the load-bearing wall. Then a vertical lathing is mounted, with a thickness equal to the insulating layer or exceeding it by 1 - 2 cm.
We suggest that you familiarize yourself with: How to calculate the lining using the example of bathing sheathing
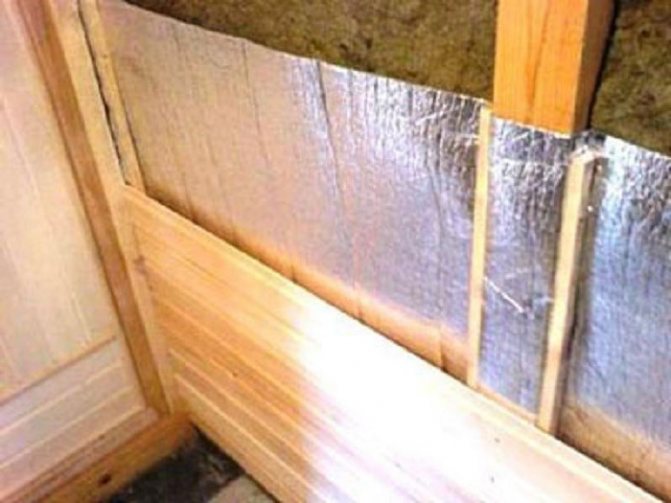
Cotton wool is laid inside the crate, after which the foil-insol is attached to the bars with a stapler. Better to overlap the stripes. The joints of the foil-clad material are insulated with special tape. On top of the infrared screen, a horizontal rail is stuffed, which serves as a support for the finishing and a base for the formation of an air gap.

Expanded polystyrene can be used as the main heat-insulating layer, subject to two conditions:
- As an infrared screen, a material is used that has an inner surface of polyethylene foam with a thickness of at least 1 cm.
- An air gap of at least 2 cm must be maintained between the screen surface and the expanded polystyrene plates.
Due to these measures, penoplex or polystyrene does not heat up to the permissible limit of 75 ° C, even if the temperature in the steam room reaches temperatures above 90 ° C. The boards are glued to the inner surface of the brick wall, and the waterproofing membrane is excluded from the sandwich.
Insulation of a brick bath from the inside
How to insulate the walls of a brick bath from the inside? It is most effective to insulate the inner surface of the walls of a brick bath with the help of natural heat-insulating materials that perfectly retain heat, but do not emit any harmful substances at high temperatures. In particular, sheets based on mineral wool, produced in the form of rolls or individual mats, are excellent for these purposes.
The only drawback of such a heater is the ability to absorb moisture, which, by definition, is always enough in any bath. Therefore, the heat-protective layer will require additional waterproofing, which protects the mineral wool from steam and water.
The procedure for installing insulation on internal walls will be as follows:
- a supporting frame is being erected on a brick wall from wooden slats;
- insulating material is laid in the resulting cells. In addition to mineral wool, more modern materials can be used here with great success. For example, foil-clad foam is not only completely insensitive to moisture and temperatures of several hundred degrees, but due to the shiny surface of the foil, it is able to reflect heat back into the bathhouse;
- the entire structure is covered with a layer of waterproofing (polyethylene, foil, etc. To ensure complete moisture resistance, the waterproofing material should be laid with an overlap of 10-20 cm. To give the joints additional strength, all joints should be fixed with thin and flat wooden slats.
In order to improve aesthetics, thermal insulation is usually not left open, but covered with wooden clapboard.
In addition to the walls, the internal thermal insulation of a brick bath should also include measures to reduce heat loss through the floors. The sequence of actions here will be as follows:
- a layer of vapor barrier is laid on the subfloor cleaned of dust and dirt;
- heat-insulating mats are lined and fixed in one way or another;
- a layer of waterproofing is laid;
- a finishing floor is equipped with the widest boards with a thickness of at least 40 mm.
It is very important to consider the material from which the sub-floor is made. If it is formed by boards, then they will need to be pre-treated with a means to prevent wood rotting.The concrete subfloor itself is capable of playing the role of thermal insulation.
Therefore, even at the stage of its arrangement, one should take care of imparting heat-saving properties. This is achieved by the following flooring technology:
The concrete subfloor itself is capable of playing the role of thermal insulation. Therefore, even at the stage of its arrangement, one should take care of imparting heat-saving properties. This is achieved by the following flooring technology:
- a layer of sand about 5-10 cm thick is poured into the pit;
- a solid heat insulator (foam) is laid;
- a mixture of cement, sand and crumbled foam is poured;
- sheets of roofing material are overlapped;
- reinforcing mesh is lined;
- a concrete solution is poured with the addition of fine crushed stone;
- a finishing plank floor is created at a height of 10-20 cm.
The resulting design is advantageous in that it is ventilated. This means a significant increase in the service life of both the finished floor and the heat-insulating concrete base underneath.
How to insulate the floor in a bath? You will find out the answer to this question by reading this article.
And in this article, read about the bath roof insulation.
Correction of insulation and ventilation by efflorescence
Efflorescence can be removed with special products.
By themselves, efflorescence on brickwork is not a problem for the load-bearing wall, but they may indicate that the insulation scheme is not working correctly, leading to a violation of moisture transfer. In winter, the partial pressure of gases dissolved in water increases. The capillary movement of liquid through the thickness of the brick increases in the direction from heat to cold. Internal condensation and capillary flow cause waterlogging of the layer located 2 - 3 cm from the outer surface of the wall.
At subzero temperatures, waterlogging is not striking due to freezing of bricks from the street side. In the spring, the condensate accumulated over the winter begins to intensively stand out on the surface, carrying water-soluble salts with it.
If efflorescence is equally formed on all walls, then the reasons can be covered in the quality of a brick, the composition of the solution, or a violation of the masonry technology. However, in the case of localization of salts on separate walls of the bath and their sections, it makes sense to revise the insulating sandwich, provided that the influence of the unsuccessful design of the ebb tide is excluded. This must be done in order to level the operating mode along the entire bearing perimeter in order to increase the building resource.
Add foil insulation
- add foil insulation, if it was not installed earlier, or eliminate possible defects of this layer (for example, poor-quality sealing of joints);
- provide a ventilated gap between the vapor barrier and the main thermal insulation;
- add an exhaust vent.
Ceiling insulation
With poor-quality thermal insulation, up to a quarter of all the heat generated by the furnace can go through the ceiling
Therefore, to reduce losses, ceiling insulation should be given no less attention than in the case of walls. The most suitable insulating material for these purposes is lightweight and non-combustible fiberglass.
Ceiling insulation works in the bath are carried out as follows:
- canvases or mats made of fiberglass are laid out on the boards of the ceiling;
- a mixture of equal parts of sawdust, sand and clay is poured over it. The optimum thickness of this layer is 20-25 cm;
- after the previous layer has dried, sheets of foam are laid out on it;
- the entire surface is filled with a small layer of cement screed.
In addition, ordinary expanded clay can provide excellent thermal insulation. With a backfill thickness of about 30-40 cm, it will be able to reliably retain precious heat.
Thermal insulation of a bath from foam blocks. Read about it here.
And this article talks about the insulation of a wooden bath.
Here https://ru-house.net/stroitelstvo/ you will find many more informative articles about building a house.
Thermal insulation of the walls of the bath process features
When you have completed the process of floor insulation, we begin wall insulation from the inside.
Please note that you do not need to loosen or process a brick tub from the inside of the bathhouse, since this wall surface will later disappear behind the wood sheathing for the steam room
The only thing that needs to be done is to saturate the brick wall in order to protect it from bacteria, but this procedure is relevant only for rooms such as steam rooms and shower rooms.
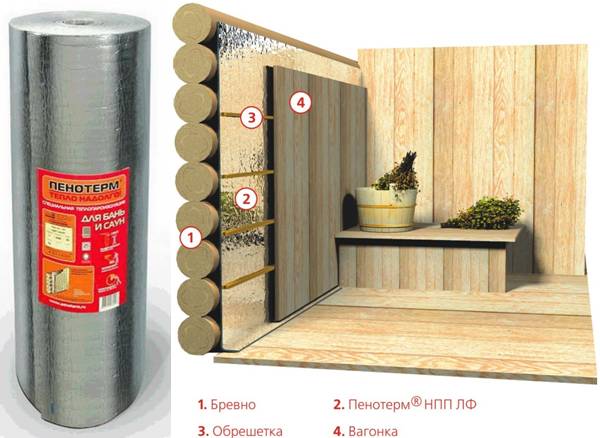

The walls of the baths should be insulated in exactly the same way as other rooms, and not only baths. However, there are a number of process features that are unique to this type of work:
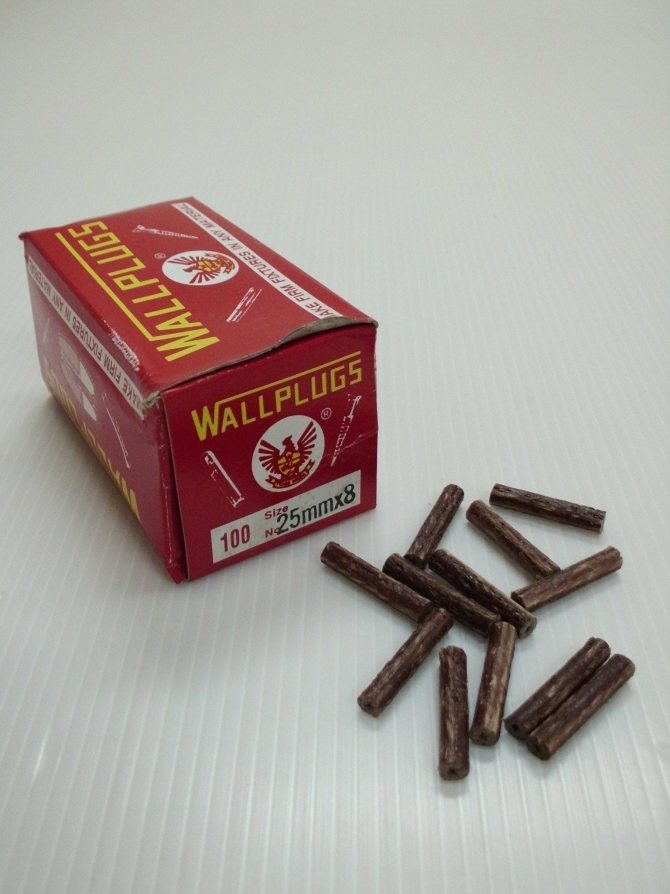
- to reduce the number of possible heat losses, close the gaps between the wall and the windows using polyurethane foam; the frame for mounting the cladding must be made of wooden beams, then attach it directly to the brick tub; it is highly undesirable to use metal suspensions and profiles for work, since they have the property conduct heat; insulation in the form of mineral wool or polystyrene plates is placed in the crate cells: the insulation is attached to the tub with dowel-umbrellas or with a special adhesive; if you are going to glue the heat insulator, then it is better to treat the brick wall of the bath with a penetrating primer before that.
So, when the main insulation has already been applied to the walls, it is necessary to apply a layer of vapor barrier, which you can use kraft paper, glassine or foil film, which, by the way, will be the most optimal material for the steam room and shower room. For example, the same kraft paper, when used in places of high humidity, can become soaked over time and become unusable.
If necessary, fill the counter battens on the battens of the sheathing. This will create a gap between the outer skin and the vapor barrier. Then, the lining should be attached to the counter-batten using thin wooden strips.
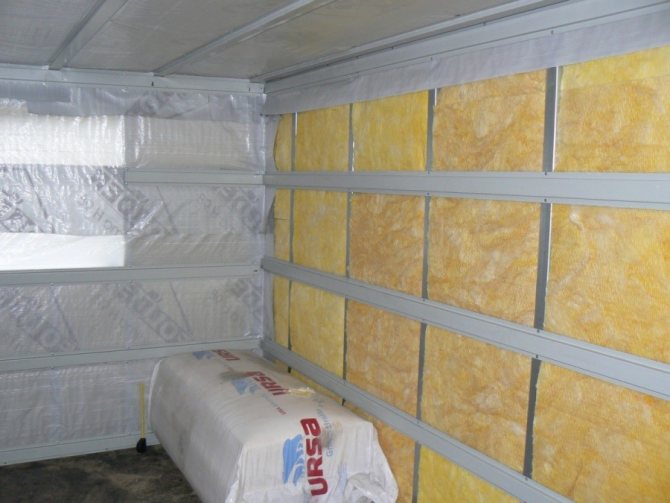

When your bath or sauna has a large area and occupies several floors, it is not necessary to insulate the walls from the inside everywhere in order to prevent strong heat losses during its operation. If a loggia is attached to the bath, it must also be insulated. You should also install good entrance doors equipped with at least two sealing circuits.
The main technologies of internal thermal insulation of the wall
Immediately, we will make a reservation that there are a large number of different ways where different heat-insulating, and not only, materials are used. Let's consider the main options that you can do yourself.
Option number 1
This method is considered by the master to be the simplest, so doing it yourself will not be a big problem. It is based on the process of wall insulation with heat-insulating materials, which fit into the crate or without it. Here is the sequence of this process:
- The inner surfaces of the walls must be waterproofed. To do this, they must be leveled with plaster or putty, and after drying, apply a coating waterproofing. We recommend using bitumen-based mastics. Rarely when roll material is used for these purposes.
- Next, a crate of wooden beams is stuffed onto the walls, which are pre-treated with an antiseptic solution.
- Now, insulation is laid between the elements of the crate.
- After that, a vapor barrier membrane is stretched right along the crate. It is attached to wooden elements with metal staples. Therefore, you will need to purchase a stapler.
- And already on the very crate, the lining is mounted.
https://www.youtube.com/watch?v=wm1q_X5klK0
Often, experts use double wall insulation, while installing two battens with insulation 100 mm thick. The process is more complicated, but it will not be difficult to do it yourself.
If penoplex is used as a heater, then there is no need to install hydro- and vapor barrier layers. But it is better not to give up the crate. This is the base on which the lining will be mounted.
Option number 2
The second way to insulate a brick bath is to build another wall near the walls, only a wooden one with a heat-insulating layer. For this, a frame made of wooden slats is installed on a brick.

Its elements can be laid horizontally or vertically. Everyone decides for himself. But remember that the elements of the wall itself will be laid perpendicular to the elements of the frame:
- Now the waterproofing membrane is stretched and fastened along the crate.
- Next, a second wall is built. It is most often erected from wooden beams with a section of 100x100 mm or 150x150 mm. Please note that the elements of the new wall must fit tightly to each other. This thickness of the wooden wall is already an excellent indicator of thermal insulation.
- But now you need to decide whether to use additional insulation or not. If "yes", then a crate is assembled along the new wall, where the heat insulator is laid. A vapor barrier or foil roll material is installed on top of the lathing. If there is no need for insulation, then the crate is mounted anyway, only from slats of small thickness. A waterproofing material is stretched on top of the frame.
- And the last stage is the decoration of the walls with clapboard.
Insulating a brick bath from the inside and with your own hands is not so simple, but also not very difficult. It is very important to protect the building from heat leakage, therefore it is important to ensure that all stages of thermal insulation are performed strictly in sequence. How to properly insulate a brick bath from the inside? You should start with floor insulation.
To equip a concrete floor, you will need more than one layer, because with proper insulation of the bath, moisture should not get on the thermal insulators.
First you need to start planning and compacting the soil. In case it is difficult to do due to large stones, the base is leveled with sand. Further, a cut-off waterproofing is spread, for example, super-dense cellophane, and the edges are wrapped on the walls. They should be much higher than the very level of the screed.
Then, before backfilling expanded clay, a pillow with a thickness of at least twenty millimeters of sand is poured. Despite the fact that, according to the instructions, this pillow can be laid under the cut-off, it is still better to do it from above - in a dry form, sand also acts as a thermal insulator, but not when it is wet. Then a layer of expanded clay is poured from above, its thickness is regulated depending on the need.
Cut-off waterproofing is not required here. To fill the screed, it is enough to put the profiles for a reference point directly into the expanded clay. Optionally, you can also install reinforcement under the beacons to secure the screed monolith.
It may very well be that you install a floor drain. Be careful: during use, water should not fall over the edges of the funnel, soaking the thermal and electrical insulation.
Wall insulation
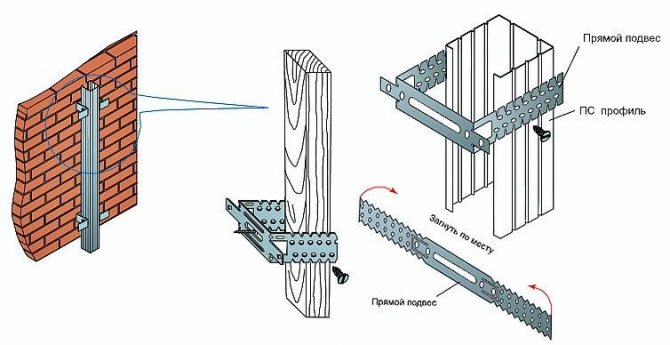
Insulating the walls of the bath from the inside with your own hands is actually not such a difficult task, if you follow our instructions. You should start by patching the lathing for the lining made of wood. Most often, the crate is attached to consoles made of metal perforated hangers for plasterboard profiles.
But before proceeding with the installation of the consoles, it would not hurt to attach the hydro-barrier to the wall with glue or even double-sided tape in general. Then you need to put U-shaped brackets on it.
We offer you to familiarize yourself with: Finishing a brick oven
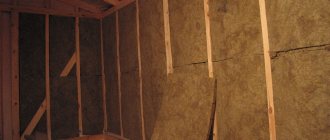
Mineral wool, one of the best insulation materials, is threaded through these brackets. So, it covers the entire area of the wall, leaving no gaps or cracks. Alternatively, you can first attach the wooden sheathing profiles. Then fill the space between them with mineral wool, occasionally nailing it with a stapler to the uneven bars. As for the thickness of the insulation, it all depends on the required power of thermal insulation.
When the mineral wool is laid, it is covered with foil-coated polystyrene foam, along with the crate. Experts advise to fix expanded polystyrene with glazing beads, so as not to make unnecessary holes in the foil.
Euro lining is installed directly on the foil, using clamps and self-tapping screws.
When insulating a brick bath from the inside, in addition to the walls and floor, it is important not to forget about the ceiling. For its thermal insulation, the same materials are used as for the walls. Even the process of installing thermal and waterproofing is identical.
Helpful tips from the masters:
- in order to avoid heat loss, the gaps between windows and walls are sealed with polyurethane foam;
- avoid metal profiles in work - they conduct thermal energy;
- before starting work, it is better to treat the walls with a special primer;
- if the boiler is insulated with foil plates, it will keep the high water temperature longer;
- in order to fix the mineral wool well on the ceiling, it is best to use a nylon thread fixing it between the profiles of the crate;
- the presence of large windows and doors in the bath is undesirable.
Let's talk about the thermal insulation of each individual section of the bath.
Wall insulation
Wall insulation always starts with waterproofing. Water should not get on the inner surface of the brickwork, otherwise the brick will begin to collapse. Therefore, first of all, the surface is waterproofed. The next step is the sheathing device. It is made from boards that are installed on the edge parallel to the floor. It is advisable to select the width of the board taking into account the thickness of the insulation.
We will separately tell you why a board is used for the lathing, and not metal? The metal profile is just as easy to install, and it may even be easier for someone to work with metal guides. Everything is really so, only for the steam room every saved percentage of heat is important, and every section of the metal is a possibility of thermal energy leakage.
The next step is to install the insulation. The insulation must be laid tightly, leaving no gaps between the board and the mats. A vapor barrier is laid on top of the insulation, which is then closed with clapboard or any other facing material. There must be a ventilation gap between the cladding and the vapor barrier; without it, the vapor barrier becomes simply useless.

Hot air comes out through the ceiling, floating above the cold one. The main danger for the ceiling is insulation soaking. After the rough surface is filled, the process of arranging thermal protection begins.
The logs are carefully wrapped with a waterproof film. You can put the film joint to joint using special tape. Mineral wool mats are laid on top. For the ceiling, it is better to use a double layer of mats, covering the gap between the two mats with a top layer. This will reduce heat loss and create a small vent gap between the two layers of insulation. Instead of mineral wool boards, you can cover the entire space with rolls. In this case, you need to ensure that there are no joints between the rolls.
The insulation is closed with a vapor barrier membrane, and then it is nailed in with boards. This completes the insulation of the ceiling, but we must not forget that when the chimney passes through the ceiling, it is necessary to separately equip the cutting with insulation, and on the wall there must be a protective screen.
Heat protection of the floor
A brick bath is usually built on a strip foundation. This means that there will be cold ground under the floor. Therefore, insulation must be started even before the construction of the rough floor surface.To begin with, level the ground. Ideally, this should be done in layers:
- Large stone
- Crushed stone
- Sand
But most often they just use sand, from which they form a leveling cushion 20 cm thick. After that, the sand is covered with a cut-off film. Special attention should be paid to the edges of the film: they should go 20-30 cm onto the wall. The next step: backfilling of expanded clay and floor screed.
Logs are installed directly on the screed, which are covered with waterproofing. The space between the lags is laid with insulation plates.
The film of hydro and vapor barrier is re-laid, which is covered with a rough wooden floor surface.
Insulation outside
Before starting to insulate a brick bath from the outside, it is necessary to carefully analyze the issue of laying bricks:
- The mortar should fill all the space between the bricks evenly, at the same thickness; The first row of brickwork should be made only of solid elements; The beams rest on the butt row; As for clay bricks, before laying them, it is necessary to thoroughly moisten the brick, especially, if the bath is arranged in the summer season.
In order to insulate the bath from the outside of the building, it is necessary to lay expanded clay 40-50 centimeters thick between the walls. You can also use slag, fluff of lime, sawdust and sand for this.
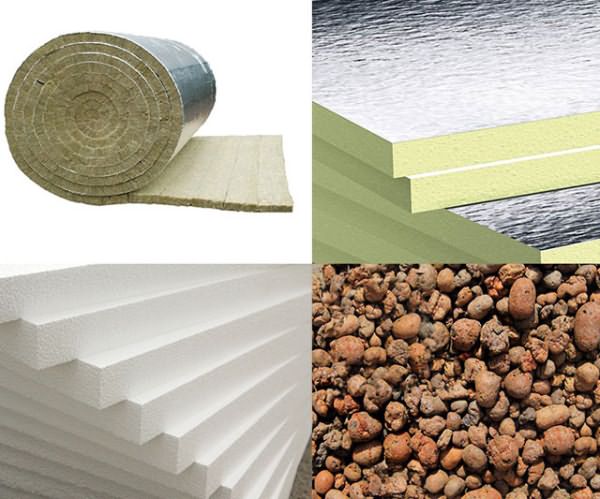

But it will be more rational to insulate the walls of the bath from the outside with a slab insulation. Direct fixation of the insulation layers occurs with the help of a synthetic binder. Plates are placed in spacers at a distance of half a meter from each of the plates. Read the instructions on how to choose a stove for a bath.
It is worth installing the slab insulation so that small gaps remain between the elements. They are necessary for the ventilation of the facade, because otherwise, the entire surface will be covered with mold during the rainy season.
