The principle of operation of the IR system
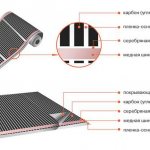
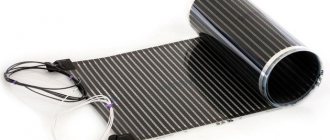
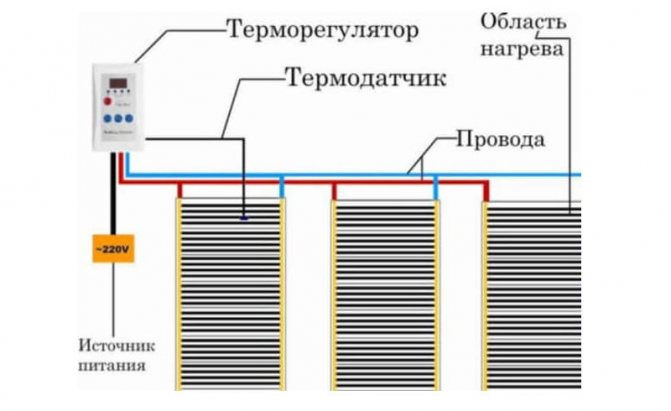
The structure of the infrared underfloor heating, in addition to the main coating, includes copper or silver strips that conduct current, a carbon emitter and a film layer. In addition, the warm coating system itself is equipped with a thermostat, a temperature sensor, special clips and clamps, and a cable for connecting to the network.
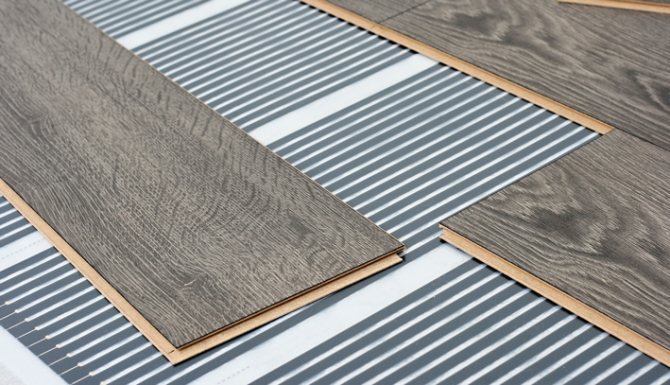
Carbon paste, which is applied in parallel stripes, creates rays under the action of an electric current. They, in turn, having reached a dense coating, heat it up. The system is designed in such a way that the air receives heat from the heated laminate. In this case, part of the rays passes through the coating and heats up the objects in the room.
To avoid overheating of the film element, it is not recommended to install an IR warm floor under large furniture.
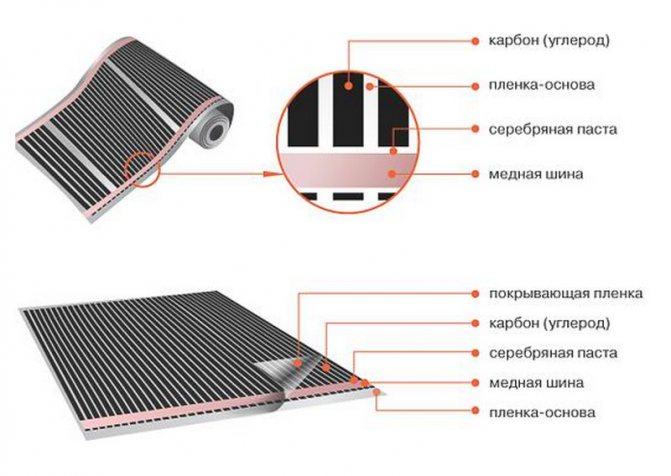
For installation, film materials with a capacity of 150 to 440 W / sq. Are used. meter. For laminated boards, films with a minimum indicator (150 W / sq. Meter) are used. This power is enough to warm the floor up to 40-45 degrees. An infrared heating system is considered rational, since its installation allows you to create optimal heating conditions.
We install an infrared warm floor under a laminate or linoleum with our own hands
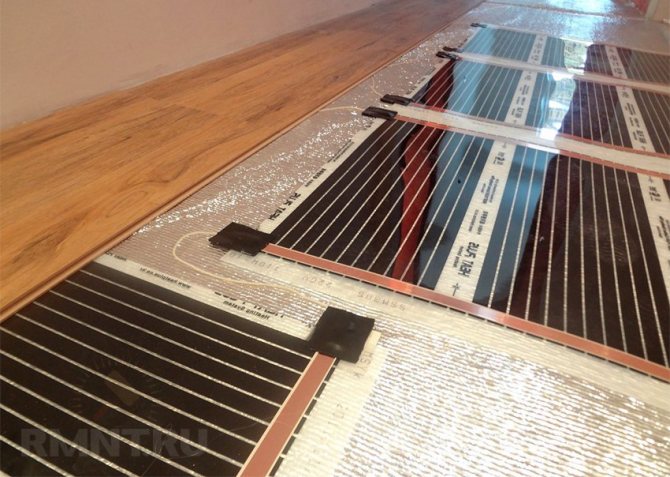

It is always comfortable with a warm floor, but not every master decides to install a heating system with his own hands. If you have chosen laminate or linoleum as your flooring, study this article, where we will tell you about a simple way to heat the floor with infrared films.
What are the features of the use of infrared film
With a reasonable approach and understanding of the technical qualities of the film, it can even be used as the only heating method. And yet, IR film is most widely used for arranging comfortable zones in the interior: floor heating in bathrooms, children's rooms and places for games, on loggias. At the same time, the heating element absolutely does not steal height and does not require changes in the construction project, with the exception of its electrical part.
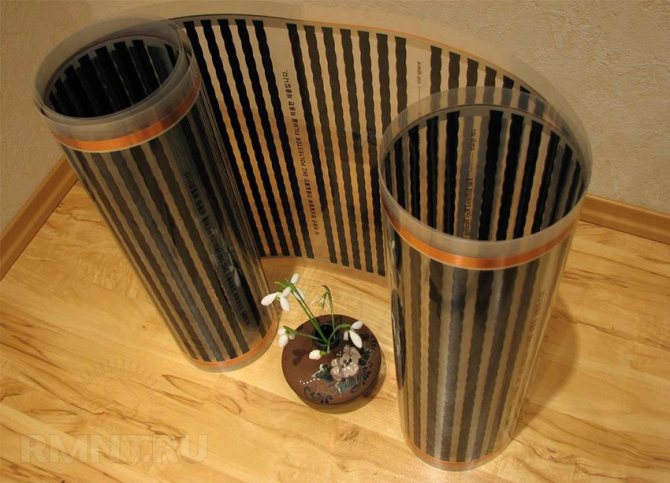

Like all innovative technologies, IR film is subject to harsh criticism, both constructive and completely meaningless. The film floor, like any other heating system, has a strictly defined scope. All sorts of myths about the inefficiency and unsafeness of the film appear as a result of its improper operation or violations of the installation rules.
Preparing the subfloor
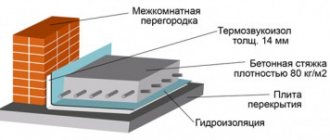
It is possible to use infrared film as the main heating system only if there are two layers of thermal insulation - the main one and the screening one. The optimal floor structures in such cases are dry screed and flooring on logs with filling of voids with stone wool. Concrete floors may be covered with an insulating polyurethane substrate: slabs or spraying.
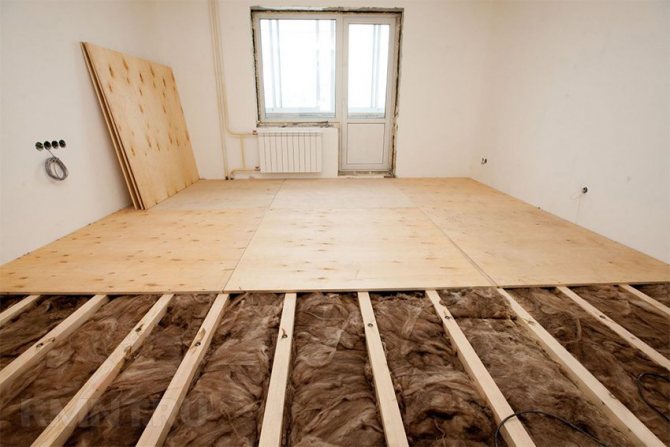

If it is not possible to raise the floor height by 5–8 cm, IR films cannot be the main source of heat in the house and are used only for comfortable heating of floor coverings, including locally.
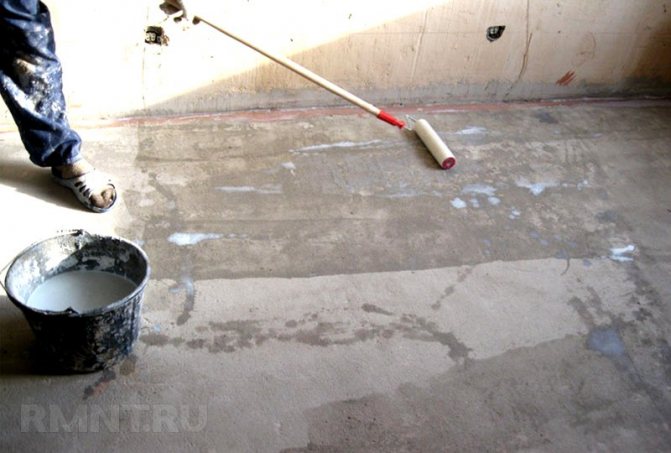

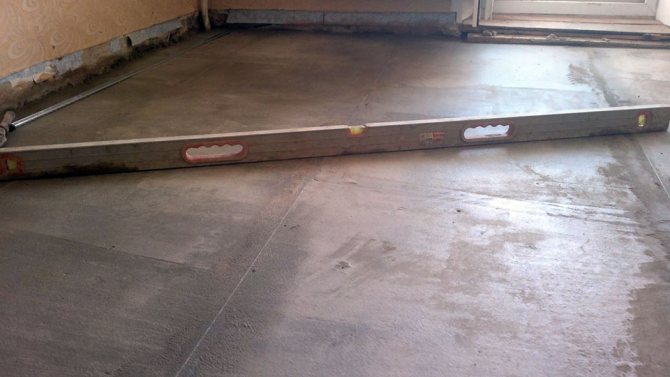
The junctions of the subfloor to the walls must be filled with polyurethane foam to eliminate convection, the gaps between the floor slabs must be sealed with cement mortar. Then the surface of the floor must be cleaned with a vacuum cleaner and to prevent further dust formation - primed.
Heat shield rules
The shielding layer reflects heat rays and reduces heat transfer to the subfloor by 70–80%.The material for the device of this layer is a lavsan substrate, it is preferable to use products of the same brand as the film. That is, it is better to purchase not only heating elements, but also a thermal and electrical insulation system.
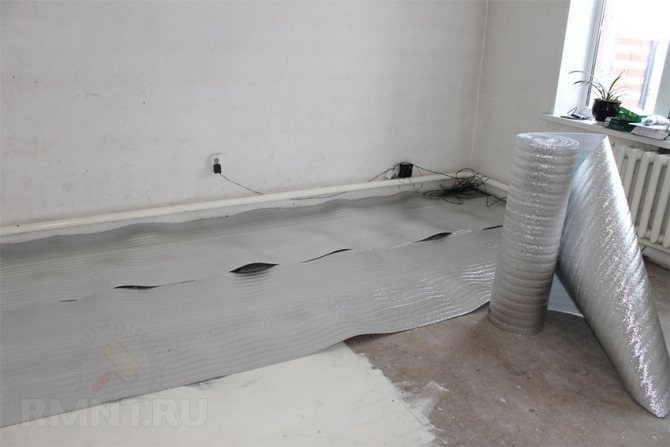

It is allowed to use cheaper polyethylene foam with a metallized film, but it is absolutely irrational. A cheap insulator has too high thermal conductivity, which reduces the useful power. The payment for increased electricity consumption during the year is equivalent to the cost of high-quality insulation materials.
The device of the shielding substrate is necessary not only in those places where the heating circuit will be laid, but also throughout the entire area of the room, in order to exclude the height difference. Lavsan backing also serves as a replacement for the conventional cushioning underneath laminate flooring.
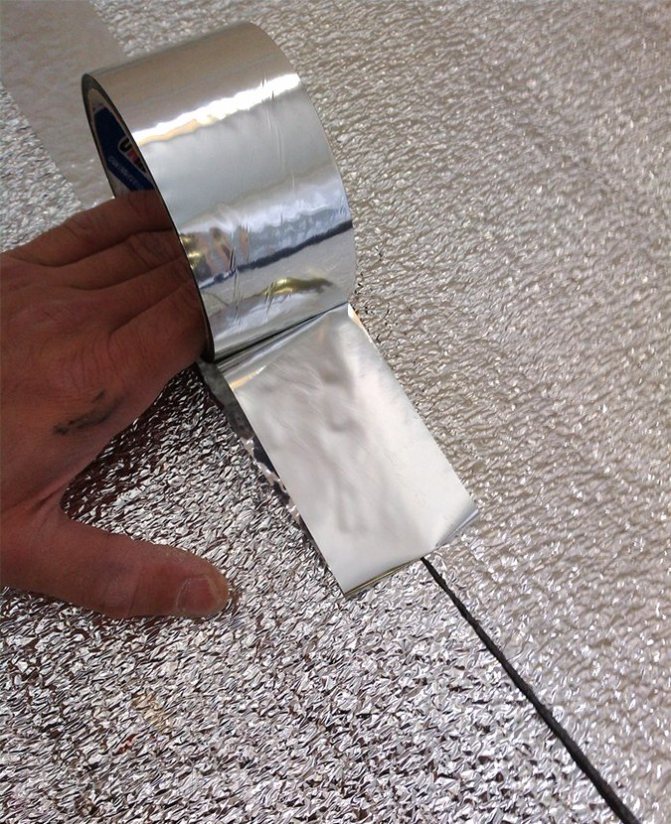

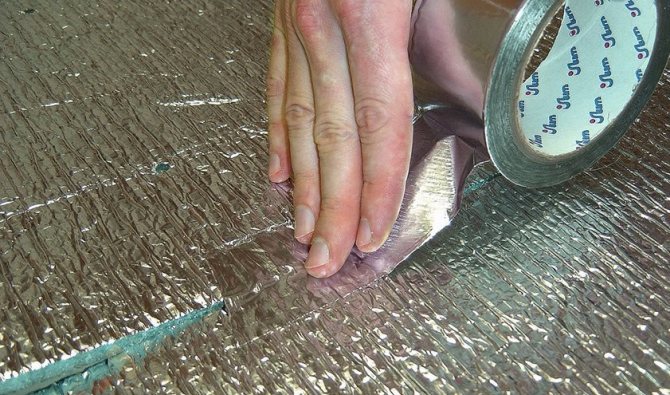
The substrate is produced in sheets or rolls and forms joints when laid. They must be glued with a special tape, which can be replaced with an aluminum tape with a polished surface. To increase electrical and fire safety, the metallized surfaces are connected with strips of aluminum foil and the surface is connected to a protective conductor to enable the circuit to be switched on through a differential circuit breaker.
Heating foil laying
The heating circuit must be calculated in advance, taking into account the bypassing of the installation sites of cabinet furniture, bathtubs and non-visited areas. In this case, it is allowed to lay the film under the kitchen set and furniture on remote legs.
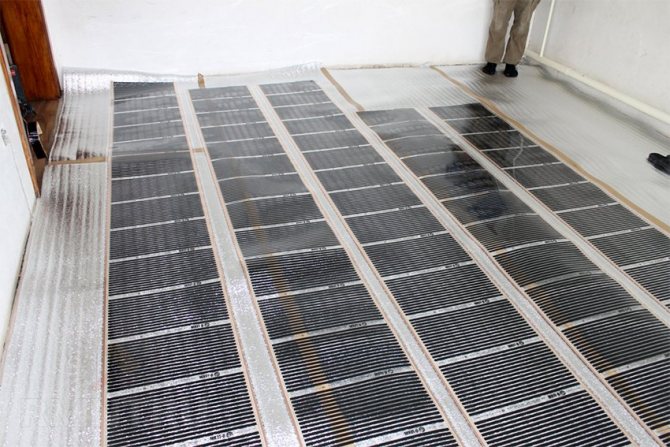

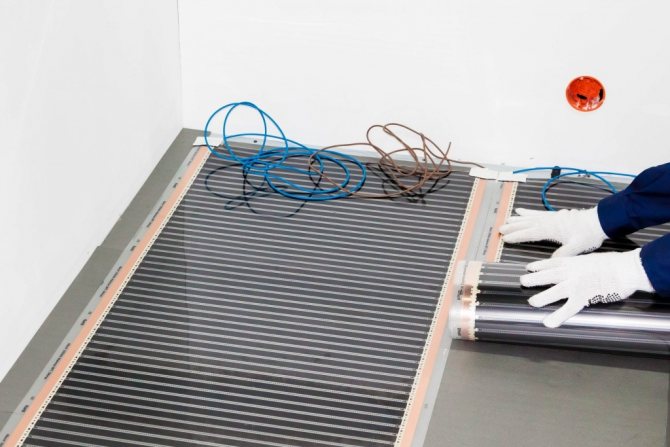
Lay the foil on the substrate in rows, keeping the recommended distance from the walls of 30–200 mm. When laying the film, it is allowed to cut across, if the remaining rolls are not enough in length, the film can be built up, keeping a gap of 20 mm at the joint.

The film is powered by two single-core stranded wires in non-combustible insulation. The connection is made with piercing clamps: first, the wire is crimped with pliers in the shank, then the jaws are applied to the metal of the contact pad and squeezed.
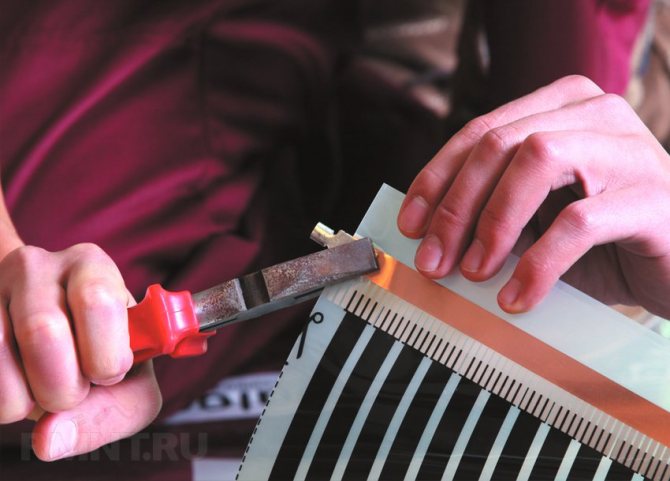

The wire connection points and open sections of the contact rails are insulated with an adhesive bitumen film on both sides.
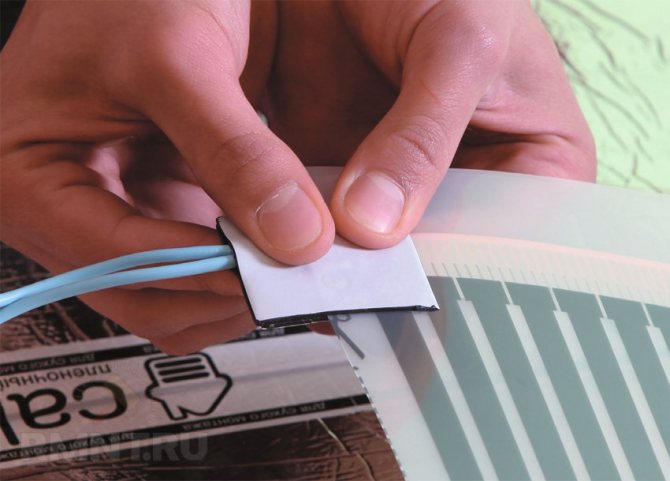

The temperature sensor is installed anywhere under the film. In the places where the sensor is installed, the insulation of the contacts and the ends of the film, small areas are cut out in the Mylar substrate and the protruding elements are hidden in them. All wires are also placed in grooves cut with a knife, after which the surface is glued with transparent tape. They also connect the joints of the film to avoid shear.
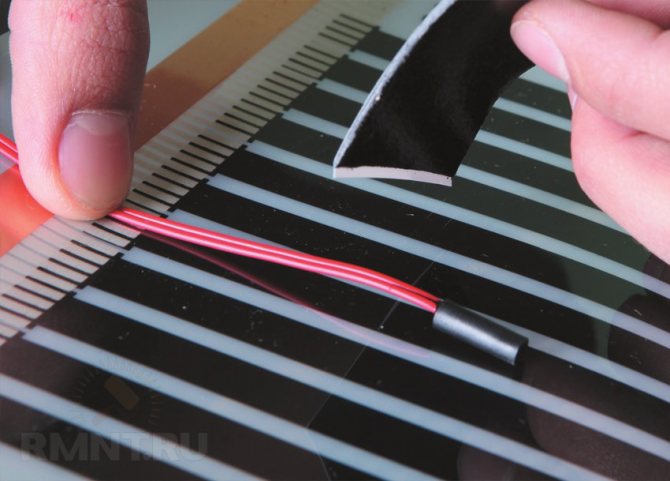

The heating elements must be protected from abrasion with plastic wrap. It is even better to use a special grounding substrate for this, which scatters electromagnetic radiation from the floor and serves as an upper contact base for more correct operation of the differential switch.
Electrical connection
It is not recommended to lay solid strips of film with a length of more than 10 m and connected stubs with a length of more than 7 m. The average electrical power of any film in an area of 1 m2 is 200-240 W, which approximately corresponds to a current of 1 A. This greatly simplifies the calculation of the power of the entire system and its connection diagrams, as well as the choice of a thermostat and protective devices. The conductive strips of the film are designed for a current of no more than 10 A, while the presence of contact connections reduces the throughput of the loop to 7 A.
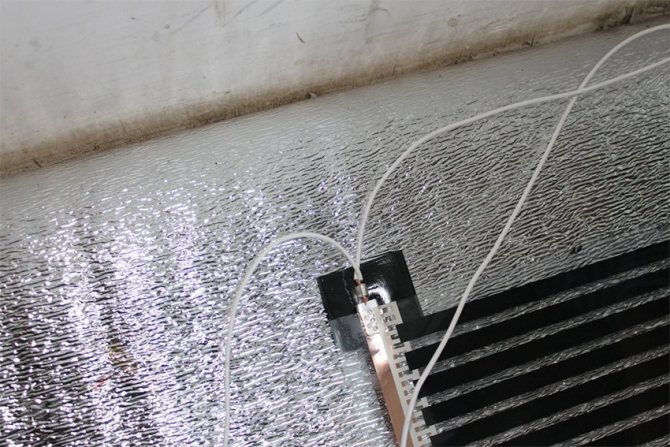

It is not allowed to exceed the specified load norms. All units should be connected with separate wires going from the film on the floor to the thermostat, or, in extreme cases, to a junction box accessible for service.
Thus, it is allowed to use thinner wires PV-3 1x1.5 for connection, which at a load of up to 10 A will not heat up at all and will last a long time.To power the thermostat, a VVGng cable with a conductor cross-section corresponding to the total power of the controlled zone is used. If the total power exceeds the permissible current of the contact group of the thermostat, the commutation is output to the magnetic starter without self-pickup.
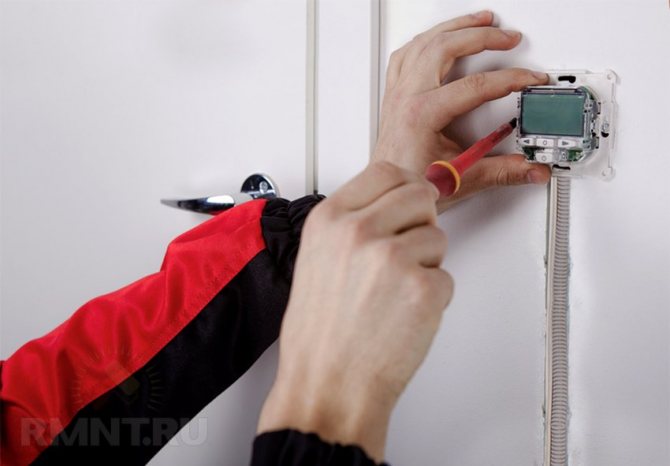

After the installation is completed, it is necessary to turn on the warm floor and check the operability of each section, and, if necessary, calibrate the sensor readings. After that, you can fix the thermostat in place and proceed with the installation of the floor covering.
Floor covering device
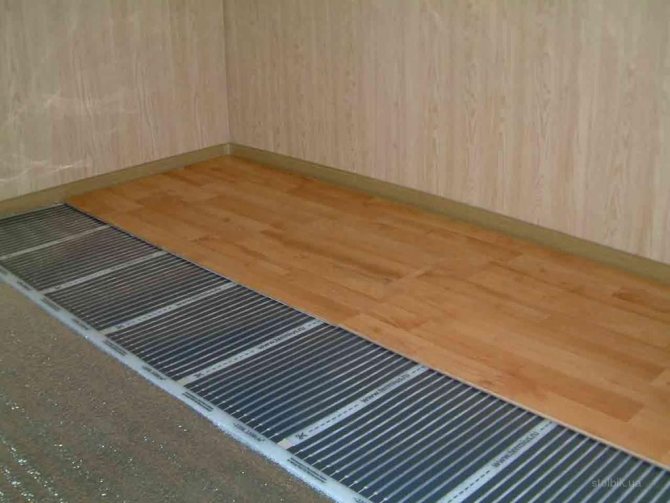
Laminate can be installed directly onto the protective foil using standard methods.
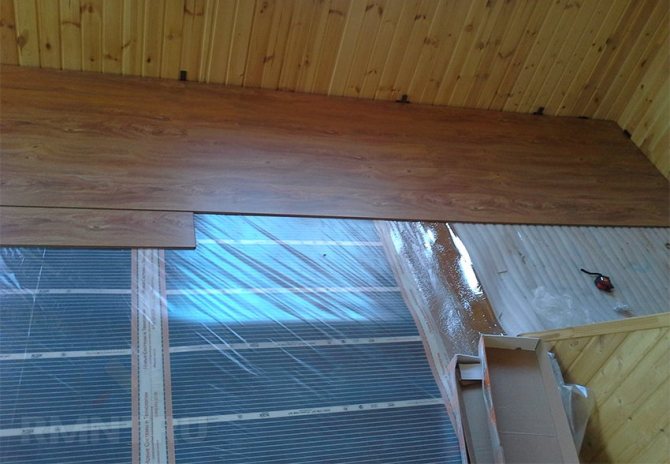

For linoleum, it is necessary to equip a leveling layer of 8 mm moisture-resistant plywood boards. To fasten plywood sheets without damaging the film, use technological gaps between the heating elements and the film fields. Plates are laid with an indent between them and from the walls of at least 10 mm, the joints are filled with silicone sealant. After it dries, the surface should be cleaned with a vacuum cleaner and primed, after which you can start laying the floor covering. Source
Become an author of the site, publish your own articles, descriptions of homemade products with payment per text. More details here.
Pros and cons of infrared heating
The modern method of IR heating at home by installing a film system has both advantages and disadvantages. The canvas with a carbon carrier is laid not only under the laminate, but also under the tiles and linoleum. These coatings accumulate heat well and transfer it to the room. The infrared heating method is appreciated for a number of advantages:
- The film layer is mounted only in places where people are present. This saves material and energy consumption.
- The system, including an IR interlayer, can withstand temperatures down to -70 degrees. Therefore, it can be safely left to spend the winter in an unheated cottage.
- IR radiation is absolutely safe for humans, since its spectrum is completely identical to the sun's rays.
- Installation of the entire system does not require any special skills. Infrared underfloor heating for laminate, tile or linoleum can be assembled by yourself.
- In the event of a failure of a separate strip, the structure remains operational, since a parallel connection is used.
- The warm base is easy to dismantle when it is necessary to repair and replace a failed element.
- During the operation of the system, the lower layers of the air remain warm, that is, the space where the person is located is warmed up first.
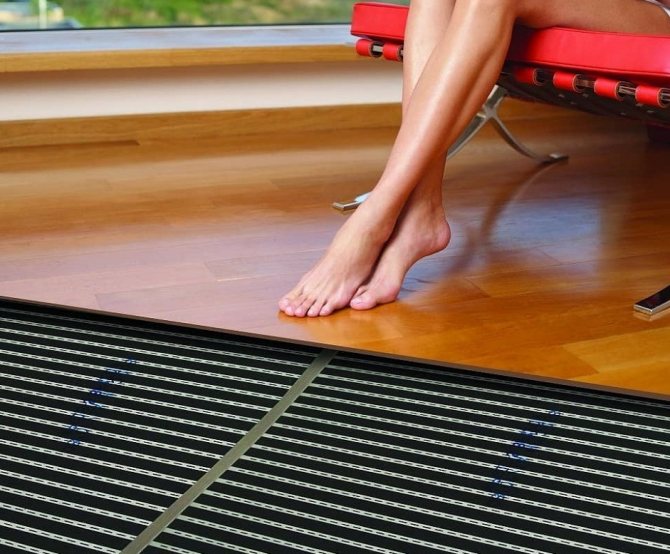

An objective assessment of infrared underfloor heating requires consideration of the cons. Such a system, with all its advantages, is energy-intensive. That is why it is considered impractical to mount IR-film throughout the house. Most often it is used when arranging the floor in small rooms where it is necessary to create especially warm conditions: a bathroom, a nursery. At the same time, in order to save money, the system is connected only during the operation of the room. Warming up of carbon fiber occurs in a matter of seconds.
The second disadvantage is the high risk of short circuit, fire and electric shock. Third, the system is power-dependent. Therefore, with frequent power outages, the floor does not perform the heating function assigned to it. Another negative point is associated with the possible rearrangement of furniture in the room. Since the film is not placed under bulky items, in the event of interior redevelopment, you will have to dismantle the coating and re-grind the film material.

Planning
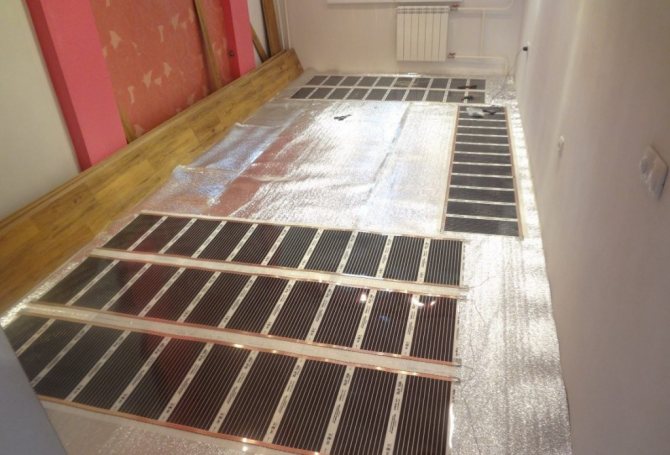
Before installing the film floor under the laminate, you should draw up a diagram on a sheet of paper according to which the heating elements will be laid.If infrared underfloor heating is used as the main heat source in the room, then the film should cover the subfloor within 65 to 85 percent of the total area. This should not include areas with built-in furniture, bulky objects, since the heat will not warm up the air, but will return back. This will lead to overheating of a separate area of the infrared film underfloor heating under the laminate.
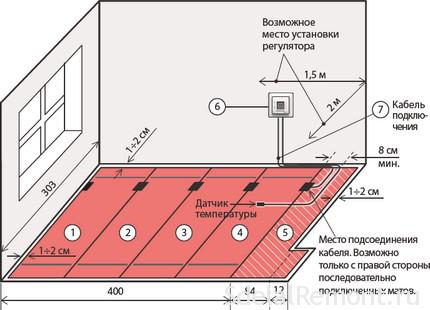

The infrared floor under the laminate can also be used as an additional (comfortable) heat source. Then it will be enough that it covers about 40% of the entire area of the room. Between the heating elements and the wall in the room, an indent should be made in the range of 10 to 30 cm. But a gap between the laid heating strips of more than 40-50 mm must not be allowed. This will create cold spots on the floor.
When drawing up a plan, it is worth considering the factor that the film should not lie on top of each other. According to the instructions, only the flooring of the area that does not have a heating element is allowed.
Depending on the manufacturer and the choice of a specific option for an infrared floor under the laminate, the length of the sections will also differ. They can be cut at random for efficient distribution over the subfloor.
IR floor heating - is it expensive?
There is an opinion that the purchase of materials and components for the installation of an infrared floor is very expensive. In reality, only expensive models require significant expenses. The price of high-quality film starts at 650 rubles / sq. meter. A full set of service equipment, including sensors, a thermostat, bitumen tape, wires, costs about 2,000 rubles. The one-time costs also include the payment for the installation of the heating elements and the assembly of the floor. However, these works are easy to do with your own hands, so you can save money at this point of the estimate. As a result, it turns out that the total cost of a floor heated by infrared rays is relatively small.

Product device
Infrared underfloor heating under the laminate has its own system, which includes the following elements:
- Wiring;
- IR film;
- Heat-reflecting material;
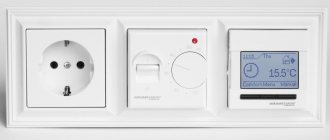
- Temperature sensors and regulator;
- Film insulation or waterproofing;
- Fastening clamps;
- Installation instructions are also included.
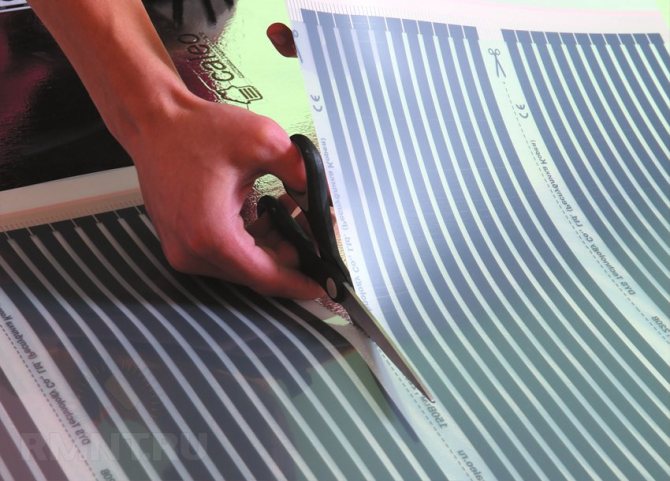
The films usually have different lengths and widths of 50 or 100 cm. They have a special cutting line along which you can cut the material of the required length. In other places, the film cannot be cut.
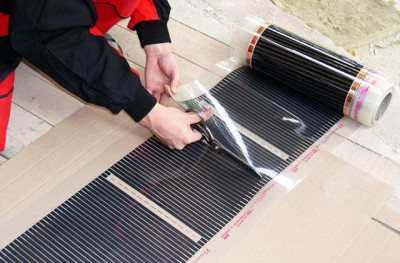

How to cut a film warm floor photo
The power of such a system can be different - 150, 220 or 440 W / m2, but for the laminate, an option is used that has an indicator of no more than 150 W / m2.
Is it possible to put underfloor heating under a laminate
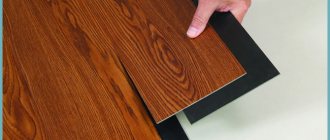
Since laminate flooring is a common floor covering in apartments, the issue of its compatibility with thermal foil is relevant. For the device of a warm base, a carbon film, an electric cable or pipes with a thermal carrier are used. At the same time, infrared film is the most optimal choice for laminate flooring. This is due to the technical characteristics of the coating and the IR-emitting film material.
Laminate has a higher heat capacity compared to other flooring materials (for example, ceramic tiles) and a lower thermal conductivity. Strong heat can negatively affect the quality of the lamellas. The carbon foil ensures optimal heating of the floor and does not cause problems with the operation of the laminate. Another reason is the character of the finishing floor heating. Of all types of warm systems, infrared provides an even distribution of heat energy over the entire surface. This eliminates the appearance of cracks, creaks, drying out of individual lamellas.

Installation features
Installation of infrared underfloor heating begins with preparatory measures, which include careful leveling of the base. It should not have any extraneous elements (dirt, debris), as well as various irregularities, since the film material allows a difference in height within 3 mm. Next, we carry out heat and waterproofing of the base in order to exclude the possibility of exposure to aggressive acid-alkaline environments on the wiring or film material. Like a core underfloor heating, infrared film is extremely sensitive to moisture, which leads to premature failure of the product.
The next step will be to lay the IR film, which must be evenly distributed over the entire required area of the base. Installation of such an element is best done at a distance of 10-15 cm from the wall, while it is strictly forbidden to overlap the product. As soon as the film material has been evenly spread, we proceed to connect the thermostat, which must be in the immediate vicinity of the wiring. Electric wires are invariably laid parallel to the film, and insulation is applied to the joints. Additionally, the ends of the copper current conductors are filled with a special sealing compound, which excludes the possibility of a short circuit. At the final stage, the system is connected to the power supply and its functionality is checked.
Thus, the installation of infrared underfloor heating will be the best solution for those who want to increase the level of comfort in a living space with minimal financial and physical costs.
Which laminate is suitable for IR underfloor heating
To get the maximum effect from the laid film and the assembled floor, it is necessary not only to carry out the installation technologically competently, but also to choose the right laminate. The shelf life of the finished floor, its environmental friendliness, heat-conducting properties depend on this. If you put a laminate that does not correspond to the type of heating equipment, then formaldehyde may be released, lamellas deform and other problems may appear. Laying laminate is suitable if it:
- Supplied with a padlock. The glue method of assembling the lamellas is undesirable, since the glued continuous coating breaks during temperature changes.
- Conducts heat efficiently. This quality is determined by the coefficient of thermal resistance: the lower the better. The optimal limit is considered to be 0.05-0.10 m2 x ° K / W.
- Has a thickness of 8-9 mm. The lock of thinner lamellas does not withstand temperature fluctuations. And thickened products conduct heat weaker.
- Belongs to class E0 or E1. A floor made of such a laminate does not exude formaldehyde when heated to 27-30 degrees.
- On the basis of wear resistance, it is classified at least 3 classes. The higher grade guarantees a long life for the floor.
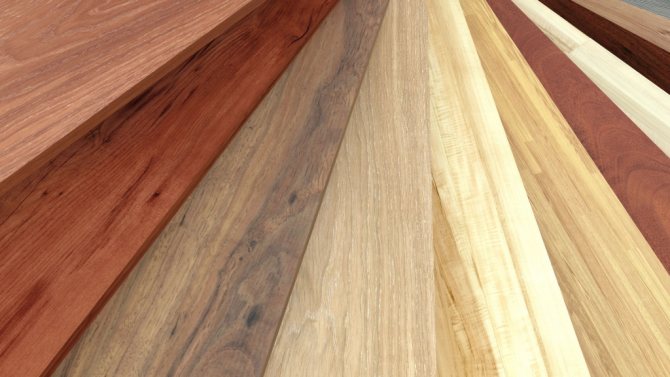

Benefits of using film heating?
The use of this system is explained by some features of other underfloor heating systems that do not match such a coating as laminate. Of these, the main ones can be distinguished:
- Electric floors, which are based on heating mats or cables, produce rather uneven heating, which is undesirable for a laminate;
- Temperature drops in the water floor heating system, when connected to a non-autonomous system, negatively affect the characteristics of the laminate and can cause deformation of the coating, as well as the formation of creaks and cracks;
- Installation of the water system requires an additional screed, which reduces the height of the room and takes the longest time to equip.
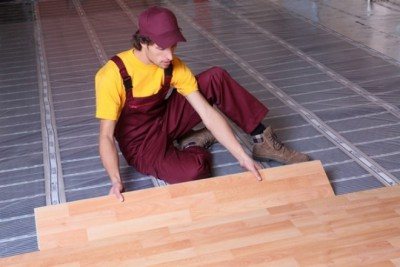

The main advantage of the underfloor heating film is that no screeds are required, the finishing coating is laid directly on the film.
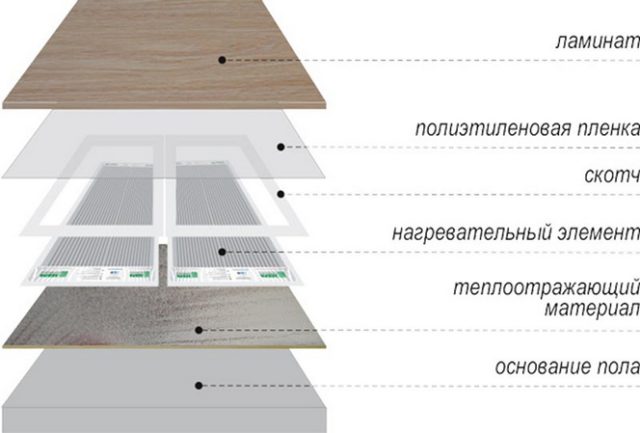

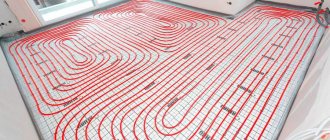
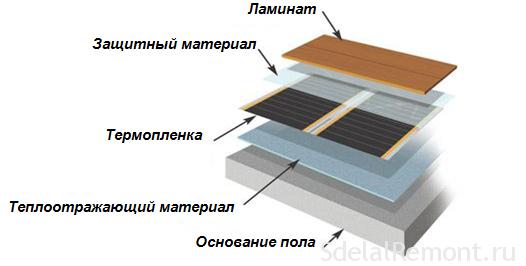
Underfloor heating "pie" device
When comparing these features of underfloor heating with an infrared floor, it can be seen that it does not have such disadvantages. In addition, IR underfloor heating under laminate has a number of advantages:
- The film underfloor heating under the laminate does not have very high heating temperatures, which excludes the occurrence of deformation of the coating;
- This type allows you to reduce energy costs, compared to other underfloor heating systems;
- The surface is heated very quickly and evenly;
- Long service life;
- Quick and easy installation, which makes it possible to lay it with your own hands;
- Does not create dry air in the room.
Infrared floor installation technology under the laminate
Installation of the floor heating structure is carried out strictly according to a certain technology. If it is decided to do the work with your own hands, then the sequence of laying the layers and observing the rules for connecting the film to the power grid should be taken with full responsibility.
What materials and tools are needed
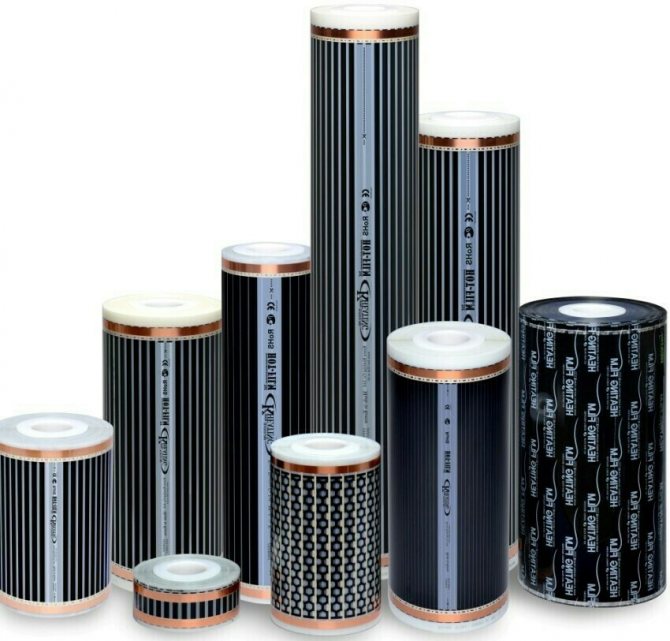
Before starting the installation of an infrared underfloor heating in a cottage or apartment, you must prepare all consumables and tools. The main part of this list is the foil floor kit. In addition to the IR film itself, it includes electric wires, clips for fastening the film, contact clips, bitumen-based adhesive tape. Canvases of carbon film for a heated floor can be 0.5 m, 0.6 m, 0.8 m or 1.0 m.In addition to the film, you will need to work:
- thermal sensor;
- thermostat;
- foil backing;
- polyethylene film;
- insulating tape;
- stationery or masking tape;
- scissors or knife;
- pliers;
- roulette;
- pencil.

Preparation of the base
The film material with carbon paste is very sensitive to any mechanical damage. Therefore, before laying it out, the surface must be carefully leveled and cleaned. If the floor does not have a screed, then it is prepared in a standard way. After the concrete has completely hardened, its surface is freed from debris and dust. It is most convenient to use a vacuum cleaner - even small damaging particles do not remain after it.
A foil substrate is spread on the screed. For laying an infrared underfloor heating, a 3 mm thick substrate is sufficient. The joints between the individual strips are glued with adhesive tape (stationery, foil or construction tape). After that, a "window" for the temperature sensor is cut out in the laid substrate.
The shiny side of the metallized substrate must face upward so that the radiated heat is not absorbed by the substrate.
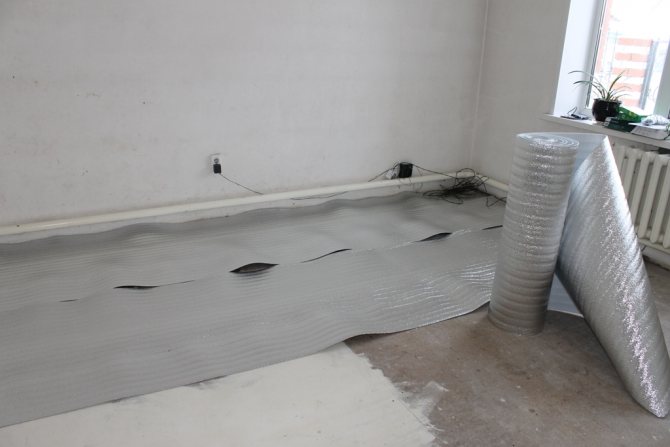

Laying IR foil
Before opening the heating element, make a layout diagram. To do this, mark the location of large furniture (wardrobes, beds, sofa) on the plan of the room. For free space, calculate the length and width of the film strips. The heating strips are planned to be placed so that they lie along walls or long aisles. In this case, the number of points of connection to the network is reduced. Next, determine the location of the sensors and the procedure for connecting the wiring.
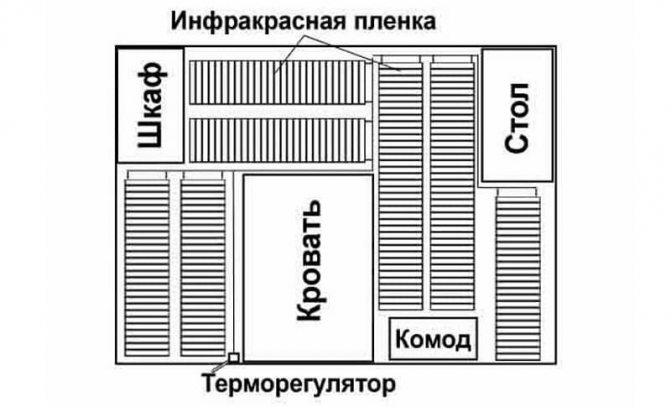

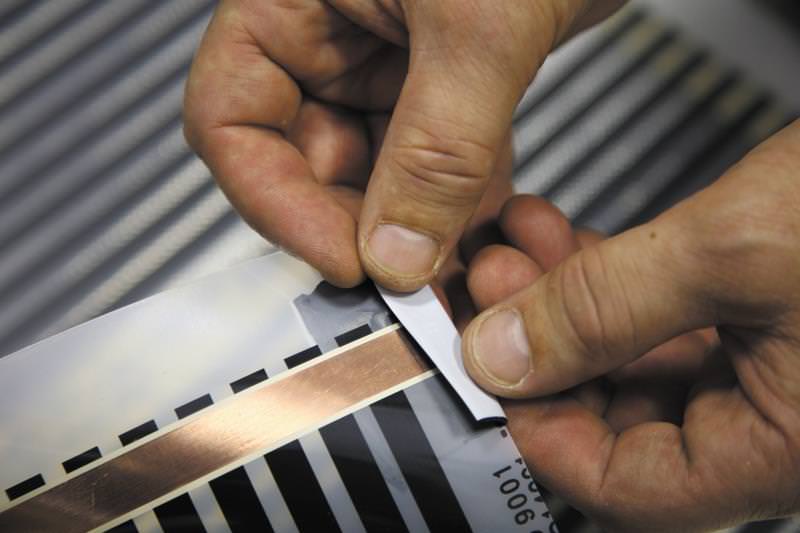
The infrared film is cut along the marked lines according to the intended length. Cutting lines are located on the film every 20-25 cm. This work is done very carefully, since damage to the conductive or carbon element leads to damage to the strip and it has to be shortened.
The cut strips of the film are laid at a distance of 0.25-0.30 cm from the wall. The distance between adjacent strips should be 5 cm.
Thermal foil contacts, which will not be involved in the connection, are insulated with bitumen tape, which is included in the infrared floor kit. The silver or copper contact, which remains open after cutting the film, is also covered with insulation.
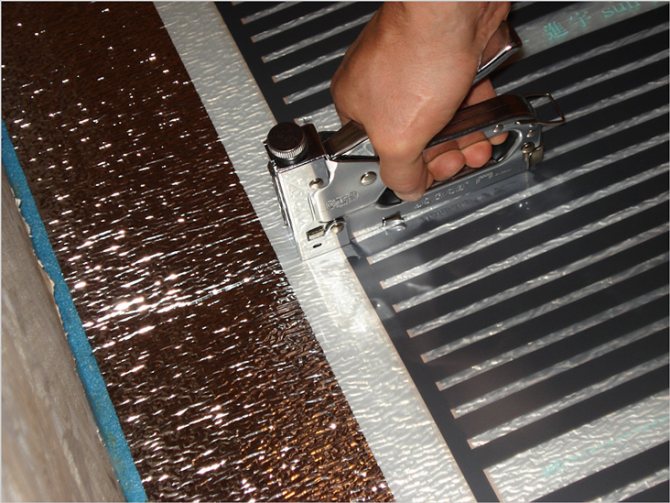
The prepared strips are spread around the room according to the plan, leaving standard gaps. In this case, the metal strips should point down. After that, the film is fixed to the substrate using masking tape.

The edge of the film strip, which is not connected to the network, is rolled up. A temperature sensor is attached to the back of the film on a carbon strip. It is fixed with bitumen tape. The installation of the thermal sensor is done in the place where a depression was previously made in the foil heat insulator. The wire from the device is buried in the substrate, making a cut in it. After that, the film is laid back on the floor and the free edges are fixed with tape.
Electrical connection
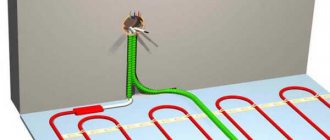
The next step in assembling an infrared warm floor under a laminate is to connect the heating elements to the electrical network. For this, terminals are attached to the conductive strip. There is a technological cut on the film, into which one part of the clamp is inserted. The second part of the clip remains on the outside from the bottom of the film. After that, the terminal is crimped using pliers. The ends of the wires are stripped and inserted into the clip.
Two pieces are cut from the bituminous tape. One is put on top of the terminals, the other - from below, the pieces are firmly pressed. Thus, the point of contact of the wires with the conductive element is insulated. After the system is switched on for the first time, the bitumen mass will melt and take the form of a terminal, ensuring complete sealing. To prevent the clips from protruding above the surface, a small cut is made in the substrate.
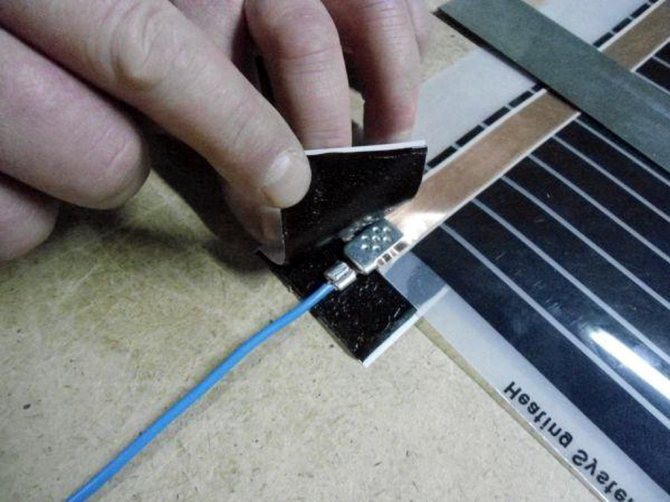

Electric wires coming from the infrared floor are connected through special terminals to the thermostat. In the installation, a special protective device (RCD) must be used. Direct connection of the heating deck to the outlet is strictly prohibited due to safety rules.
It is important to correctly calculate the power of the RCD, therefore, in the absence of the necessary knowledge and skills in this matter, it is worth contacting the professionals.

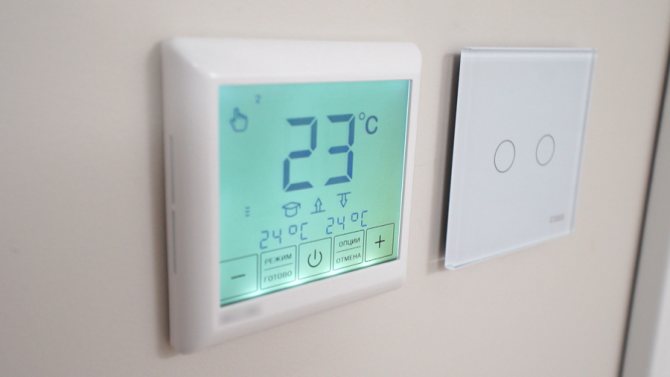
Installing a thermostat
In accordance with the previously drawn up layout of the elements, a place for the thermostat is determined on the wall. Two grooves are made to this point in the wall for wiring. One branch leads to the switchboard, the second to the floor for connection to the heating foil.
The thermostat is fixed on the wall, cables are connected to it. The groove channels are sealed with putty and leveled with the wall surface. In some cases, internal wiring can be dispensed with to reduce the amount of dirty work. The wires are laid along the wall in plastic cable ducts. When the installation and connection of the infrared underfloor heating is completed, a test run is made. If everything is in order, proceed to the final stage: laying the coating.

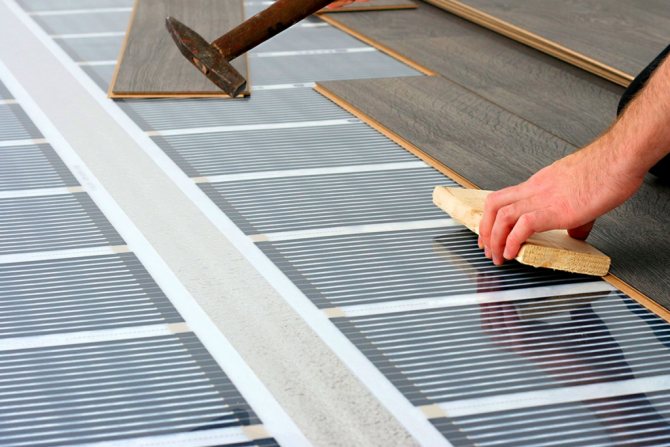
Laying laminate on an infrared warm floor
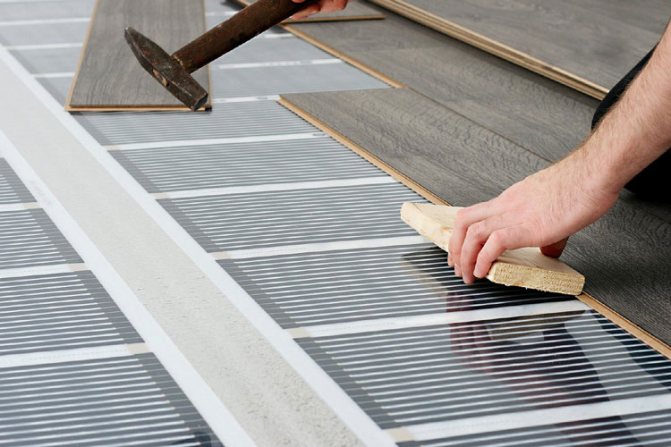
The finished film IR layer is covered with polyethylene for additional protection from water. The optimum polyethylene film thickness is 150-160 microns. It is spread with an overlap (at least 10 cm), leading to the walls by 15-20 cm. The joints are glued with tape. The assembly of the lamella floor is carried out according to the standard instructions. The main feature in the work is accuracy, since the IR-film is very easy to damage.

Before assembling the finishing flooring, it is necessary to determine the location of the lamellas so that at the end of the layout there is no narrow gap along the wall. A slot less than 50 mm is difficult to close so that the lock snaps into place.
When the entire floor structure is installed, it is gradually put into operation. First, a gentle warm mode is set - 15-20 degrees. Then 3-4 degrees are added every day and gradually brought to operating temperature.
Laying the film floor
The infrared underfloor heating film should be cut and laid according to a previously prepared plan (scheme). As soon as it is ready, you can distribute it over the surface, and then fix it with adhesive tape (scotch tape). The foil must be placed on the thermal insulation.
There are certain requirements that prohibit certain actions when installing heating elements. The film should not be attached around its entire perimeter.It is enough to choose only a few places, and for gluing, choose an adhesive tape with two sticky sides.
As for the heat insulator, it should not have a foil base. Installation of infrared underfloor heating under the laminate should be carried out with copper tapes that conduct current to the heat insulator. Heating elements should be laid along the entire length of the room. There will be fewer wires and connections if the length of the film reaches the maximum. At the same time, the distributors of warm floors should take into account the maximum length of one piece of film. According to the plan, it is best to arrange the junction points of the wires close to the walls, or ideally - under or next to the baseboard.

Also, all sensors of the warm floor are connected to the mains. Before installing laminate flooring, the heating system must be checked to ensure that it is not dismantled in the future. It will not be superfluous to make a measurement using a system ohm tester.
Before installing the laminate, a layer of waterproofing in the form of a polyethylene film should be laid on top of the infrared underfloor heating. The overlap of each subsequent row should be 30-40 cm. The joints are glued together with adhesive tape.
Installer tips
In order for the installation to proceed quickly and without problems, the masters recommend not only strictly observing the technology, but also remembering some working nuances. They relate to the installation itself and the conditions of the room in which it is carried out:
- The assembly of the infrared underfloor heating and the laying of the laminate must be carried out at a humidity of at least 60% and a positive temperature.
- Thermal film material may only be connected to the mains in a fully expanded form.
- If the carbon layer was damaged during operation, then the place of the defect must be covered with insulation on both sides.
- The place of connection of the temperature sensor is chosen so that in case of repair it can be easily replaced.
- If an accident occurs in the house, and the floor is flooded with water, then the IR system must be urgently disconnected from the network.
What users say about infrared floors
Despite the fact that the tape warm floor under the laminate began to be laid relatively recently, the technology received very flattering reviews from users. Here are a few of them.
“How great it is in the morning to stand with your feet not on a cold floor, but on a warm, pleasant to the touch. Immediately, the mood is good for the whole day. "
Leonid, Tomsk
“Electricity bills come in the same way as for a regular electric water heater, and the house has become much warmer. I didn’t regret the money and time spent on installation ”.
Mikhail, Tambov
“The floors are working, but the room heats up rather slowly. True, I am more likely to blame here, because I made the layer of screed under the laminate too thick - seven to eight centimeters. In general, there are no complaints, everything is cool ”.
Vladimir, Perm
Thousands of people in our country have already appreciated the advantages of this method of heating apartments and private houses. Surely you will not be disappointed if you give up conventional heating radiators in favor of infrared underfloor heating.
