So, you decided to start building your own house, and naturally you want it to be cozy and comfortable, and given the peculiarities of our climate, this means one thing - the house must be warm. And from what to build a warm house? Any building materials seller will advise you on a million options, but is this what you need?
Let's figure it out.
First, you should clearly understand what your home will be like. There are different options, you can build a dwelling from foam concrete, wooden beams, bricks and their various options and modifications.
Replacement of windows and doors
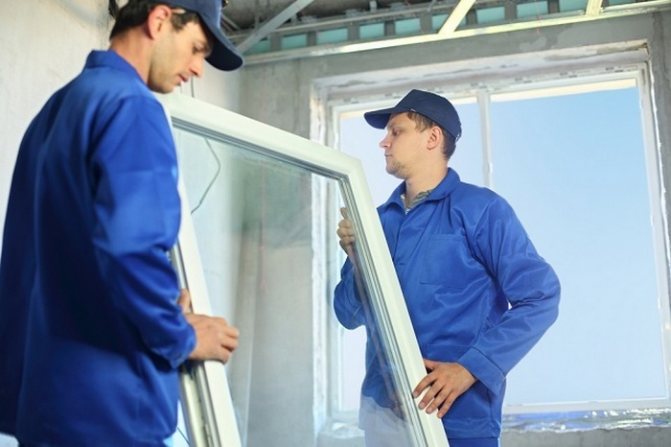
The most important thing when insulating a house is replacing windows and doors.
For any house, be it a stone structure or a wooden one, the presence of old door and window frames threatens with heat loss. And no matter how much you glue the cracks, no matter how much you stuff cotton and foam rubber in them, in any case, with the slightest wind, the microclimate in the house will be disturbed under the influence of falling temperature. Therefore, the most important thing when insulating a house is to replace windows and doors. Better if these are double-glazed windows for 3-5 cameras, and installed by professionals. The craftsmen carry out the work without distortions and technological violations, which, in turn, plays an important role in the insulation of the cottage.
Important: when installing new windows, you can additionally insulate the slopes. From what to make insulation, you decide. But most often it is mineral wool. This solution is a plus for high-quality insulation of the entire cottage.
If the doors are being replaced, then it is advisable to align the geometry of the doorway. The doors themselves can be doubled. So less heat will go through the door leaf. And the sound insulation will be higher.
We insulate a wooden house
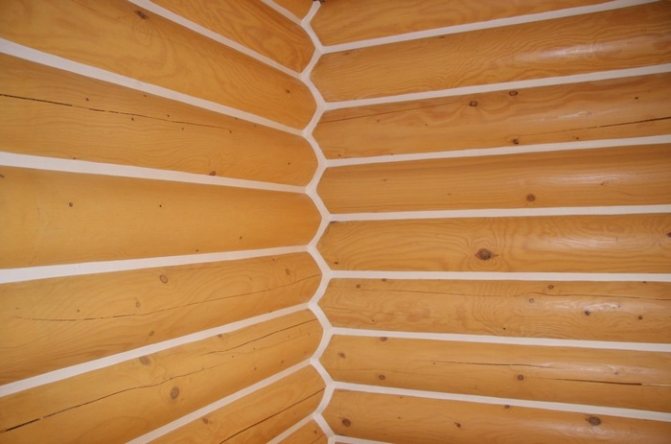

The walls of a wooden cottage are most susceptible to the movement of air masses through their cracks, so you should take care of high-quality insulation of all joints between logs or timber
The walls of a wooden cottage are most susceptible to the movement of air masses through their cracks. Therefore, it is worth taking care of high-quality insulation of all joints between logs or timber. For this, a special sealant is used, which is applied to the joints according to the technology.
Important: this method of insulation is used only for a newly built house, if there is no desire to spoil its attractive appearance. If the hut is an old log or log house, but at the same time it stands firmly and reliably, and you are not going to build a house of a new type, then you can not only insulate the house, but also make it more attractive. To do this, use the following technology below.
Tip: Use only mineral wool to insulate wooden walls, as it tends to breathe. This means that the walls of a wooden house will not rot under the influence of the resulting perspiration on them.
So, the insulation of the walls of a wooden house with mineral wool is performed as follows:
DIY frame one-story house
- First, all walls are treated with an antiseptic 1-2 times with drying breaks between each layer. In this case, the corners and crown of the house should be especially carefully processed. It is better to work in dry warm weather.
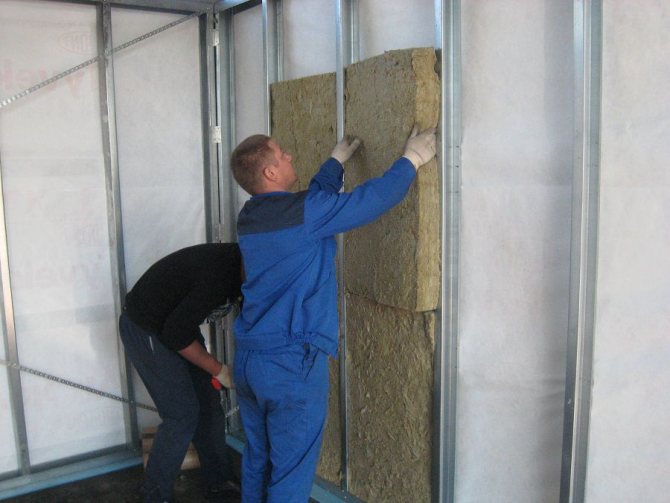
- After the antiseptic is completely dry, the walls are covered with a layer of waterproofing with a vapor-permeable layer. In this case, the vapor-permeable (perforated) side must be turned towards the tree, and the glossy (waterproofing) side must be laid with mineral wool slabs. The waterproofing is overlapped on the walls, fixing it with construction tape at the joints and brackets around the perimeter.
- Now, a vertical lathing of beams with a section equal to the thickness of the mineral wool slabs is stuffed onto the walls. The pitch of the beams can be done 2-3 cm narrower than the width of the insulation sheet. Thus, it will be possible to lay cotton wool slabs without additional fastening (bulging).
- The top of the mineral wool is covered with another layer of waterproofing with a vapor-permeable layer. Here, the vapor-permeable surface should face the insulation, and the glossy one should look outward. The waterproofing is also attached with an overlap, gluing the joints with tape.
- A ventilated frame made of small-section bars is attached on top of the waterproofing. Thus, the distance between the insulation and the subsequent finishing should be at least 5 cm.
- And last but not least, everything is covered with decorative wood or other finishes, which completely transforms the old house.
We insulate the floor in a wooden house
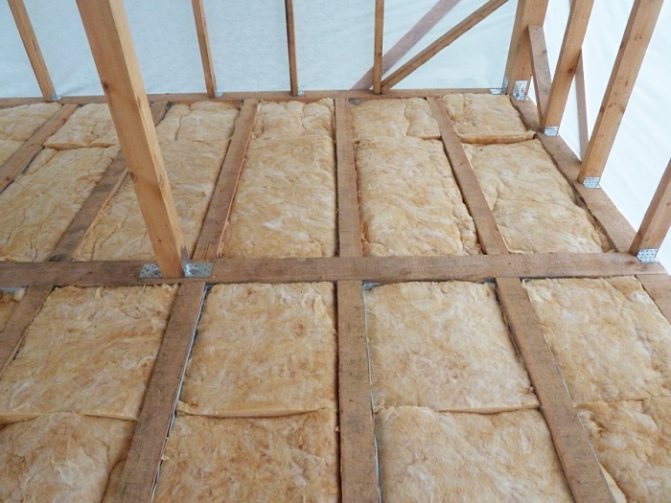

So that the insulation of the walls of a wooden house is not wasted, you can additionally insulate the floor.
So that the insulation of the walls of a wooden house is not wasted, you can additionally insulate the floor. To do this, you will have to dismantle the boards up to the log. The rest of the work will look like this:
- A layer of waterproofing material is laid on the soil freed and cleaned of debris (subfloor) with a vapor barrier up and the glossy side down.
- Expanded clay of different fractions is poured onto the waterproofing. This material is very good insulation, keeping the house dry.
- From above, expanded clay or other insulating material is covered with a waterproofing layer and the floor boards are fastened back.
We insulate the attic in a wooden house
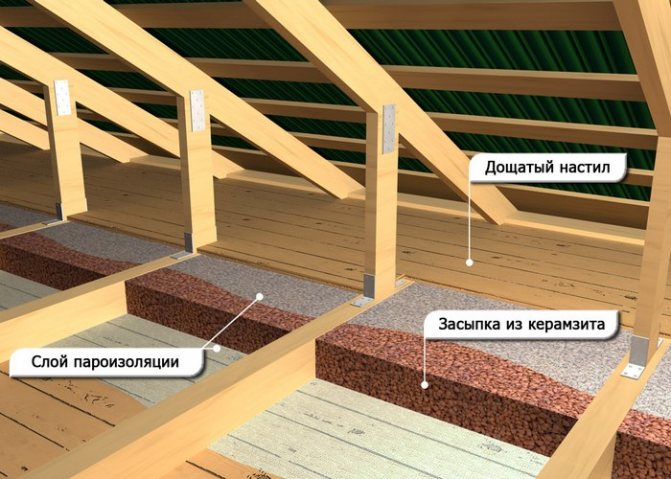

The attic in a cottage made of wood is insulated using floor technology
- The attic in the cottage is made of wood, insulated using floor technology. That is, first, a layer of waterproofing is laid on the floorboards of the attic with a vapor barrier layer to the boards. After that, wooden logs are laid on the floor of the attic with a step of 50-70 cm.
- Insulating material is mounted between the lags. It can be mineral wool, extruded polystyrene, expanded clay, etc.
- The insulation is covered with waterproofing on top and the floor is leveled with plywood boards or floorboards.
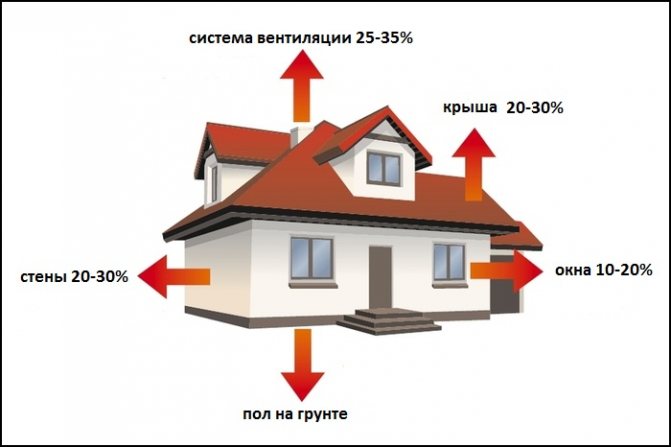
Important: insulating the attic allows you to save heat in the house by 20-40%, since it is the heat that goes up.
Where is it profitable to use liquid thermal insulation
Unlike most thermal insulation materials, liquid ceramic thermal insulation coatings work effectively in conditions of low heat transfer from the outer surface. Heat transfer - heat transfer (convective or radiant) between the surface of a heated solid and the environment.
Heat transfer from a surface is highly dependent on what material the surface is in contact with. It is better if such material is air. In addition, heat transfer by radiation or convection is typical for highly heated surfaces.
This suggests that a coating of heat-insulating paint can be effectively used as topcoat and for very hot surfaces.
Liquid ceramic thermal insulation is recommended for effective thermal insulation of “hot” surfaces with temperatures up to 200 ºС. Coating with heat-insulating paint allows to reduce the surface temperature to a safe value according to sanitary standards (up to 45-55 ºС).
At industrial enterprises, liquid thermal insulation is used in this way - for thermal insulation of heat and steam pipelines, boilers, energy facilities, tanks for storing petroleum products and other metal structures.
Attempts by sellers and manufacturers to impose on customers the use of liquid thermal insulation to insulate walls, facades, ceilings in a house, arguing that a thin layer of paint replaces traditional insulation, are cheating.
The use of insulating paint in the household
Liquid thermal insulation applied to the steel pipes of the water supply system will help prevent condensation on their surface and protect the pipes from corrosion.
It is known that in winter the surface temperature of the outer wall is always lower than the indoor air temperature. To increase thermal comfort, it may be sufficient to increase the surface temperature of the outer wall or ceiling from the side of the room by literally a few degrees. Application of liquid thermal insulation on the inner surface with a thickness of 1-2.5 mm. often enough to eliminate freezing of a window slope, wall or ceiling, eliminate condensation and mold on their surface.
Liquid insulation can be easily tinted in any color; wallpaper can be glued to the paint layer.
As a rule, liquid insulation has to be applied in several layers. Given the relatively high cost of the material, its use in the household, in the above cases, is beneficial if the coverage area is small.
Promotional video for one of the manufacturers of liquid thermal insulation:
The effect is impressive! The paint must be taken! Truth?
Please note that the announcer in the video reports the thickness of the liquid thermal insulation: 3 mm. And this is about 6 layers of paint!
At the end of the video, the announcer concludes that there are wonderful "fire retardant" and "Heat-saving" properties of liquid thermal insulation.
Each of us undertook a similar experience when we took a hot frying pan through a rag. But I have never heard anyone say that the rag is 1 mm thick. in terms of heat-saving properties, it is equivalent to 50 mm. foam!
In all these experiments, with ice and a frying pan, the heat transfer process is influenced by the combination of thermal conductivity, heat capacity and density of the materials used.
Above in the article, as an example, the value of thermal conductivity of liquid thermal insulation of one of the manufacturers is indicated (0.0698 W / (m * ° K)). Thermal conductivity of liquid thermal insulation is greater than that of traditional heaters (0.043 W / (m * ° K)). For this reason, a thin layer of liquid insulation cannot in any way replace a layer of 50 mm. mineral wool or foam.
Please note that the above thermal conductivity of liquid thermal insulation is determined by standard technique... The fact is that manufacturers of thermal insulation paint in advertising documents often indicate a wonderfully low value of thermal conductivity, which is determined by calculation. For example, in the documents I met calculated thermal conductivity for liquid thermal insulation 0.0012 W / (m * ° C). Buyers usually ignore this difference in methodology. This circumstance allows sellers mislead the buyer. Compare thermal conductivity values and claim that paint is 50 times more effective than polystyrene.
To save heat in the house, reduce heating costs more profitable, efficient and reliable to insulate the wall in one of the traditional ways - a layer of mineral wool or polymeric foam insulation.
It was possible to find the results of testing the thermal insulation properties of paint of one well-known brand. The paint was applied to a drywall sheet and it was determined how the coating changed the coefficient of thermal conductivity of the sheet. The results indicate that at room temperature the layer of such paint is 1 mm thick. can only replace 1.6 mm. foam.
We insulate a stone house
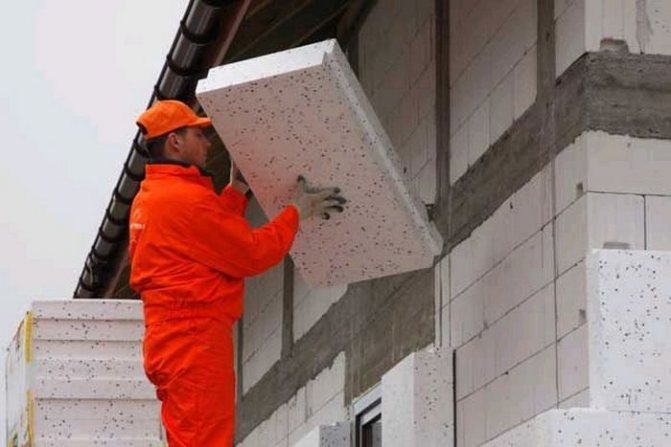

Insulation from the outside is considered the best option, since it is convenient to carry out the work, and the walls are reliably protected from the formation of mold and mildew
Many professionals and private craftsmen know how to build a warm house at the stage of its installation. But how to make a house warmer during its real use, we will consider below.
Note that a stone house can be insulated in three ways:
- Outside.It is considered the best option, since it is convenient to perform the work, and the walls are reliably protected from the formation of mold and mildew.
- Inside. This method spends not only energy, time, but also the useful area of the room. Therefore, insulation from the inside is not as common as external insulation.
- Wall insulation. This technology is permissible only at the stage of building a house, when expanded clay is poured between two walls, thereby forming the walls of the house according to the principle of a pie.
We will consider the external insulation of a house made of stone.
The following materials can be used as insulation:
- Mineral wool in slabs;
- Extruded polystyrene;
- Polyfoam is common in slabs;
- Cork slabs;
- Expanded clay;
- Warm plaster.
Important: but in any case, when insulating a house, all layers of the cake should be placed outside in such a way that the vapor permeability of each next layer of material increases in the direction from the walls of the house to the edge of the finish.
Work on the insulation of the walls of a brick house is carried out using the following technology:
Frame house for permanent residence: types and features
- The walls of the building are completely cleaned of dust, dirt and debris. If cracks are found in the masonry, they should be covered with a cement mixture.
- After that, the stone walls together with the plinth are primed in one or two passes with drying intervals.
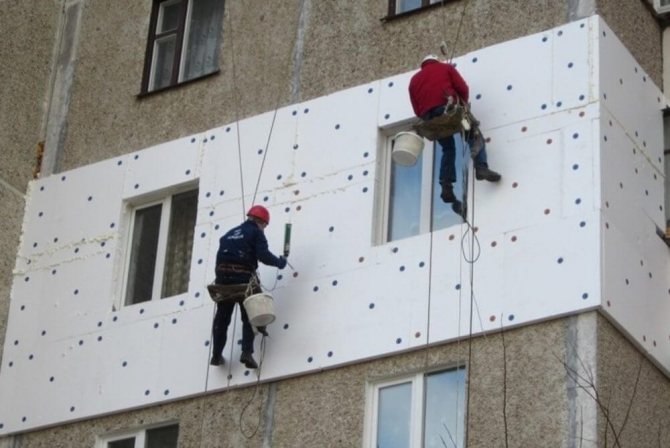
- Now you can attach the thermal insulation material to the walls. As a rule, it is mineral wool or polystyrene. Plates are attached to the walls either with glue, placing it pointwise on a sheet of insulation, or on dowels. Plates are placed close to each other in a checkerboard pattern (that is, a bandage like brickwork).
- Next, a reinforcing mesh is attached on top of the mounted insulation, on which decorative plaster is subsequently applied.
Important: the insulation plates should be placed on the wall strictly from bottom to top. Thus, the stability of the entire insulation layer will be ensured.
- At the very end, the stone house is plastered with decorative plaster or faced with stone tiles. As you can see, building a warm house can and should be done without delay.
Second part: water heated floor
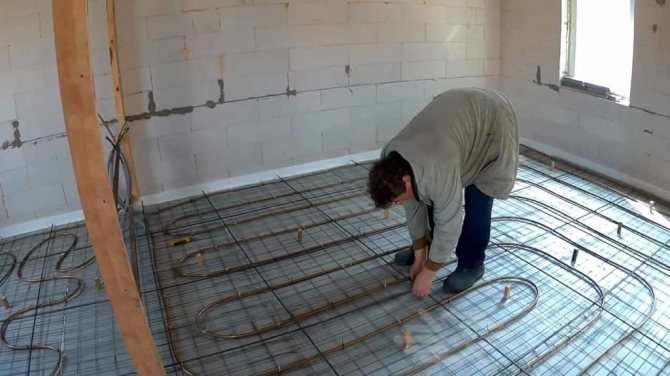
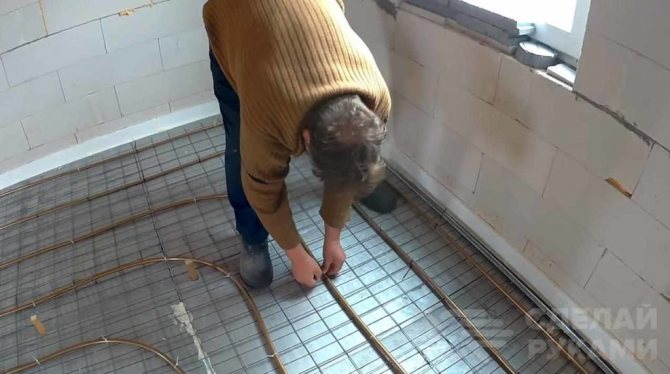
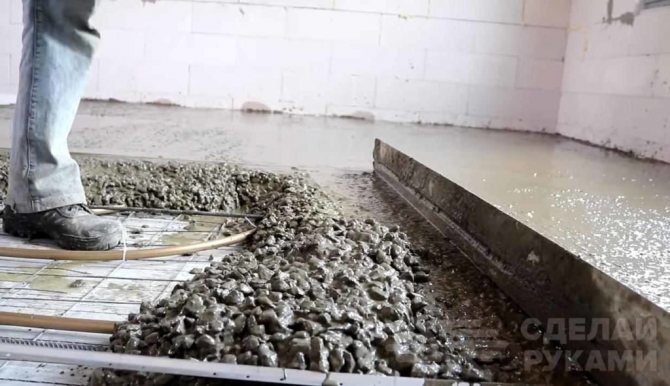
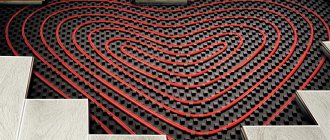
A water heated floor, unlike an electric one, is a little more complicated, but more environmentally friendly, practical and cheaper during operation, since a gas or solid fuel boiler (firewood, coal, pellets, etc.) can be used to heat the coolant (water, antifreeze, etc.) etc.). With the latter, we get a non-volatile house from power engineers or gas workers. Since in the absence of electricity, the gas boiler will not work, but it will always work on solid fuel. Until recently, underfloor heating on water was always laid in a screed, which introduced restrictions on frame and wooden houses, where the floors were mainly, and the second floor was always made along logs. And you yourself understand that no one will pour 5-7cm of concrete on the second floor of a frame house: both for reasons of price and complexity, and for safety (a concrete screed in a 20m2 room will weigh almost 4 tons, not counting the weight of the floor itself) ... Currently, this problem has been solved by using, all already beloved, PPP or strips of ordinary OSB or fiberboard. They called this method - light systems of underfloor heating on water.
The main goal of lightweight systems is to make a water heat-insulated floor where it is not possible to make a cement-sand screed. Lightweight systems have several advantages:
- Significantly less weight compared to a concrete screed, this allows you to make a water-heated floor in buildings where the load on ceilings and walls is limited, for example, on the second floor of a wooden or frame house. - The absence of a "wet process" allows you to start up and operate the system immediately after the completion of installation, while in a concrete system, complete crystallization of concrete occurs within 28 days. - Lightweight systems are thinner (minimum thickness of lightweight systems - 18 mm, concrete - 50-80 mm.).- The lightweight system is less inertial, therefore it quickly responds to the customer's settings.
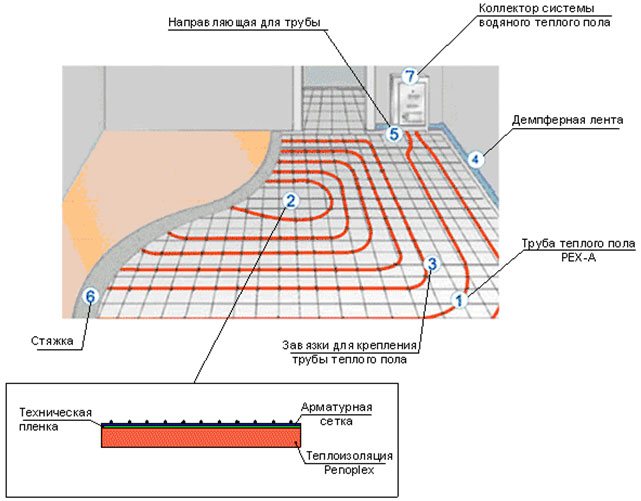
Standard underfloor heating in a screed. The advantage is that it can be expanded in circles with fewer collectors and no restrictions on its method and method of laying.

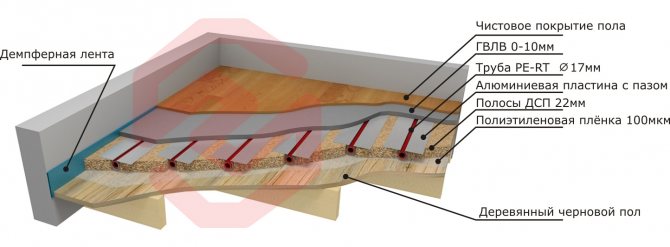
Lightweight water floor heating systems are structurally divided into two types: wood and polystyrene. In both cases, butterfly shaped aluminum plates are required. The plate is a heat-removing and heat-distributing element in a lightweight system, and has a special profile, due to which the plate tightly compresses the heat pipe, and heat transfer is carried out more efficiently over a wider distance from the pipe itself. Plates are mounted in the gaps between OSB strips, chipboard or in EPS, depending on the system. A lightweight wooden system for laying a warm floor, cheaper, but more difficult to install, suitable for wooden floors on joists, has a small thickness (from 18 mm), and building materials for it can be purchased in any construction markets. Laying of such a floor goes only in strips between wooden guides, which are made from OSB strips 18 mm, or chipboard 22 mm. The main purpose is to fix aluminum plates and create a rigid surface. A heat insulator in this floor structure in the form of a heater with a reflector (foil) must be provided in the floor. In the case of using parquet or laminate as a finishing coating, it is possible not to use gypsum fiber board, but to lay the finishing coating directly on aluminum plates, obtaining small savings, less inertness and greater energy efficiency.

Lightweight polystyrene system for underfloor heating. The main purpose is to prevent the flow of heat downwards, and to direct it upwards, as well as fixing the aluminum plates. It is advisable to use, as in the case above, additional insulation of floors for polystyrene plates. Two cross layers of gypsum fiber board (gypsum-fibrous sheet and / or moisture resistant) serve to create a hard, even surface on a soft layer of polystyrene foam. GVL sheets are carefully fastened with self-tapping screws so as not to damage the pipes laid from below.


No matter what material the thermal insulation layer is made of, the following principles must be followed: - The thermal resistance of the thermal insulation layer must be greater than the total thermal resistance of the floor layers above the thermal insulation (including the final coating). - The greater the heating load, the thicker the thermal insulation layer. - The higher the thermal resistance of the finished coating, the thicker the thermal insulation layer.
To control the system "underfloor heating on water", it is necessary to use rather complex and bulky equipment, in contrast to the electric underfloor heating, where the controller is the size of a switch that can be installed anywhere in the room. In the water system, the water floor is already a whole cabinet, and with a large room and their number, this is a lot of cabinets. Of course, if the house is compact enough, then all floors can be controlled directly from the boiler room. If it is impossible, each room will need to be connected individually, which causes some inconvenience and increases the initial costs and settings.
Underfloor heating control option with small rooms and general control.


A variant of underfloor heating with large rooms and finer settings for each line.
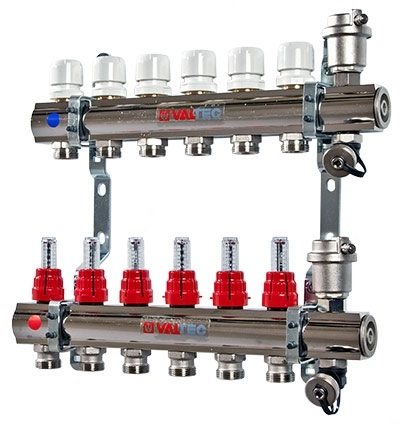

A variant of independent control of underfloor heating for large rooms or a group of rooms with finer settings for each line.
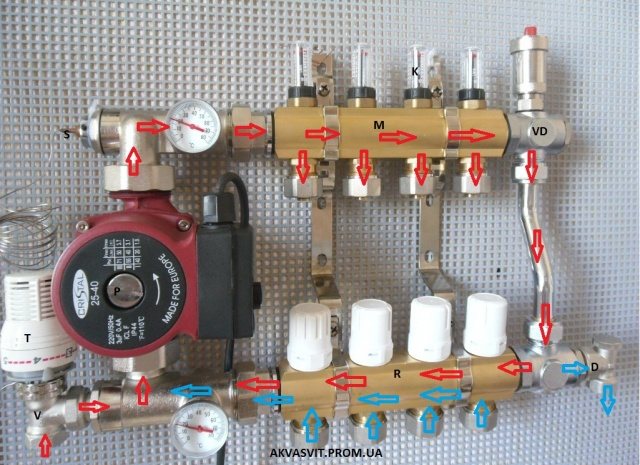

Summing up, we believe that underfloor heating is the second of the best and most efficient home heating systems, the water floor is more energy independent and environmentally friendly since there is no EMP.And if the budget and opportunity allows, then the most correct and first option for heating, there will still be a warm floor and a battery under the windows.
