Types of heat exchangers
During the selection of the described device, you can find products of various types. Coil-shaped heat exchangers are most commonly used. Corrugated devices are also popular. In addition, many people use products in which air acts as a coolant.
By the type of heat carrier, almost all devices can be divided into those that use air and products that heat water. Devices of the first type have a simpler structure, but are less efficient.
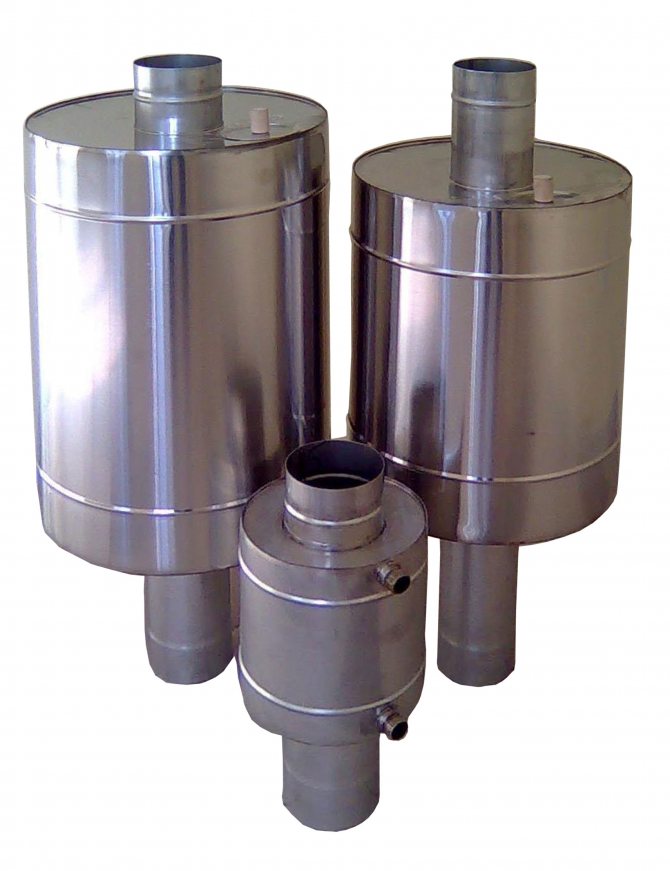
If you wish, you can create a heat exchanger for installation on a chimney with your own hands. This will require tools such as a grinder and a welding machine.
How to make a homemade chimney convector to heat the air? (+ detailed video)
To create the simplest convector that will improve air heating in the same room where the boiler is located, you will need:
- Welding machine.
- At least 8-10 thin steel tubes with a diameter of about 32 mm and a length of about 50-60 cm. Ideally, take food grade stainless steel. Worse, but also galvanized steel will do. In shape - usually take round tubes, but square or rectangular sections are also suitable.
Installation is carried out as follows: these pipes must be welded in a circle around the chimney, as close as possible to the firebox.
Overview of Furanflex polymer chimneys: characteristics, pros and cons
What is a spark arrester, why is it needed on a chimney, and how to make it?
Similar posts
Liquid devices
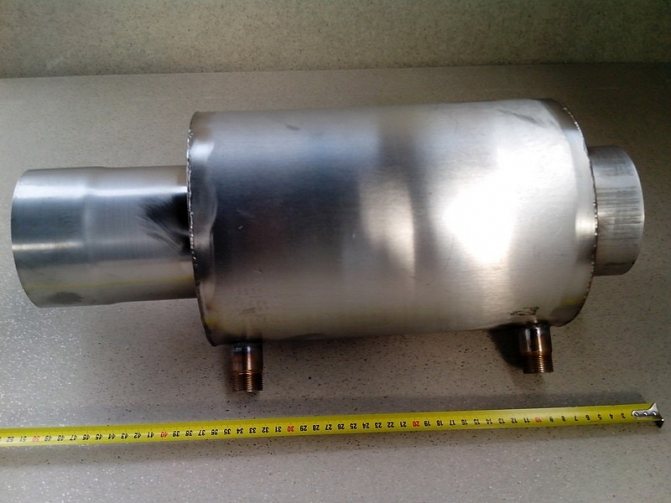
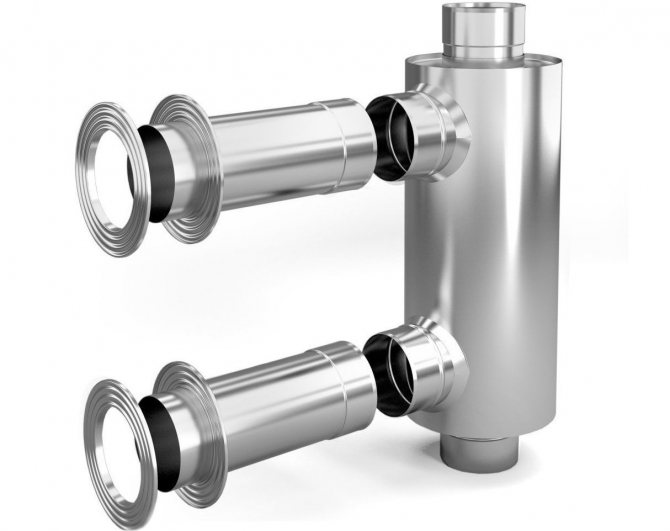
During the manufacture of liquid heat exchangers, in order to make them safer, the core is placed in a metal case. At the same time, a heater is placed in it. Basalt wool is often used to create the described devices.
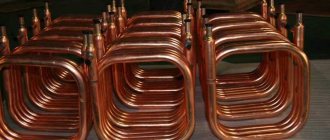
Such products are fixed on the chimney, which contributes to the heating of the coolant. If a coil is used, its ends are connected to the heating system. If the product is created by hand, a copper coil should be made. This is due to the fact that this material has a high thermal conductivity.
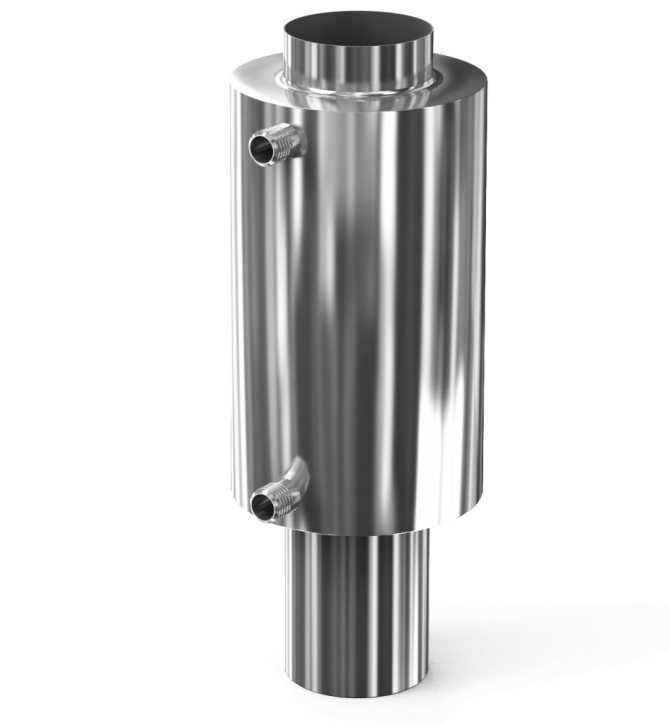

Some home owners use metal products, but to increase efficiency, you have to significantly increase the size of the structure.
The circulation of the coolant is carried out as follows:
- first, the liquid heats up, resulting in an increase in its volume;
- after that she climbs the coil;
- after that, the liquid is directed to the radiator;
- the cooled coolant is displaced and directed to the heating element.
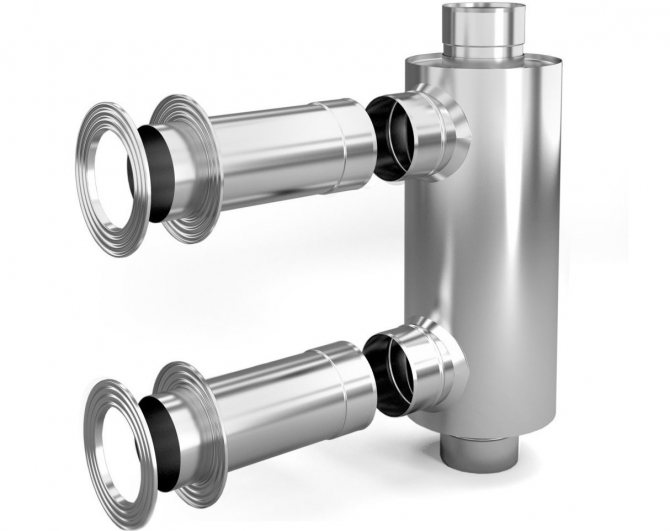

For the system to work effectively, parameters such as the length of the heating element and the diameter of the pipes used to create the system must be calculated in advance. If these parameters are not taken into account, the system will not work efficiently. In some cases, due to mistakes made during the creation of the system, a water hammer occurs.
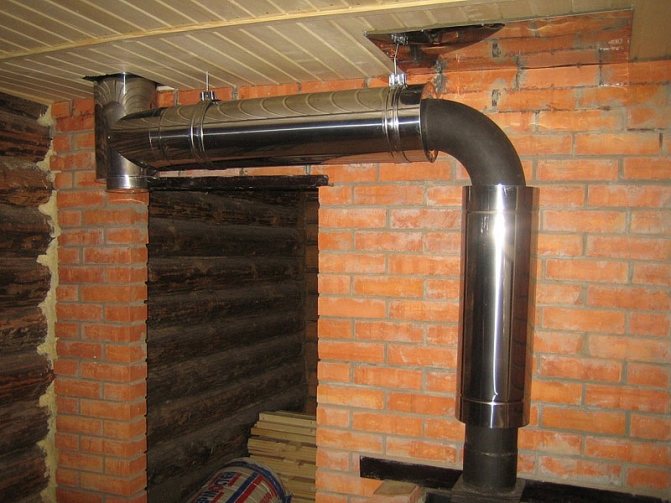
When installing a heat exchanger on a chimney pipe, you should remember that the construction must be safe. Its heated parts must not come into contact with materials that could catch fire.
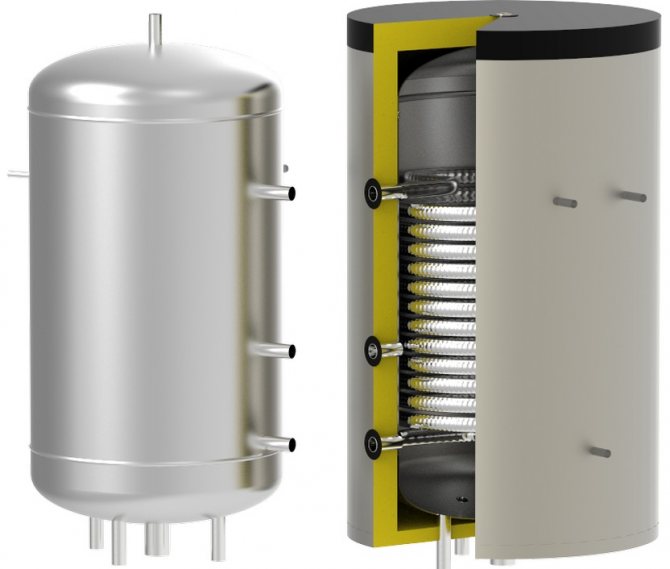

Connection options for structures
The chimney heat exchanger can operate in two main modes. And each of them has its own process of heat transfer from the smoke to the inner tube of the heat exchanger.
So, in the first mode, we connect a remote tank with cold water to the heat exchanger.Then water condensation occurs on the inner pipe, which is why the heat exchanger itself is heated exclusively due to the heat of condensation of water vapor of flue gases. In this case, the temperature on the pipe wall will not exceed 100 ° C. And the water in the tank will take a long time to warm up.
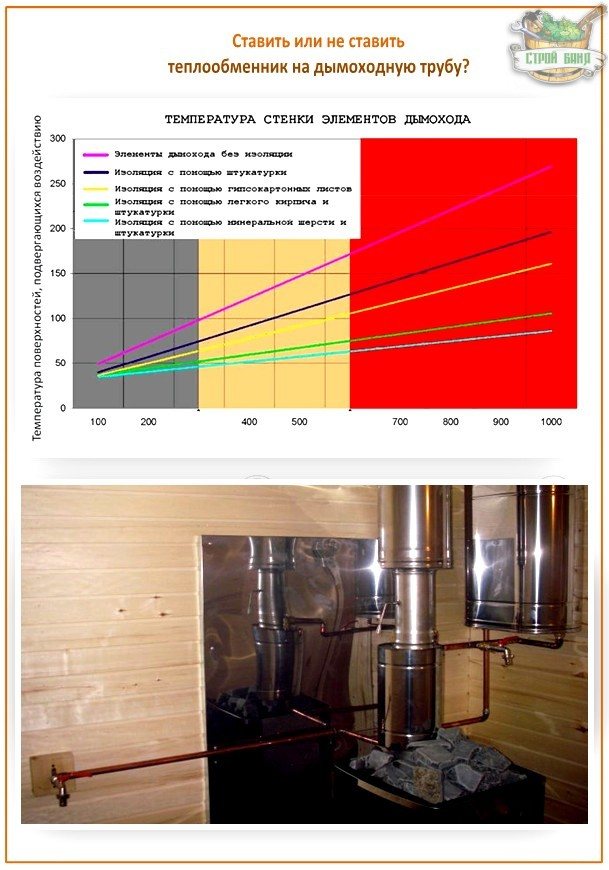

In the second mode, condensation of water vapor on the inner wall of the heat exchanger does not occur. Here the heat flow through the pipe goes more significantly, and the water heats up quickly. To understand this process more fully, do this experiment: place a pot of cold water on a gas burner. It will be clearly visible how condensation will appear on the sides of the pan, and it will drip onto the stove. And despite the flame of 100 ° C, this state will go on for a long time until the water itself in the pan heats up. Therefore, if you use a heat exchanger on a pipe as a register for heating water, then give preference to its small structures with thick walls of the inner pipe - so there will be much less condensation.

Tin pipe - simple and durable!
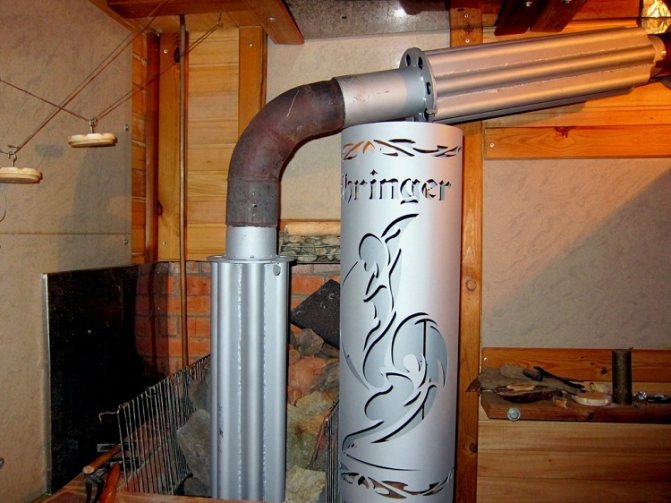
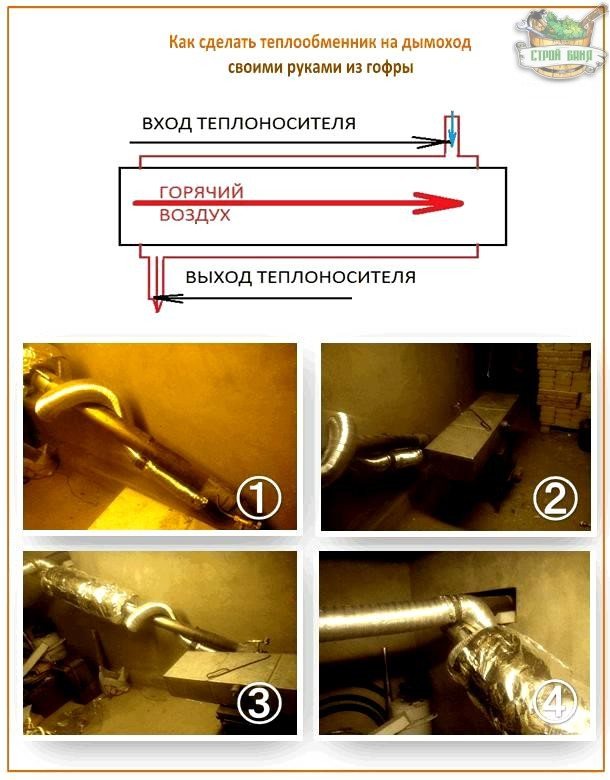
This option is simple, practical and convenient. In fact, here the chimney is simply wrapped around a metal or copper pipe, it constantly heats up, and the air distilled through it quickly becomes warm.
You can weld the spiral to your chimney with an argon burner or semi-automatic welding. You can also solder with tin - if you only degrease it in advance with phosphoric acid. The heat exchanger will hold onto it especially tightly - after all, samovars are soldered with tin, and they serve for a really long time.
Corrugation - cheap and cheerful
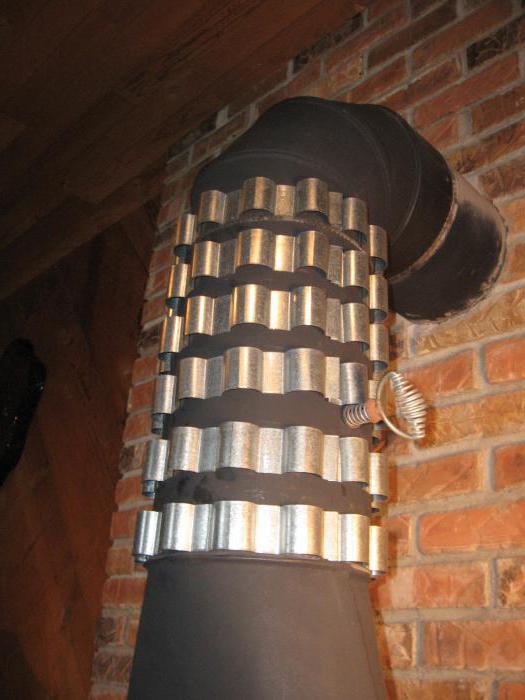
This is the simplest and lowest budget option. We take three aluminum corrugations and wrap them around the chimney in the attic or second floor. In the pipes from the walls of the chimney, the air will be heated, and it can be redirected to any other room. Even a room that is large enough will be heated up to heat while you heat the steam room stove. And to make the heat removal more efficient, wrap the corrugated spirals with ordinary food foil.

Heat exchanger-hood - for warming up the attic
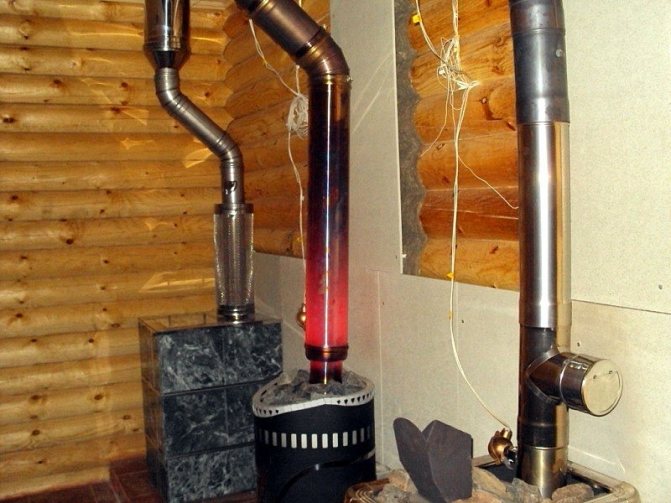
Also, on the chimney section in the attic room, you can put a heat exchanger that would work on the principle of a bell-type furnace - this is when hot air rises up, and when it cools down, slowly down. This design has its own huge plus - an ordinary metal chimney on the second floor is usually heated so that it cannot be touched, and such a heat exchanger will significantly reduce the risk of fire or accidental burns.
Some craftsmen also cover such heat exchangers with a grid with stones to accumulate heat and decorate the base of the heat exchanger. In this case, the attic turns out to be even more comfortable and may well be used as a living room. Indeed, based on practice, the temperature of the sauna stove pipe does not exceed 160-170 ° C, if there is a heat exchanger on it. And the highest temperature will already be located only in the area of the gate. Warm and safe!
Disadvantages of liquid heat exchangers
The disadvantages of the described devices include:
- The complexity of manufacturing and making calculations. Before carrying out work on the creation of a device, it is important to take into account the area of the house and other parameters that can affect the efficiency of the system.
- The need for constant monitoring of such system parameters as coolant pressure and temperature.
- Increased liquid consumption associated with its evaporation from the expansion tank. Moreover, in winter, if the house is empty, the liquid must be completely drained.

But it should be noted that almost any person with knowledge of physics at the school level can make a liquid heat exchanger. But before manufacturing the device, it is important to draw up a drawing of the entire structure, which will display the dimensions of all elements.
When using a liquid device, remember that if the house is not being used during the winter, the liquid must be completely drained. If this is not done, it will turn into ice, which can lead to the destruction of pipes and radiators. If the heat exchanger is installed in a house that is used all year round, you can forget about this drawback.
Features of air heat exchangers
Devices of the described type consist of a metal case, inside which there are several nozzles. During the operation of the system, cold air heats up and enters the room.
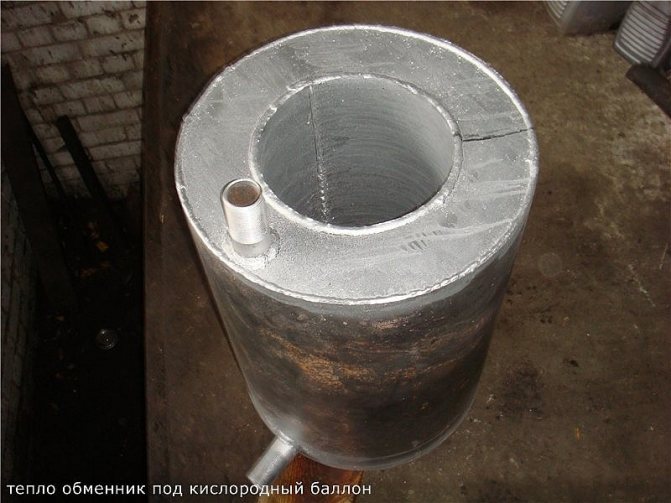
If desired, you can make and install an air heat exchanger on the chimney with your own hands. To do this, you need to have several metal pipes of various diameters, a grinder and a welding machine.
Before work, you must purchase the following materials:
- a piece of pipe having a diameter of 50 mm;
- a pipe 2.4 m long and 3.175 cm in diameter;
- metal sheet 350x350x1 mm;
- 2 liter metal container.


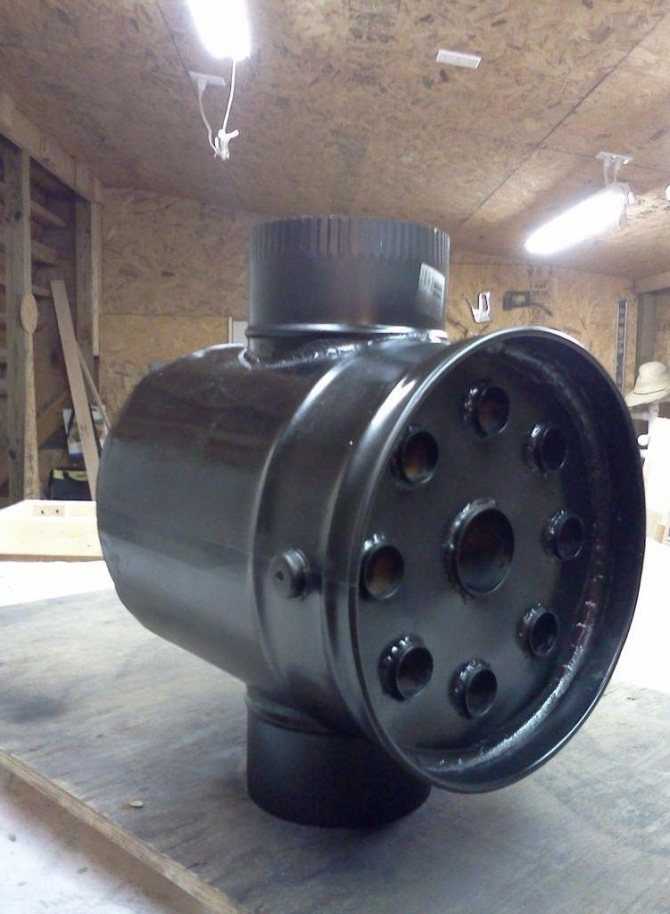
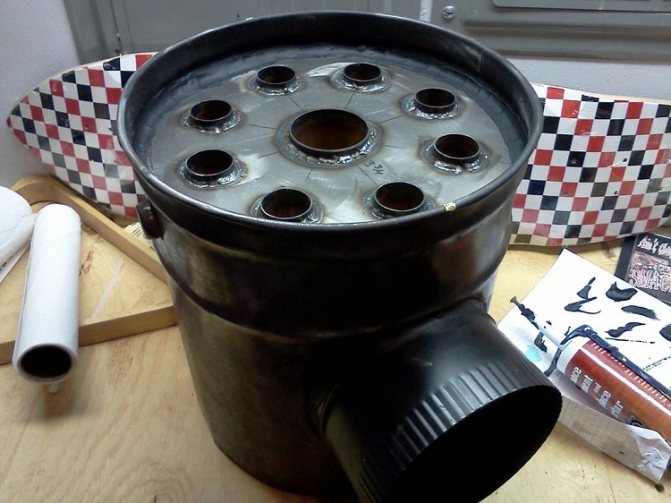
The manufacture of a heat exchanger begins with cutting out metal circles. After that, in the center of the created circles, it is necessary to cut holes for a 5 cm pipe. Around the holes, it is necessary to mark the points at which 8 openings will be cut for a pipe with a diameter of 3.175 cm. This pipe must be cut into 8 sections. The result is 8 tubes 30 cm long.
The next step is to attach a pipe with a diameter of 50 mm to the central hole. Sections 30 cm long are welded to the side holes. As a result of the work carried out, a heat exchanger core will be created. After that, you can start creating the device case.
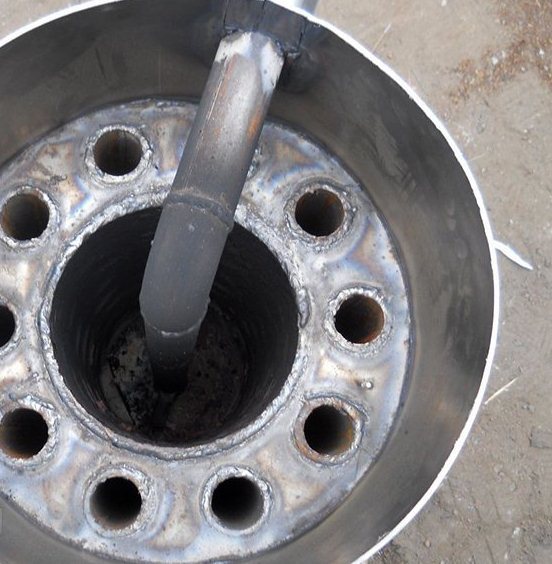

After the described actions, you need to cut off the bottom of the previously prepared metal tank with a grinder. On the sides it is necessary to cut a hole that is equal to the diameter of the chimney.
Then you need to connect the pipes. The created heat exchanger body must be put on the core and then welded to it. After carrying out such work, the structures should be covered with heat-resistant paint. When it is dry, you can install a heat exchanger on the chimney.
Heat exchanger in the form of a bell
An air heat exchanger can be installed in the attic, or it can be made in the form of a bell. The structure will work on the principle of a furnace, while hot air will rise upward, and after cooling down, it will go down. This design has its advantages, expressed in the fact that the metal chimney on the second floor is heated to such temperatures that it cannot be touched, while the described design will reduce the likelihood of fire and accidental burns.
Sometimes the heat exchanger on the chimney in the bath is lined with a grid, which is filled with stones, they serve to accumulate heat. The base of the heat exchanger can be decorated in this case. The attic will turn out to be more comfortable, and in this case you can use the room as a living room. As practice shows, the temperature of the furnace tube does not increase by more than 170 ° C if it is supplemented with a heat exchanger. The highest temperature will be only in the area of the gate, which speaks of safety and comfort.

Features of devices used in the bath
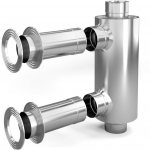
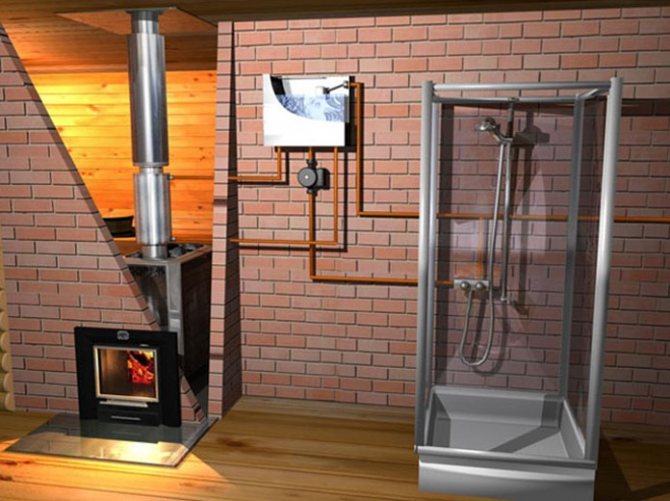
By design, the described devices can be divided into built-in ones attached to the chimney. Products of the second type are often called samovar-type devices.
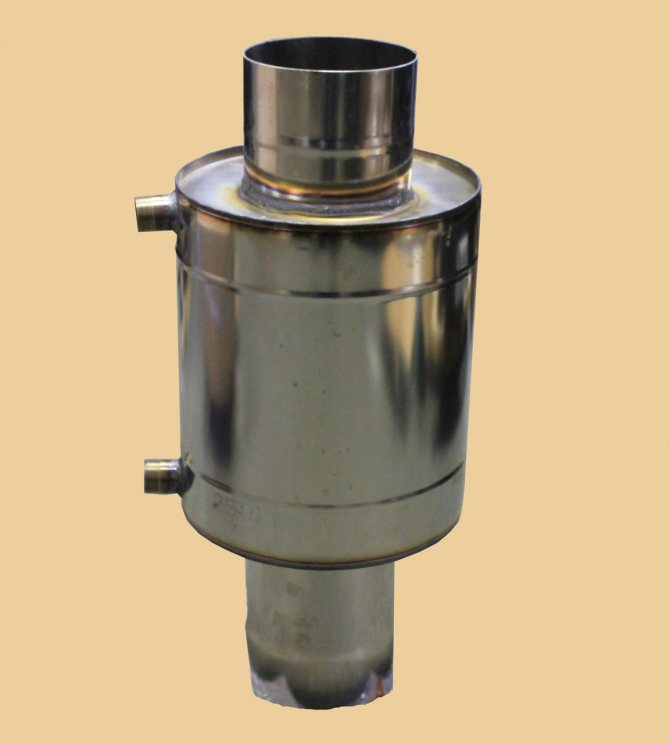

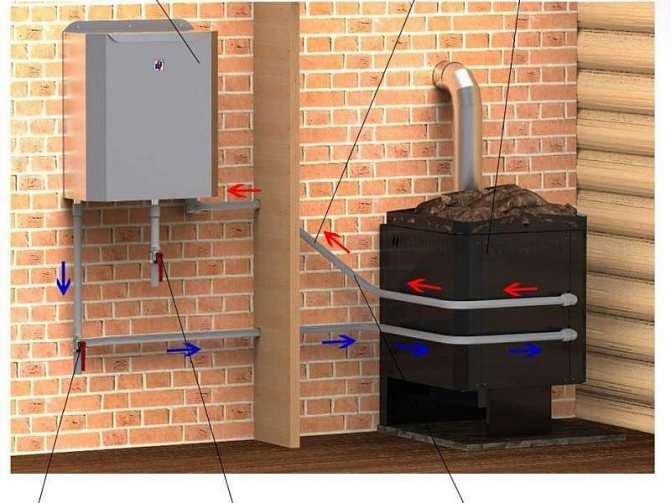
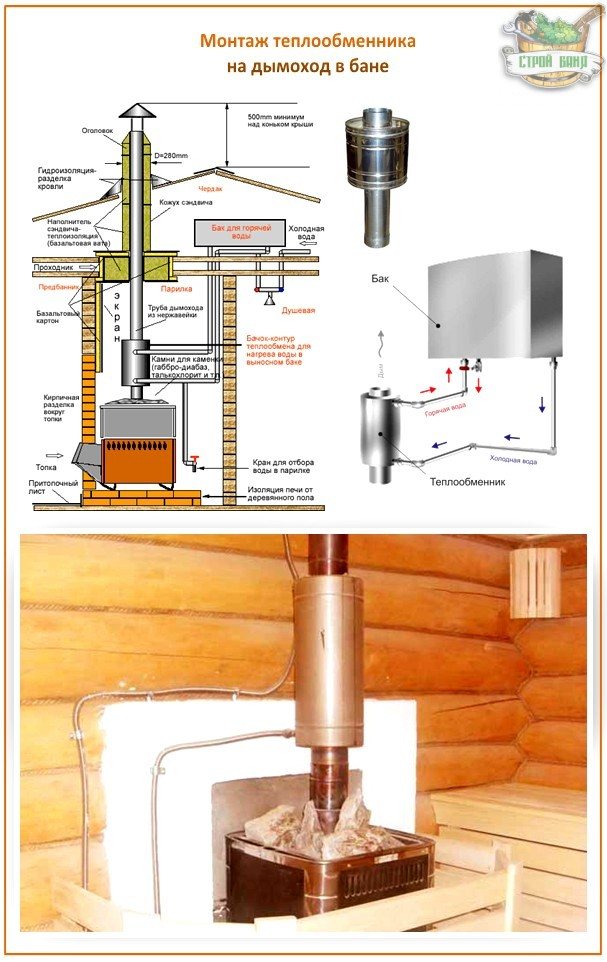
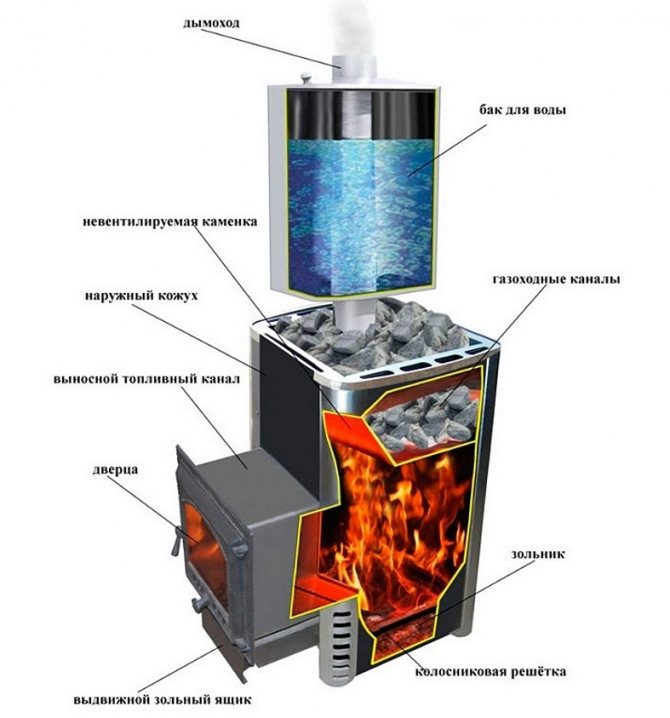
Built-in structures consist of a small cistern with a capacity of up to 5 liters. It is installed between the firebox and the heat generator casing.
A container with a volume of up to 100 liters is connected to the heat exchanger using pipes. After heating the heating system, hot water rises through the pipe. The cooled coolant flows back to the heat exchanger.Due to this, the required temperature of the coolant is maintained in the external tank.
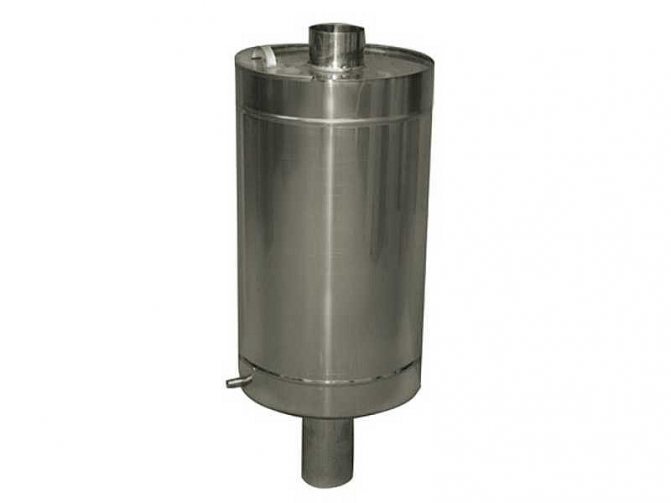
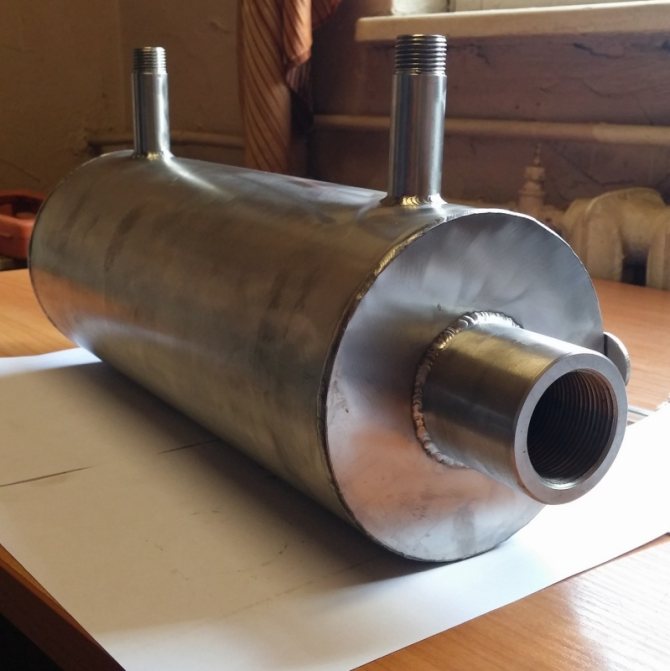
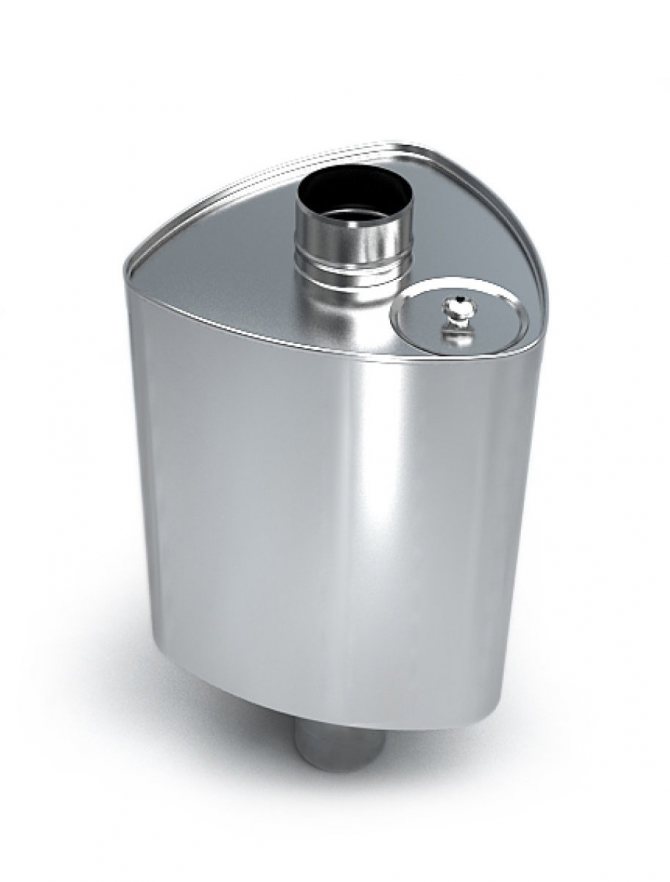
Samovar-type devices are a sealed container encircling the chimney. In the process of heating the liquid, in this case, heat is used from the combustion products moving through the pipe.

Sauna stoves with heat exchanger
The advantages of the described structures include:
- Simultaneous solution of two tasks - heating the steam room and dressing room, as well as heating the water.
- Possibility of installing the tank in a room that is located closer to the steam room.
- Long term of use. This is due to the use of high quality materials.
- No need for maintenance of the structure.
- Small oven dimensions. This saves space in the steam room.
- The power of the furnace with a heat exchanger is sufficient for quick heating of the room.
When carrying out work on the installation of the heat exchanger, you should remember some rules. For example, it is necessary to connect pipes in the system in such a way that they are not rigidly fixed near the walls. This is due to the change in their linear parameters during heating of the coolant.
It should also be remembered that heat-resistant materials must be used to seal the threads. The choice of the volume of the container installed in the bath should be carried out taking into account the fact that the heating is carried out within two hours.
