Ventilated facades are very popular among private developers. The design under consideration allows you to simultaneously provide high-quality insulation and a beautiful appearance of a residential building. Anyone can handle the arrangement of a ventilated facade with their own hands. However, before starting work, you need to consider the main features of the system and select materials for assembling the battens, wall insulation and finishing cladding.
DIY ventilated facade
General information about ventilated facades
First of all, you need to study the features of hinged ventilated structures and understand their main purpose.
Ideally, the finishing decorative coating should have good vapor permeability. In the course of their life, people release a lot of moisture: cooking, bathing procedures and other household activities - all this leads to an increase in air humidity. Some of the moisture escapes through the ventilation system along with the exhaust air, while the remaining moisture must escape through the pores in the facing material.
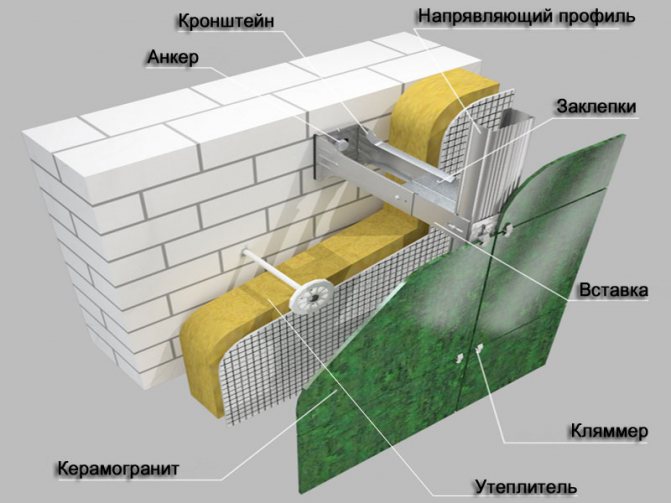
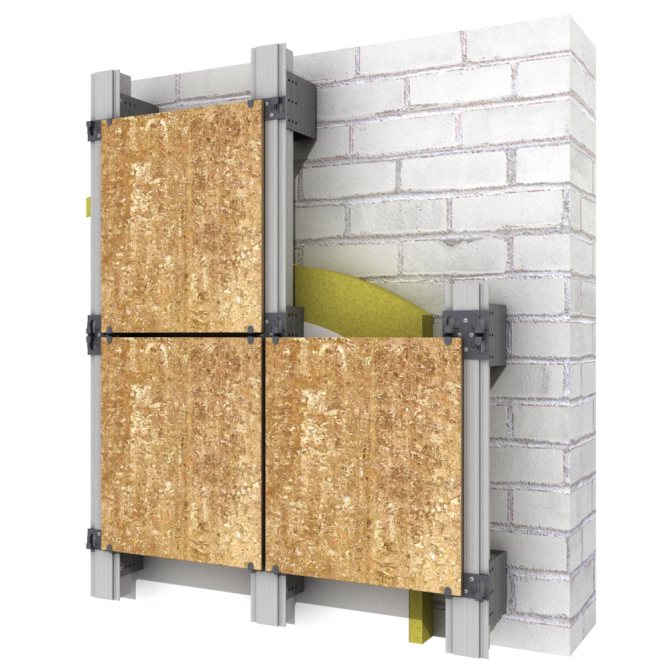
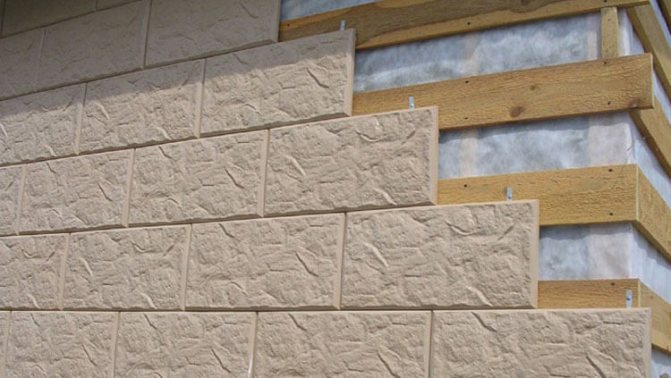
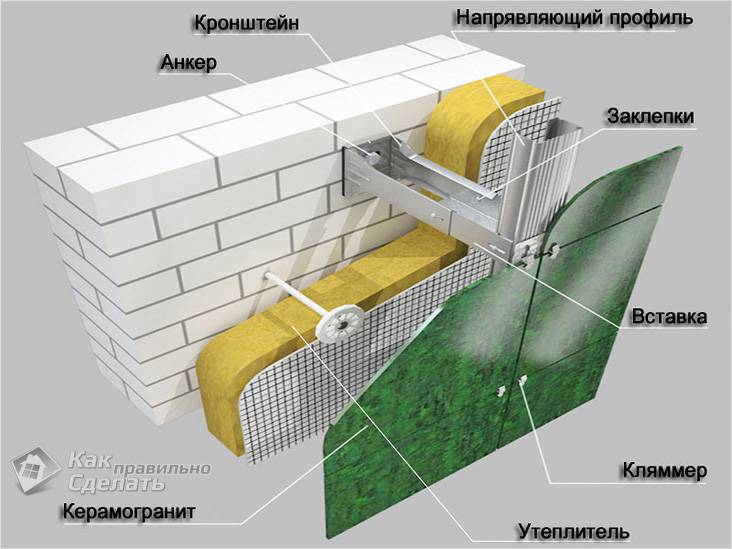
Ventilated facade made of porcelain stoneware
The vapor barrier should be equipped in such a way that the wall material is as vapor-permeable as possible inside the room and has minimum performance on the outside. This rule is relevant for all types of facades. Violation of this recommendation usually leads to a deterioration in the thermal insulation qualities of walls and a decrease in their durability.
At the same time, the facade of the house must be reliably protected from atmospheric precipitation. In this case, it is best that the outer part of the walls does not get wet, because this will lead to a reduction in the service life of the structure.
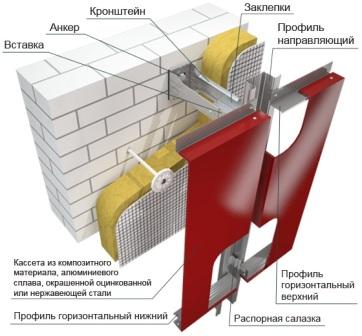

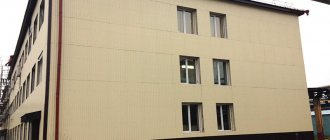
The most progressive façade system is a curtain-type ventilated façade.
Some logical contradiction follows from the information given. But there is a completely understandable and simple solution: to ensure optimal waterproofing and vapor permeability, the protective facade coating must be fixed at a certain distance from the wall surface, while simultaneously providing high-quality ventilation of the gap. It is this design that is commonly called a ventilated facade.
What you need to know before installing a ventilation facade?
Before starting installation work, you must familiarize yourself with
What is a subsystem?
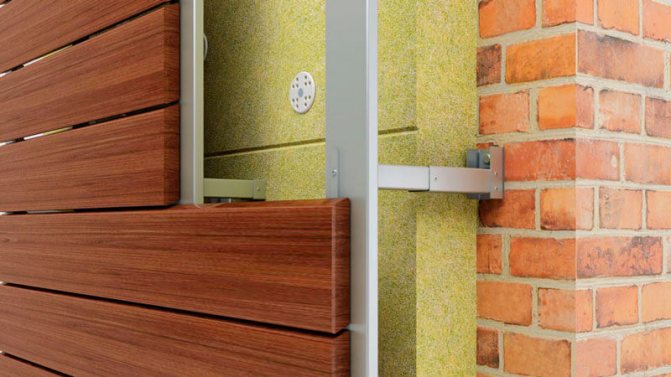
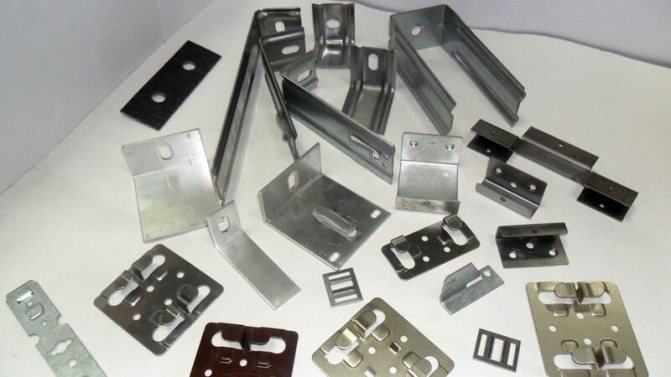
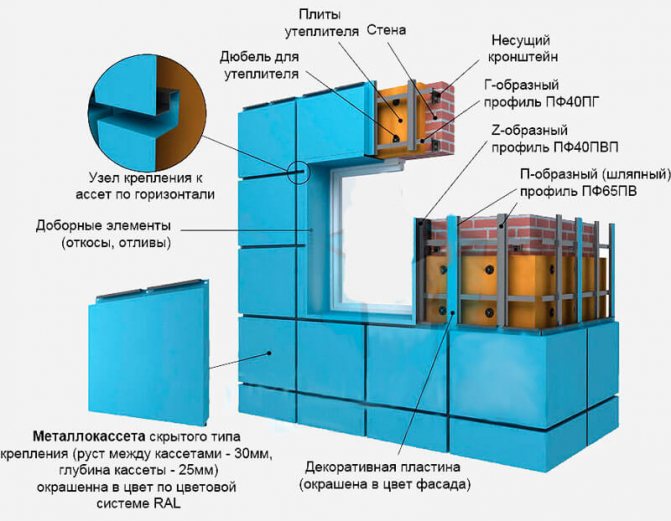
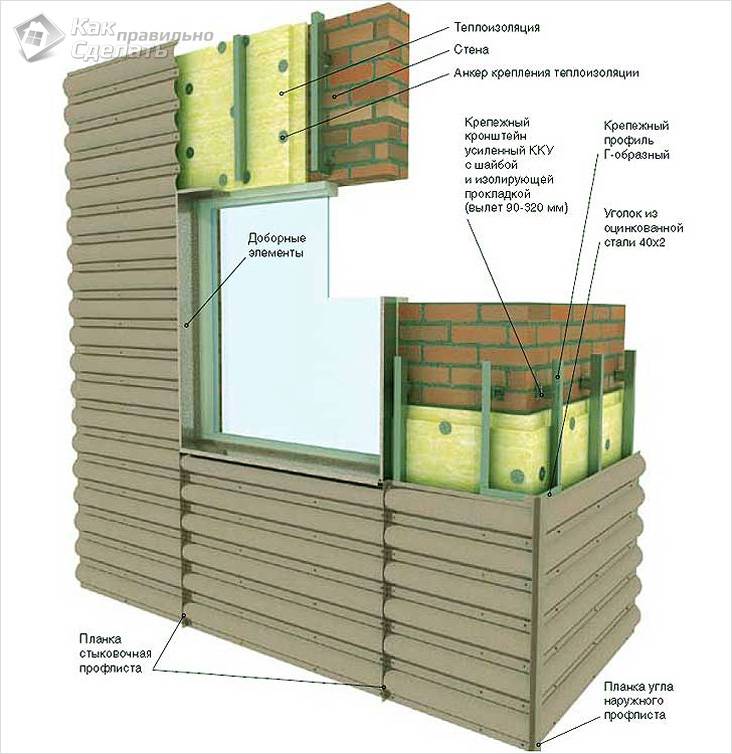
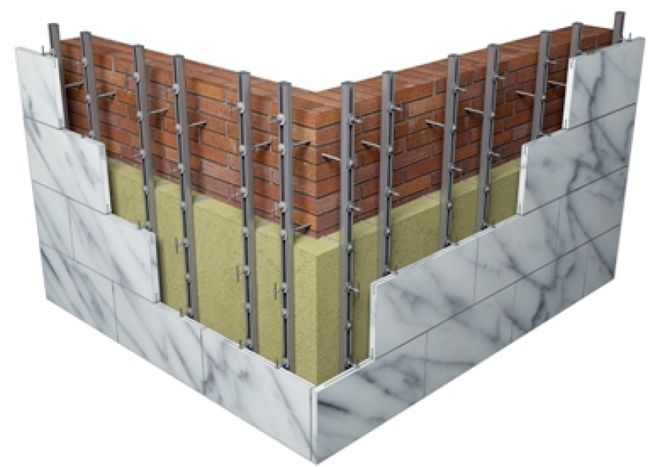
A subsystem is called a metal crate or a supporting frame of a ventilation facade - it is this that provides both space for laying the insulation and the air gap between the insulation and the upper facade material. Depending on the selected construction material, the service life of the metal system can reach half a century.
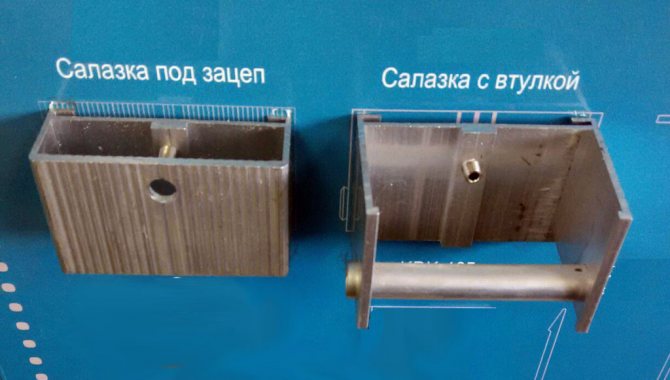
The concept of a subsystem includes the entire volume of fasteners - these are profiles and brackets, corners, various guides and galvanized ventilation runs. As for the requirements for the subsystem, it must be made of metal elements with a thickness of at least 0.9 (1.2) mm.
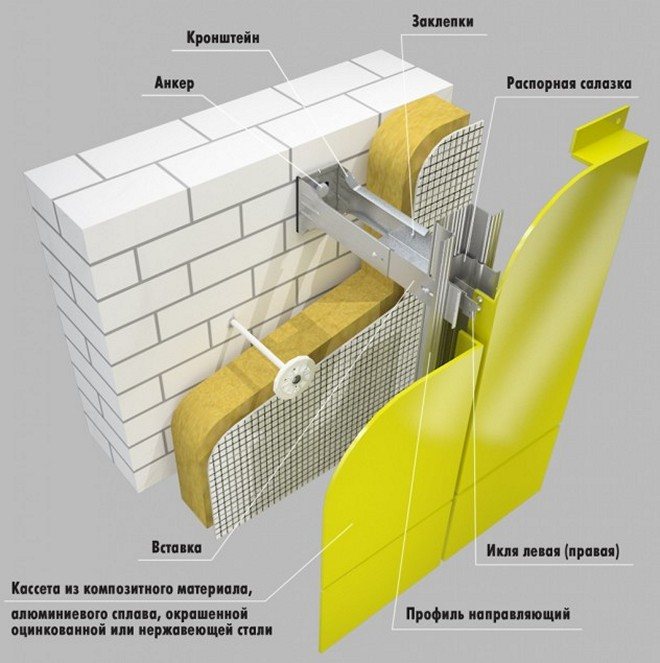

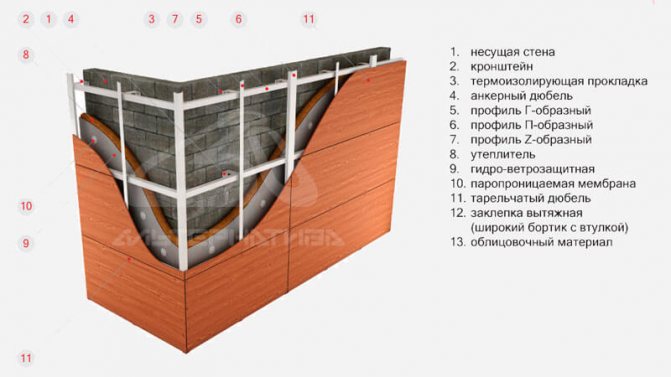
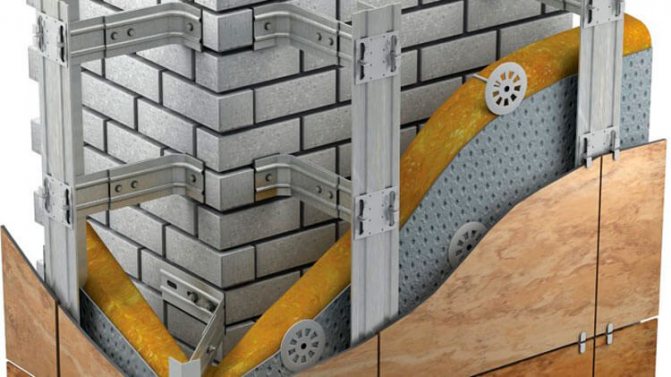
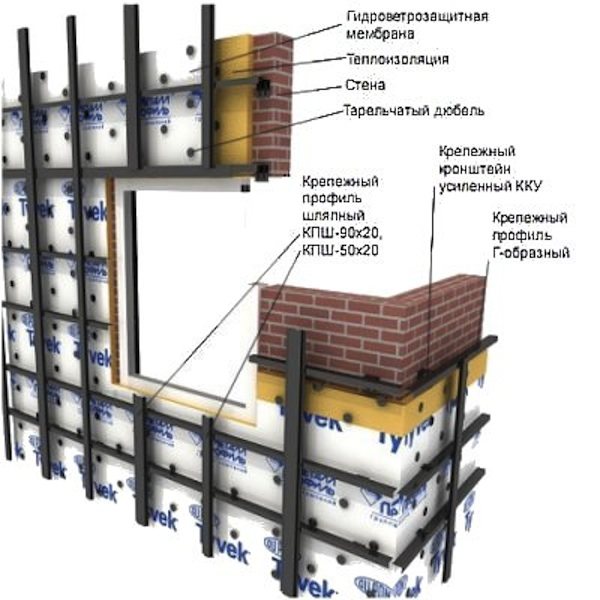
Ventilated façade frame components
The standard thickness of the fixing profile and brackets is:
- 0.9 mm;
- 1.2 mm;
- 1.5 mm;
- 2 mm.
It depends on the selected cladding material, its weight, wind load, etc.
What kind of insulation to choose?
Insulation for the ventilation facade is selected, it is necessary to take into account its flammability, since due to the circulation of air flows, the flame spreads very quickly through the structure.So the heat insulator must belong to the flammability group G1 - these materials do not support combustion:
- Minvata;
- Penoizol;
- Liquid polyurethane foam;
- Ecowool.
It is from this list that you can choose a heater. At the same time, ecowool will be the least successful choice, since even if it does not burn, it still smolders and absorbs moisture.
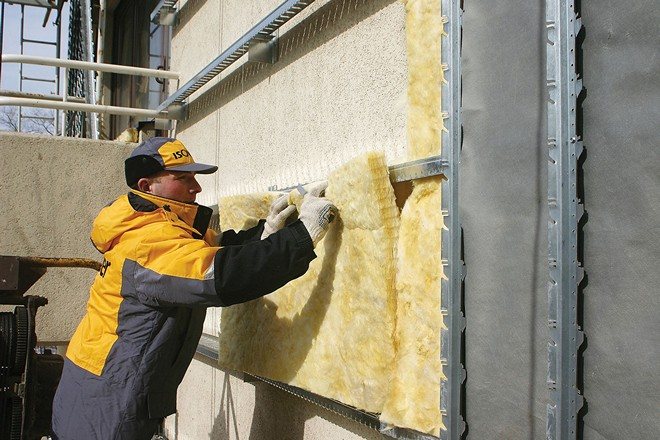

Insulation of the facade with mineral wool
Polyurethane foam is non-combustible, but hygroscopic, and also has good noise-insulating properties and a low coefficient of thermal conductivity, but its cost is too high, which makes it not the best option for a large-area ventilation facade. It is better to choose mineral wool - this material is not so expensive and, at the same time, has good vapor-permeable and heat-insulating properties, however, it must be covered with a wind-waterproof film. Cheap mineral wool shrinks during operation, while expensive brands do not. This material is the best choice for a ventilated facade.
What is a membrane for?
Regardless of the chosen insulation and its thickness, the presence of a hydro-windproof membrane in the multilayer cake of the ventilation facade is mandatory. Despite the existence of a strong opinion that insulation with a density of 80 kg / m3 does not require wind protection, since it does not get wet or blown out, this does not correspond to reality. The basis for the emergence of such a myth was the study of insulation in the laboratory, while the reality is somewhat different. A full-scale test shows different results - the presence of a membrane has a positive effect on the thermal performance for the facade, and the insulation + membrane system insulates the facade more effectively than insulation without a membrane with a 4-fold excess of density.
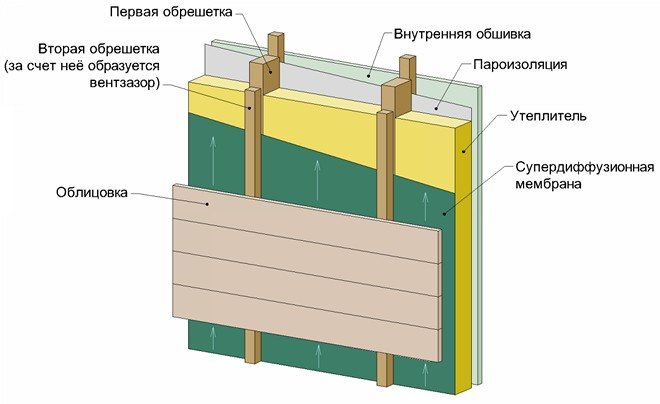

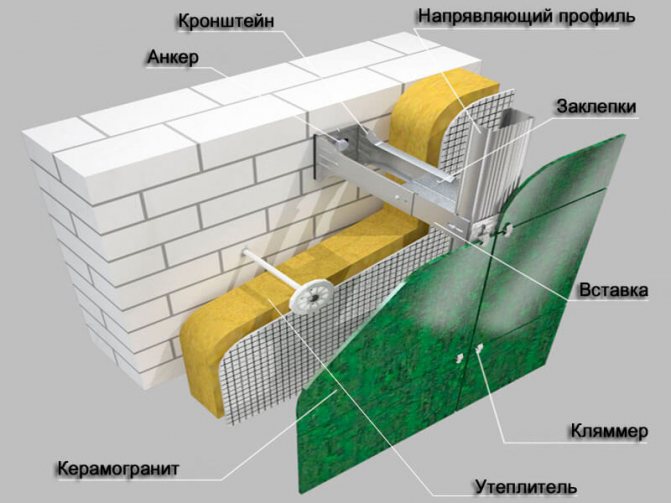
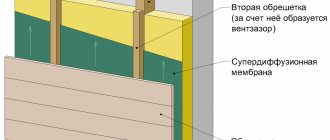
The structure of the insulated ventilated facade with a superdiffusion membrane
Why do you need an air gap?
The ventilation façade must have an air gap of a certain size, which will ensure stable normalization of the temperature regime inside the room and reduce the load on the building façade from exposure to UV rays. The movement of air in the space between the insulation and the finish is due to the presence of input lugs in the basement of the building, and air comes out through the holes made in the parapet. There are also exit rusts between the facing slabs. In any case, the diameter of the ventilation openings must be no more than 20 mm.
The size of the gap of the ventilated air gap is determined by the requirements of SNiP, which provides an increase in thermal protection and maintenance of a good humidity and temperature regime of the enclosing structures. That is why the characteristics of thermal protection of facades require competent calculations, taking into account all the operational characteristics of the building.
Too small a gap between the thermal insulation and the facing material will lead to the destruction of the insulation, and then to the destruction of the surface of the facade wall. An unreasonably large gap causes hum in strong winds. An incorrectly selected insulation, for example, combustible polystyrene foam, leads to a violation of the fire safety of the building.
Design advantages and disadvantages
Hinged ventilated structures have a number of advantages. But, like in principle all existing ones, such systems have some disadvantages.
Benefits
Among the main advantages of ventilated facades are the following provisions:
- insulation allows you to significantly save on heating the house;
- waterproofing in combination with a ventilation gap eliminates the risk of moisture retention on the walls, which significantly increases the service life of the materials used;
- ease of arrangement.You can handle the installation of all elements of the ventilated facade with your own hands;
- increasing the soundproofing properties of the walls.
disadvantages
Among the disadvantages, moreover, relative, can only be attributed to the high cost of the structure. However, at this point, it is imperative to pay attention to a significant reduction in heating costs after installing a ventilated facade. All expenses for insulation, cladding and other things pay off quickly enough.
Preparation
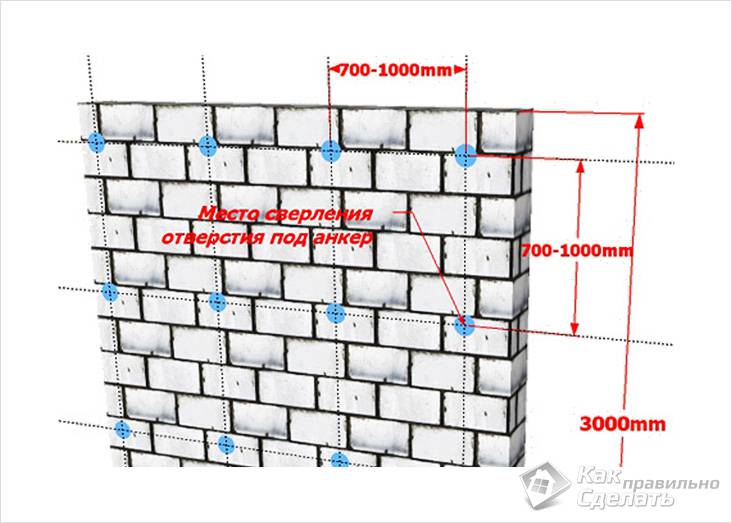

Markup scheme
Preparation for work plays an important role and at this stage it will be necessary:
- level the surface on which the work is planned.
- prepare all the necessary materials (insulation, vapor barrier, topcoat), as well as tools.
- to conduct additional theoretical training. Refreshing certain nuances of the proposed job is often more important than having a tool.
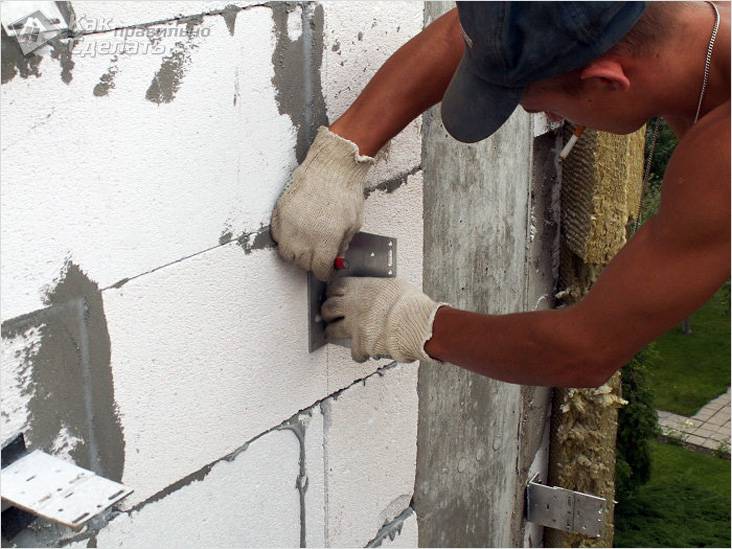

Performing markup
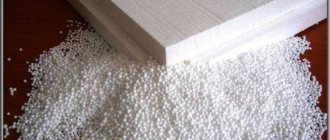
Several materials can be used as insulation, without which the installation of a ventilated facade is impossible. However, the most appropriate in most cases will be foam. Mineral wool is also a good insulation, but when exposed to moisture it can lose its operational properties, the foam is devoid of this drawback.
Tips before you get started
In order for the finished structure to retain its high performance characteristics for a long time, for its arrangement it is necessary, firstly, to use high-quality materials, and secondly, to follow the rules for installing all components. Follow the instructions and there will be no problems.
Do not skimp on the purchase of building and finishing materials. High-quality material cannot cost much less than its average market value. Buy all the necessary items in trusted places, giving preference to reputable manufacturers.
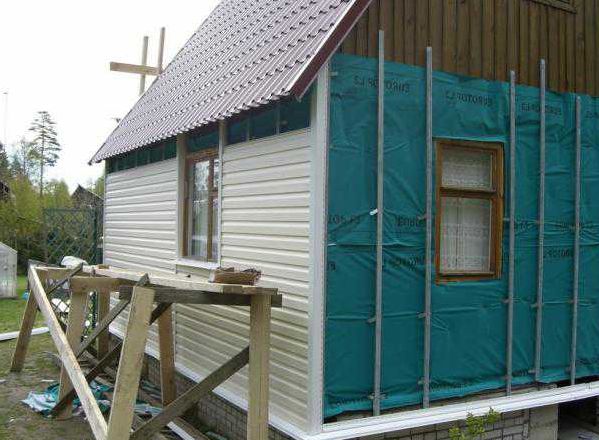

Facade siding
Pay due attention to the choice of facing material. For example, tiles in many of its varieties are very suitable for finishing the facade. However, the tile has a very big problem - the tearing off of at least one cladding element leads to the so-called. “Domino effect”, as a result of which the usual gust of wind can tear off nearby tiles.
As a result, a hole will appear, due to which the characteristics of the entire structure will decrease. Therefore, if possible, it is recommended to refuse such a cladding.
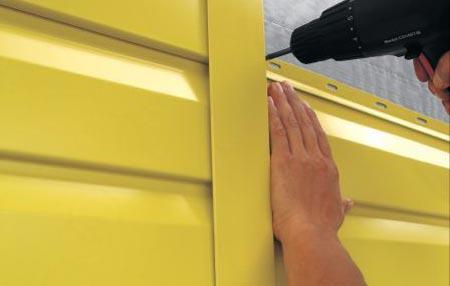

Facade cladding with siding
The best finishing cladding for ventilated facades is siding. Subject to proper installation, the appearance, service life and other important characteristics of such a finish will not be inferior to other popular materials. You will receive more detailed information on the properties of siding below.
Installation work
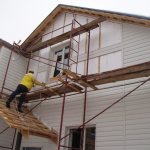
Before starting all work, you should clearly determine the appearance of the future facade, purchase materials that are suitable for you in price and quality, put up scaffolding, stock up on consumables and tools that may be required before installation.
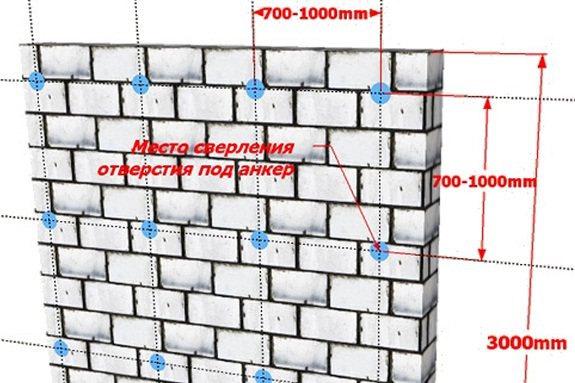

Markup scheme
It's important to know! When creating a ventilated façade, the manufacturer's instructions on the packaging must be followed.
Ventilated facade installation technology assumes the presence of the following tools and consumables:
- building level;
- plumb lines and rule;
- screwdriver, drill, and ideally a hammer drill;
- grinder with a grinding attachment; knife, scissors for metal;
- corner, tape measure;
- a hammer;
- drills for concrete (10 mm) and for metal (4 mm), paronite gaskets, anchors and plastic dowels;
- metal profiles and fasteners;
- thermal insulation material;
- planks and slopes;
- facing tiles.
After the completion of the preparatory work and the preparation of everything necessary, the installation of ventilated facades begins.
The first step is to mark the entire perimeter of the building. To do this, draw a horizontal line from the bottom of the wall surface along the basement level and side vertical markings for beacons. After that, you need to arm yourself with a tape measure and a building level to mark all the points on which the metal profiles will be attached.
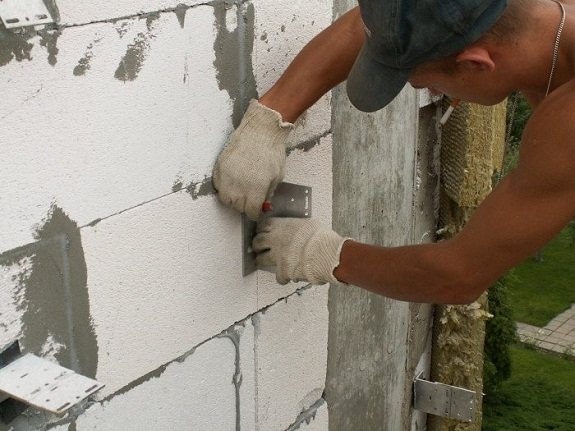

Marking
The distance between the profiles directly depends on the dimensions of the facing material. After that, it is required to determine the vertical lines by means of plumb lines and mark the installation locations of the brackets.
Now, in the marked places on the wall of the building, it is necessary to drill holes with a hammer drill or puncher. Then put paronite gaskets on the brackets and install them in these holes. All brackets should be mounted vertically. The lower row of brackets must be installed horizontally, maximum half a meter from the ground level. This is done for better circulation of air masses. Installation of the lower row of brackets must be carried out along a horizontal line along the entire perimeter of the structure.
As mentioned above, do-it-yourself installation of hinged ventilated facades presupposes the presence of a heat-insulating layer.
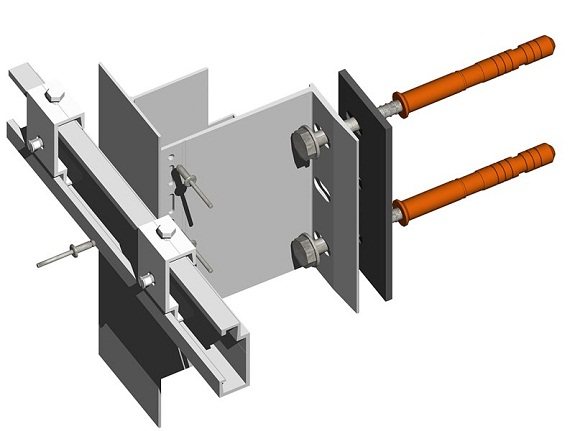

Fastening for a ventilated facade
It's important to know! In this case, it is better to purchase thermal insulation material in the form of plates, rather than rolls.
Most often, mineral wool is used as a heat-insulating material, this is due to the economical cost of the material, but in conditions of high humidity it is better to use foam or expanded polystyrene. In places where it touches the fasteners, the insulation must be carefully cut with a knife.
Very often, during this procedure, a fragment of the thermal insulation material falls out, it must be returned to its place, since the one-piece structure of the insulation ensures the preservation of heat. It is necessary to attach the insulation material to the base by means of mushroom dowels.
By clicking on the link https://vse-postroim-sami.ru/materials/flooring-tile/6879_ukladka-fasadnoj-klinkernoj-plitki-instrukciya-po-montazhu-svoimi-rukami/, you will find instructions for laying clinker tiles. This article contains information about facade thermal panels. You may also be interested in an article on facade glazing.
To do this, it is necessary to drill a hole in the wall through the insulation, and then drive a dowel into it, two fasteners must be spent on one insulation plate. If you have purchased a multi-layer material, then it must be laid with an overlap to avoid joints. Using this method, the entire building is sewn up with insulation.
If the thermal insulation material that you have chosen is not protected from moisture, then you will have to additionally install a special protective layer. It is a film membrane, which is covered with a layer of insulation. In the lower part of the wall, this film should be tucked under the thermal insulation layer and fixed with the same plastic dowels.
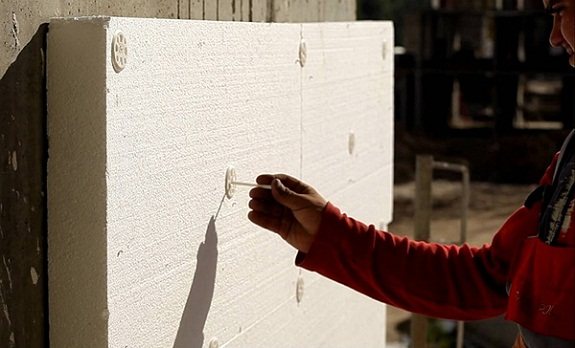

Laying the thermal insulation layer
In those places where the brackets converge, you should make cuts in the film. It is very important to correctly lay the membrane so that as a result the film is not damaged, wrinkled and there are no folds on it. As a rule, the film is sold in small fragments, so joints cannot be avoided. On the sides, you can do a small overlap for more confidence, but with the top things are different. The edge of the lower film fragment must be plugged under the next one. This is done so that the formed condensate flows downward and does not fall on the insulation layer.
After laying the thermal insulation layer and, if there is such a need, the protective film, you should proceed with the installation of the supporting structure. The thickness of the frame fragments determines the gap for the circulation of air masses between the thermal insulation layer and the cladding of the ventilated facade. The first step is to place the corner profiles on the corner fasteners accordingly. After that, holes should be made in the profile, which should be located in the same way as on the bracket, and riveted. With this method, you need to install all the profiles.
It's important to know! When installing profiles, remember that for the base / plinth, metal structures must be placed in a horizontal position. L-shaped products should be mounted in the center of future facing plates, as well as along the perimeter of door and window openings. T-shaped elements must be installed in those places where the cladding plates will touch each other.
If it becomes necessary to build up the metal profile, this procedure should be carried out outside the bracket. That is, two elements must be fixed on the brackets; a special tire must be applied to the touching point.
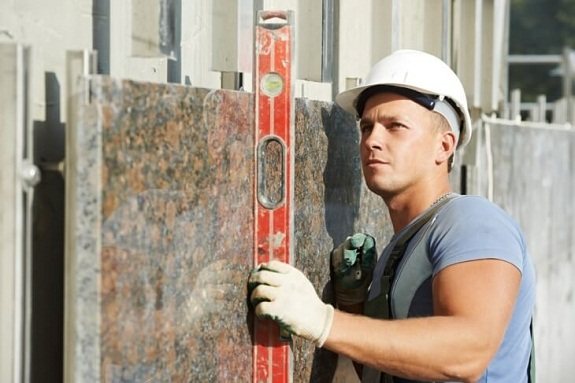

Installing the topcoat
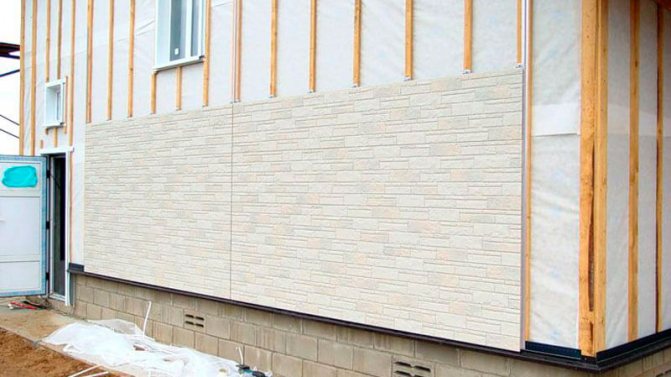
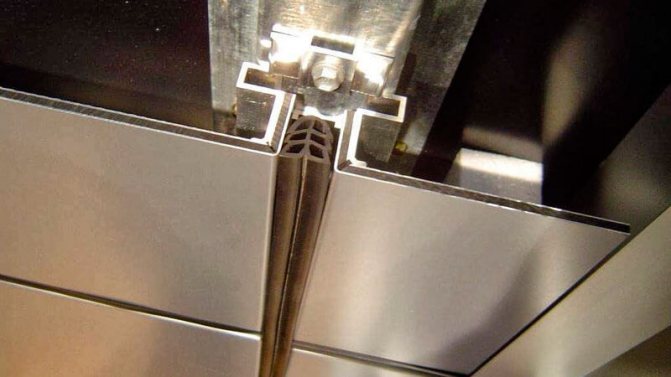
The final stage of the installation work is the installation of the cladding. This operation should be started by setting the slopes for the openings. The installation methods for cladding elements can differ significantly from each other, it depends on the material used, for example, aluminum cladding can be placed directly on the profiles of the supporting frame, and stone or porcelain stoneware products are installed using clamps. Now you know how to make a ventilated facade in general terms. Next, we will take a closer look at the nuances of facade work.
Back to content
Finishing
We have already mentioned the undisputed champion of this market segment - vinyl siding. The material has many advantages over existing alternatives, namely:
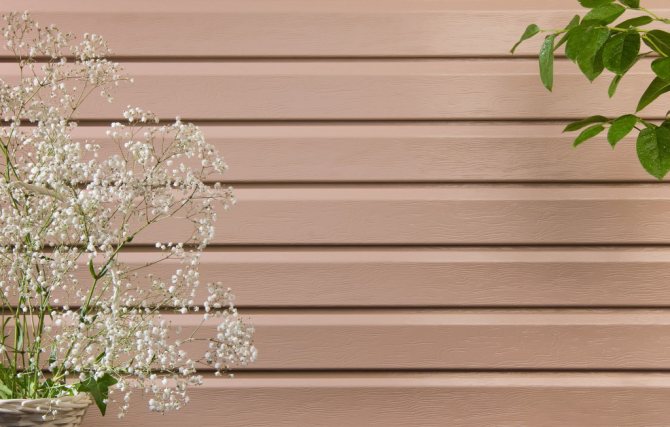

Vinyl siding
- siding is sold at an affordable cost. The difference becomes especially noticeable when comparing siding with porcelain stoneware or clinker tiles;
- the material is easy to process. You can use a simple hacksaw to cut the siding;
- siding is lightweight, so you don't have to worry about increasing the load on the foundation and walls of the house;
- a large selection of siding of a wide variety of colors and textures is available for sale, which allows you to choose the ideal finish for any site.

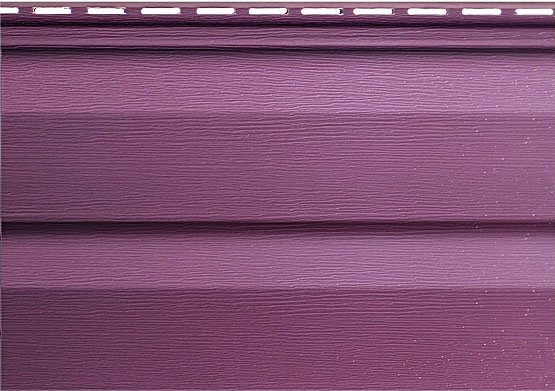
Vinyl siding
Ventilated Facade Installation Guide
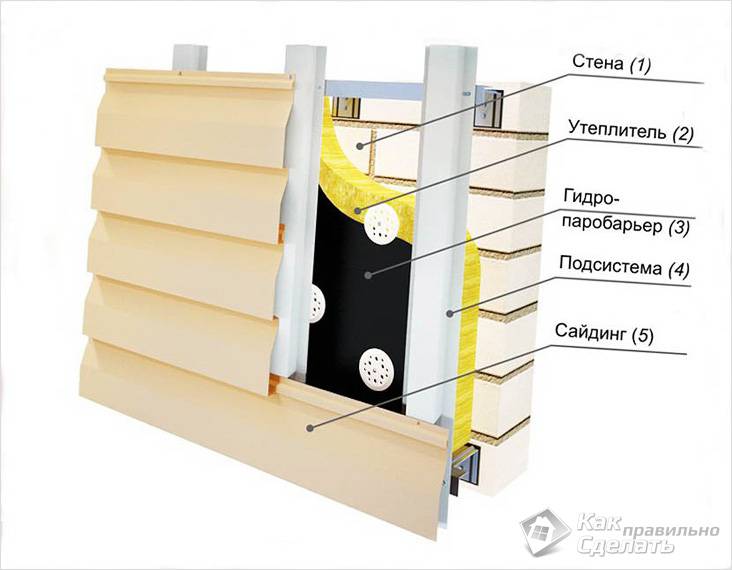
First step. Assemble the crate. Attach the bars to the wall vertically, in increments of a couple of centimeters less than the width of the insulation plates. It is more convenient to first fix the extreme slats, pull the string between them and, guided by the rope, fix the intermediate elements at the same level.

Metal frame lathing
Second step. Place the insulation between the battens of the battens.
Step three. Cover the insulation with a vapor barrier membrane. Lay the vapor barrier strips horizontally with an overlap of about 10 cm.
Fourth step. Fill over the battens of the battens with the perpendicular bars of the counter battens. This will create the required ventilation gap.
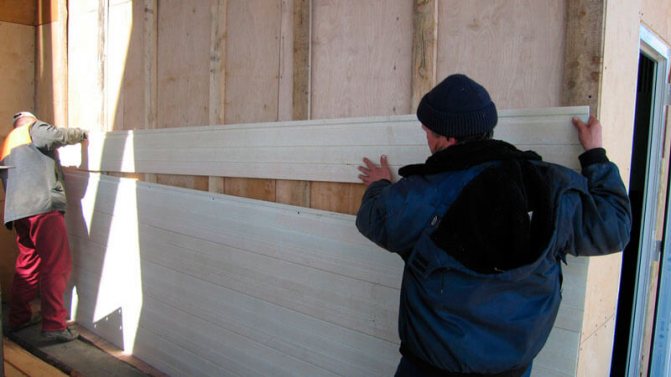
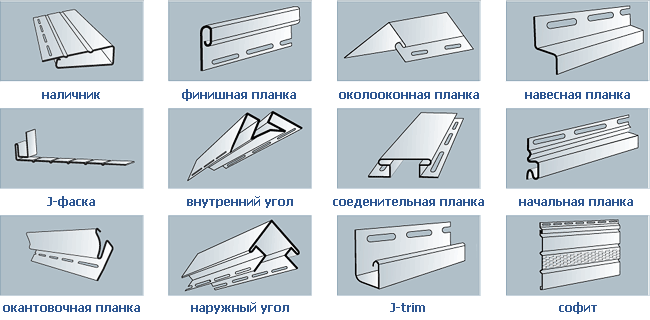
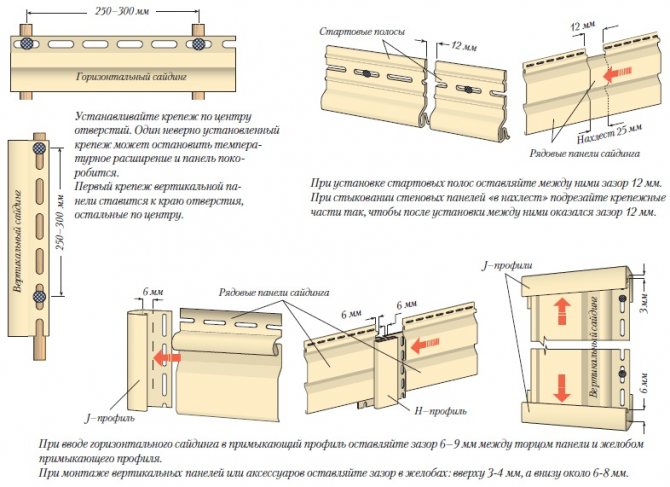
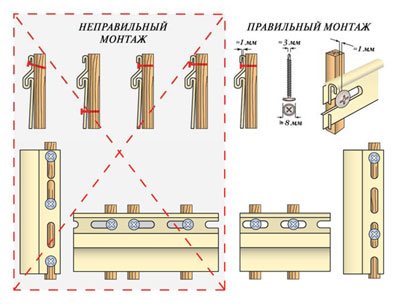
Fifth step. Attach the siding to the finished sheathing. The cladding is made of polyvinyl chloride. This material changes its size when the temperature changes, so rigid fastening of the planks is unacceptable. A small gap (3-5 mm) must be left between the panels. Hammer in the fasteners (screw in) not reaching the end by about 2 mm. Fasteners must be placed strictly in the center of the holes intended for them.

Vinyl siding

Installation instructions

Correct installation method
How to make money on the installation of hinged ventilated facades
Added to favorites: 0
The business idea of installing hinged ventilated facades is likely to interest men, especially if their profession is close to this topic. A time comes when you do not want to work for someone else's uncle, but there is a desire to work for yourself.
In fact, this business is very attractive.
- First, it's interesting.
- Secondly, you will only have to invest in the purchase of working tools. Everything else is at the expense of the customer.The entrepreneur is only required to cooperate with the wholesale base in order to receive discounts for the client for the purchase of material.
Business benefits of installing curtain wall facades
- Low competition.
- Ease of installation, even a beginner can do.
- Fast payback.
- Manufacturing mobility.
- No problem with the choice of material.
- Reasonable prices for the material.
- Large amount of work.
The leaders in the demand market are stone panels.
How to mount facades
The principle of operation is similar to the cladding of a house with siding.
Before starting the installation, it is necessary to prepare the surface.
- Check her condition. The wall must be flat and solid.
- Remove downpipes and other structures that might interfere with installation.
- Make sure that there is no fastening of the electric cable, gas pipeline, plumbing and other wiring in the wall.
Installation technology
- Attach brackets with paronite gaskets to the wall.
- Attach the insulation (at the request of the customer) the dowel with bolts.
- Protect the thermal insulation with a windproof membrane.
- Attach the guide rails to the brackets: vertically and horizontally. The slats are usually made of galvanized profiles.
- Close the structure with external trim so that there is an air gap between the casing and the insulation.
In fact, there is a detailed instruction with formulas and tables, as well as the usual recommendations. Everything is very accessible.
Therefore, there should not be any difficulties when installing hinged ventilated facades.
There is a wide choice for cladding: wood panels, natural stone, profiled sheet panels and so on.
Pros and cons of hinged ventilated facades
In order for customers to be interested in the proposal to carry out the installation of hinged facades, the businessman himself must know their advantages in order to convey information to the customer.
pros
Facades provide warmth and dryness. Soundproofing, which is important for the city. Durability. Their service life is up to 50 years. Quick installation. Minimum garbage in the process. Cons
Minuses
This is the only negative, but worth it. Most customers are not deterred by the price.
When a novice entrepreneur receives his first order, it is important to do everything in good faith and with high quality. Before starting the installation of hinged ventilated facades, you need to carefully consider every detail.
The materials must also be of high quality. There is no room for error here. After all, you will have to redo it, and this is a loss of finances and, consequently, subsequent orders. Business reputation is key. There will be no positive reviews, which means there will be no profit. As a result, the case will burn out.
How to make money on the installation of hinged ventilated facades
Learn about the benefits of a profitable curtain wall ventilated façade installation business and the secrets behind installing them.
Recommendations of professional builders
To make the work as easy as possible, and the finished ventilated facade retains its original characteristics for a long time, follow a few simple recommendations of professional builders.
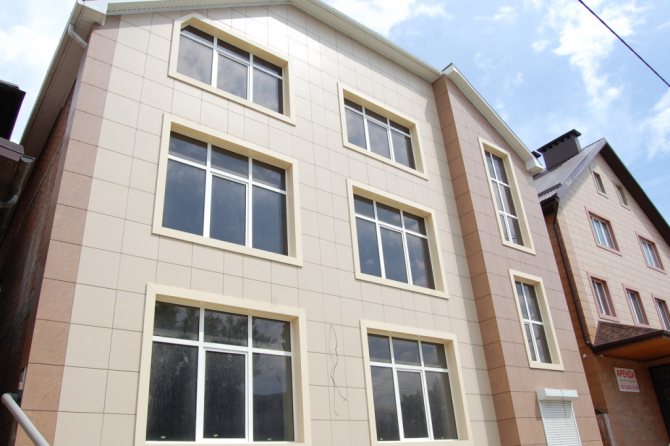

Ventilated facade
- First of all, when installing a structure, you need to focus on an individual project developed specifically for your home. The project will allow you to competently plan the scope of work and calculate the required amount of materials.
- When choosing fasteners, be sure to check the quality of the dowels. Consider the parameters of the battens, insulation and cladding.
- The ventilated facade must not be built on walls made of hollow bricks, foam concrete and other materials with a density not exceeding 600 kg / m2.
- Thermal insulation materials are necessarily accompanied by the manufacturer's instructions, which describe in detail the procedure for fastening the material. Follow the recommendations. For example, a mandatory rule for all thermal insulation materials is some displacement of vertical seams.
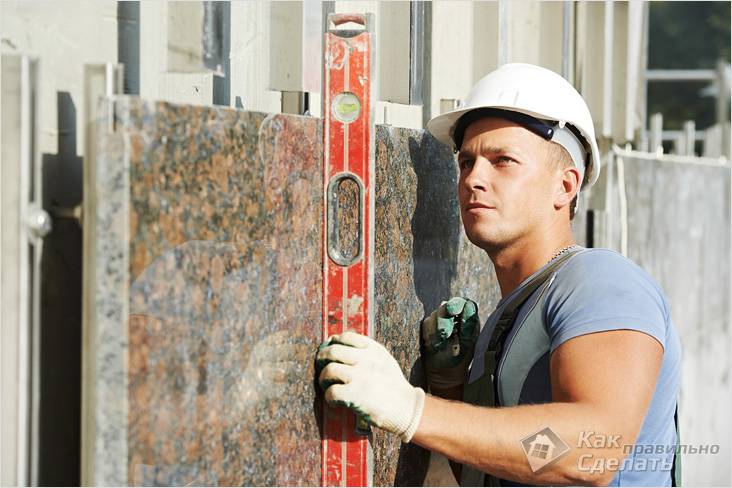
- Insulation and finishing material must be fixed strictly according to the level. Even a 5mm error for a 10m facade is an unacceptable deviation.
- The holes for the dowels are prepared exclusively with a drill. It is prohibited to use a hammer drill for these tasks.
- The design of a ventilated facade requires the presence of a counter-lattice. Thanks to this element, the gap necessary for ventilation of the space will be created.

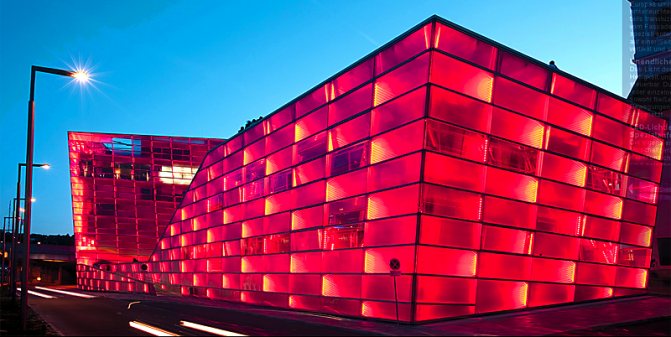
Ceramic ventilated façade
Thus, there is nothing super complicated in the independent arrangement of a ventilated facade. It is enough to understand the basics of work, choose the most suitable materials and complete all planned activities in accordance with the instructions. Do not forget the recommendations received, and the ventilated facade of your house will serve as long as possible, while maintaining its original performance characteristics.
Happy work!
Types of structures
Depending on whether a frame is used for arranging a ventilated facade or not, there are two types of construction.
One of them is simpler in terms of installation, and the second is complex and time consuming. But let's get acquainted with each, and then choose what you liked more.
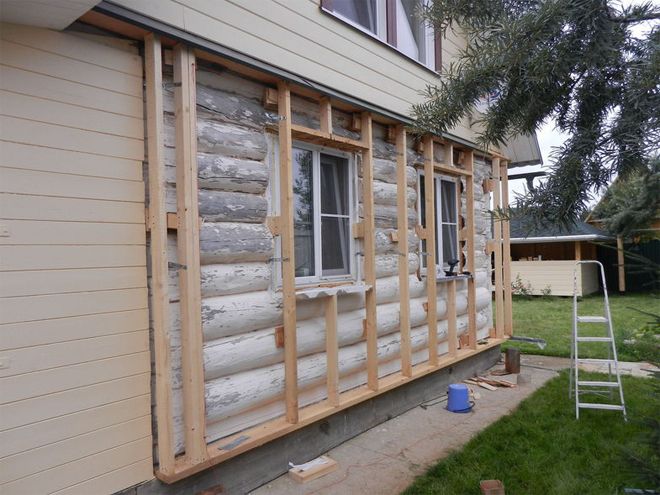
Frame option
In this case, the first thing to do is install the frame. For lathing use:
- Wooden bars.
- Aluminum profile.
- Stainless steel profile.
The choice of material depends on how long the frame will last and what kind of facing will have to be used. Wooden blocks are an environmentally friendly material, but the service life will not exceed 10-15 years. But this is a great option for a wooden house.

The aluminum profile will last much longer, but do not forget that this is a soft metal and it will not withstand concrete or porcelain stoneware cladding. But stainless steel is a versatile person, and it serves for a long time, and will withstand serious loads.
As for the advantages and disadvantages of the method, they certainly exist. Builders highlight the following positive aspects:
- speed of arrangement. If you collect all the necessary materials and not be distracted by trifles, then a hinged ventilation facade with a frame can be assembled quickly enough;
- if the walls have minor flaws, then there is no need to plaster them beforehand. Differences are hidden with adjustable brackets;
- a multilayer "cake" protects against all negative influences, which means that the supporting structure of the house will retain its strength for a long time;
- variety of finishes.
The most difficult thing when erecting a frame is the correctness of the markup. If this is not done, then the structure will remain unstable, and the finish will lie crooked. In addition, in the absence of a gap or an erroneous calculation of its value, ventilation will not be carried out in full or will be completely absent.

This will lead to the accumulation of moisture in the thickness of the insulation or in the interior. An important disadvantage is the complexity of working with materials that are laid on glue. If the owner of the house decides to take such a step, then a chipboard must be laid on the frame, but it is imperative to remember about the ventilation holes.
Frameless method
This option is used when the facing material forms a free-standing wall. The simplest example is a cladding brick wall. In order to make such a cladding, you need not only to know all the intricacies of styling, but also to have at least a little experience.
If you do not use reinforcement or wire for the bundle, then the facing wall can collapse. In addition, in the bottom and top row, be sure to leave vertical seams between the bricks without mortar. They are essential for ventilation.
To make a frameless ventilated facade, you need to spend a lot of time and effort, and it is very difficult to cope with this task on your own. The reasons are as follows:
- The bricks are quite heavy.
- You constantly need to mix a fresh solution, since over time it becomes unusable.
- Many subtleties of correct brick laying
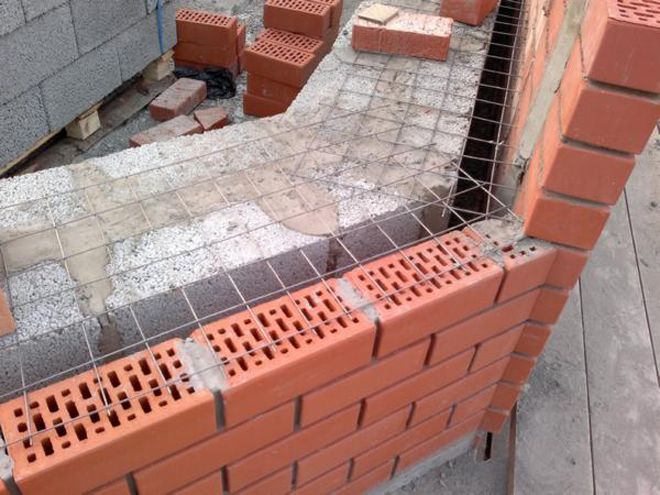

The frameless method also has a right to exist, since, despite all the unpleasant moments when performing editing, it is able to perform all its functions to the fullest. Therefore, leave the execution of all work to a professional team.
