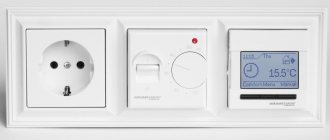
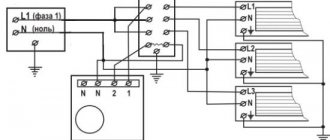
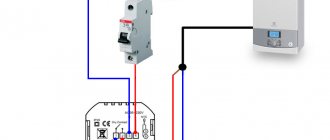
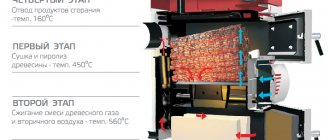
The principle of operation of room thermostats
Thermostats with temperature sensor
The room temperature controller works as follows:
- A sensor built-in or removed from the thermostat housing measures the air temperature in the room;
- The sensor transmits information to the actuator;
- The actuator, depending on the temperature value, turns on or off the heating devices and air conditioners connected to the regulator;
- When the room temperature drops to the value that was taken as the minimum during the device settings, the device turns on the heater again.
Thus, this control equipment does not function constantly, but cyclically, turning on and off the heating at the minimum and maximum value of the air temperature in the room. For electromechanical and mechanical thermostats, this range is very small, while for electronic models it can be much wider.
Do-it-yourself thermostatic regulator installation
No special skills are required to install a mechanical or electrical thermostat for heating radiators. The only difficulty can be caused by the installation of a bypass in a heating system made of metal pipes.
What you need to work
To install a thermostat on a heating battery with your own hands, you will need:
- mechanical or electrical thermostat;
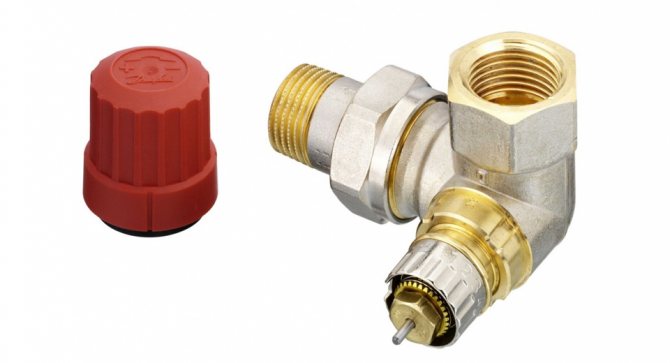
- shut-off valves;
- a piece of pipe and fittings or a welding machine for arranging a bypass in a one-pipe heating circuit;
- adjustable and plumbing wrenches.
In addition, you need to stock up on tow and a special paste to seal the joints.
Preparatory activities and installation
Before proceeding with the installation, it is necessary to drain the water or other coolant from the heating system. To do this, shut off the taps at the entrance to the apartment from the heating riser.
This work is best done during a period when the heating season has not yet begun.
After all the coolant has been drained, proceed to installing taps on radiators. To do this, at a short distance from the battery, the horizontal pipes are cut, after which the sections of the line are disconnected from the radiator. Further, the sequence of work looks like this:
- Depending on the material, a jumper is welded or installed between the supply and return pipelines in a single-pipe heating system.
- Remove the shanks with nuts from the shut-off valve and thermostat and screw them into the plugs of the heating radiator.
- Shut-off and thermostatic devices are connected.
- Assemble the battery piping.
- The heating system is filled with a coolant.
After turning on the heating, it is necessary to inspect all areas for leaks and, if necessary, eliminate or repair defective places.
When installing the thermostat, be sure to think about the possibility of convenient settings for the device. To do this, provide sufficient free space and correctly orient the adjusting knob.
Varieties of thermostats
Programmable thermostat W1209
Depending on the design and principle of operation, these devices are of three types: electronic, electromechanical and mechanical.
Electronic
The simplest electronic thermostat is a device consisting of the following parts:
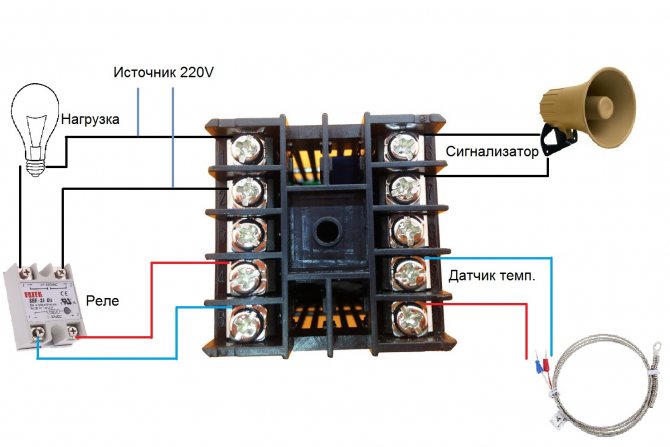
- The controller is a printed circuit board with a microcircuit.This is the key part of the thermostat that receives information from the external temperature sensor, processes it and sends the appropriate signal to turn on or off the heater, air conditioner;
- Monochrome liquid crystal display and control buttons - used for setting and programming the thermostat to maintain the required temperature background in the room;
- Remote temperature sensor connected to the controller using a flexible thin cable;
- Contact group - clamps in which the conductors of the cable connecting the thermostat with a heater or air conditioner are fixed.
Such a device works quite simply: an analog signal arrives from the sensor via a cable to the controller, which is decoded by its microcircuit, correlates with the set temperature value, after which the controller decides to turn on or off the heating equipment.
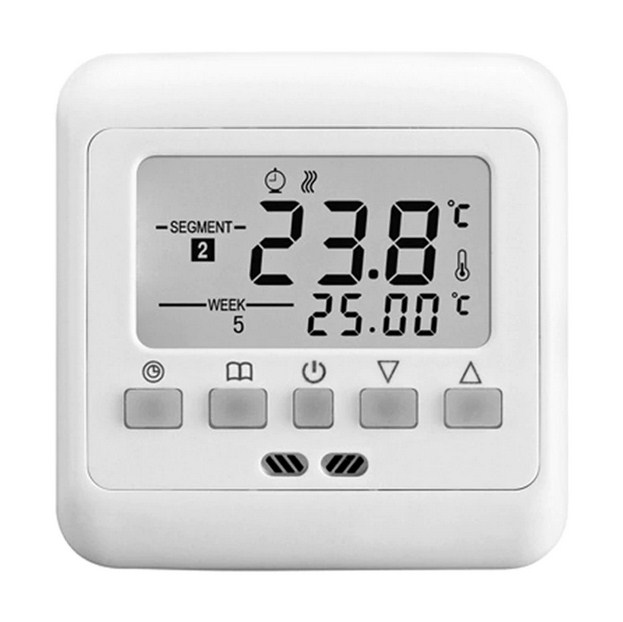
Electronic thermostat
Electromechanical
Occupying an intermediate position between electronic and mechanical such thermostats are of two types:
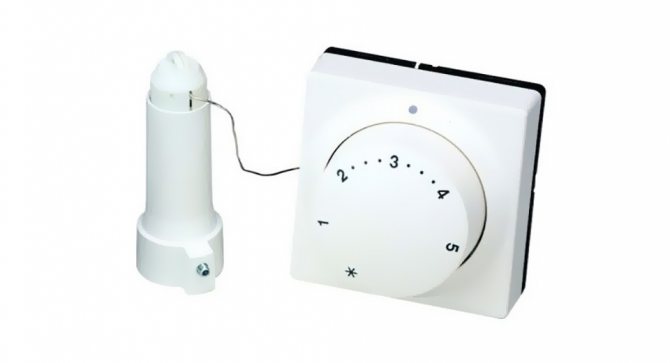
- With a bimetallic plate and a contact group - a plate is located inside such regulators, which, when heated to a certain level, bends, opening the circuit contacts that feed the heating equipment. When cooling down, the reverse process takes place: the plate straightens, closes the contacts, and the heater turns on. The adjustment of the inclusion of this device is carried out using a rotating dial with a pusher that changes the distance between the plate and the fixed contacts closed by it.
- With a capillary tube - the design of such a device is the same as that of analogues used in water heaters and boilers.
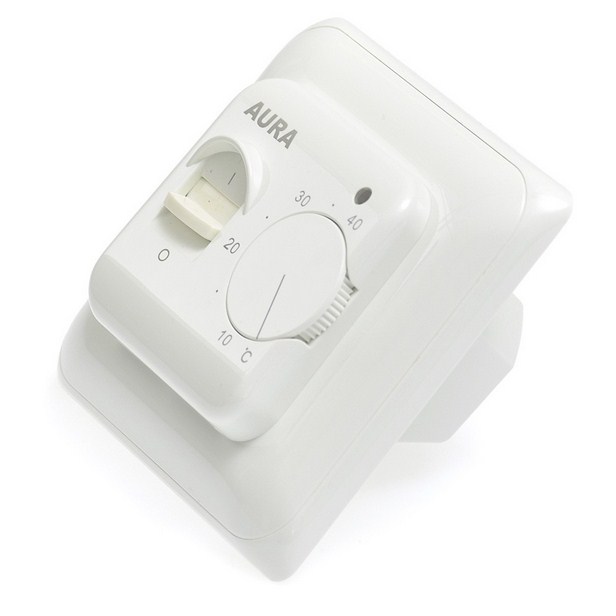
Electromechanical room temperature control
Mechanical
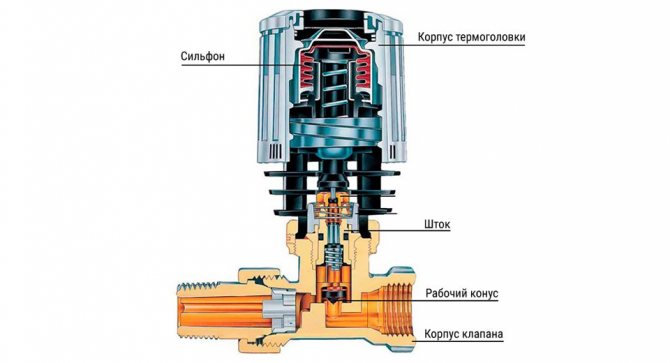
The main elements of this device are a gas-filled membrane that responds to changes in the air temperature in the room, and a control mechanism consisting of two moving contacts.
The thermostat works as follows:
- As the temperature rises, the gas filling the membrane expands;
- A pusher located on one of the outer walls of the membrane opens the contacts of the control mechanism circuit, thereby disconnecting the heater connected to the device.
Regulation in such a thermostat is due to a rotating dial (wheel) that changes the distance between the membrane and the control mechanism.
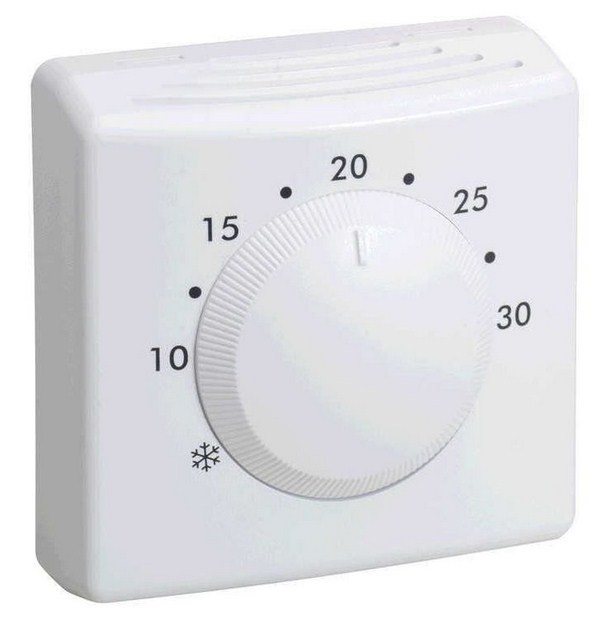

Mechanical type thermostat
Refrigerators Electrolux
Answers to frequently asked questions
Ranco K-59 thermostat adjustment
Currently, in the production program of Electrolux there are not so many refrigerators with a mechanical control system based on thermostats. However, the fleet of such refrigerators already in operation is still very large. And we get a lot of questions about the possibility of adjusting the Ranco K-59 thermostats used in them. This article has been written to meet the demand for this information.
A modern mechanical thermostat (in particular, Ranco K-59) is a relatively accurate device that involves a one-time adjustment of characteristics directly during manufacture. It is assumed that thanks to the use of quality materials and the successful design of the thermostat, the factory adjustment will be enough for its entire service life. Those. no "unauthorized misalignment" of the mechanism will occur. Practical observations fully confirm the hypothesis that there is no need for any adjustment work with the Ranco K-59 during operation. In the overwhelming majority of cases, if about the temperature characteristics of the device, then it is associated with a partial loss (ie leakage) of the working gas in the "Bellows - capillary tube" system, and not with the misalignment of the thermostat mechanism.However, if a specialist in the repair of household refrigerators for some reason decided to precisely adjust the Ranco K-59 thermostat, and not replace it with a new one, then he can use the material given on this page.
The Ranco K-59 thermostat has three adjusting screws that change the temperature characteristics of the device. Two of these screws are located on the opposite side of the instrument to the electrical contacts (see photo 1).
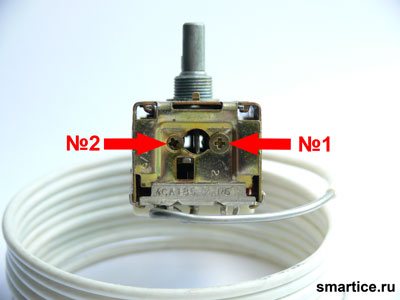

photo 1 - the first two adjusting screws
With the help of these screws, it is possible, within certain limits, to change the opening temperature of the working contacts of the thermostat (the working contacts are contacts 3 and 4). When screw # 1 is rotated clockwise or / and screw # 2 counterclockwise, the opening temperature of the working contacts will increase (accordingly, rotation in the opposite direction will lower the temperature at which the opening will occur). In this case, screw No. 1 provides "coarse" regulation of the opening temperature, and screw No. 2 - "smooth". It should also be borne in mind that the screws do not have stops at their threaded ends, and with excessive counterclockwise rotation, the screws may fall out of the threaded bushings of the thermostat mechanism.
The third Ranco K-59 adjusting screw is located under the white plastic cover located on the electrical terminal block. To access the screw, you must remove this cover from the terminal block (see photos 2 and 3).
photo 2 - Plastic cover.
photo 3 - The third screw.
This screw allows you to adjust the temperature at which the working contacts of the thermostat are closed. When the screw is rotated clockwise, the contact closure temperature decreases. The opposite is also true: when rotating counterclockwise, the closing temperature will increase.
When carrying out adjustment work, it should be borne in mind that Ranco K-59 thermostats belong to the class of devices with an adjustable dead zone. Those. Ranco K-59 have operating contact closure temperature independent of the setpoint. Only the opening temperature of the working contacts depends on the set point (i.e. on the position of the thermostat operating mode adjustment knob displayed on the refrigerator control panel). Therefore, when carrying out the adjustment using screws No. 1 and No. 2 (see photo 1), the current setting of the device must be taken into account.
Additional information about the Ranco K-59 thermostat (including the temperature characteristics of various versions of this device) can be obtained on this page.
Boiler control
The principle of operation of the thermostat
A gas boiler or electric boiler can be controlled by a thermostat installed in the living room, as well as a more complex regulator of the temperature background - a programmer. Depending on the boiler design, there are three options for connecting such control devices:
- To special connectors on the boiler control board (for wall-mounted volatile models);
- In series with a boiler thermostat with a mandatory connection to a gas valve (for non-volatile floor-standing models);
- Instead of a boiler thermostat (for floor-standing boilers).
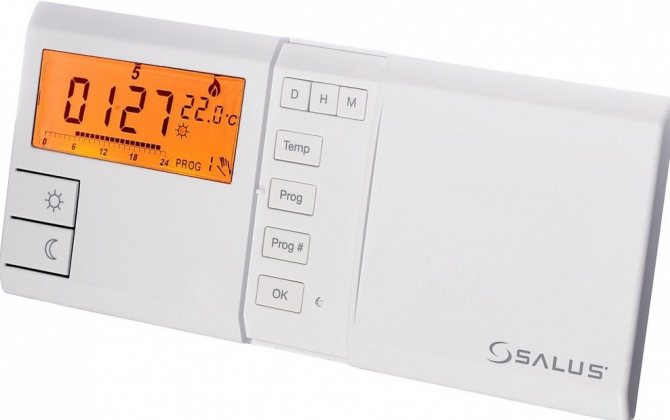

Modern wired programmer for gas boiler
Important! For the installation of such regulators, the most distant rooms from the boiler are chosen: the bedroom, the hall.
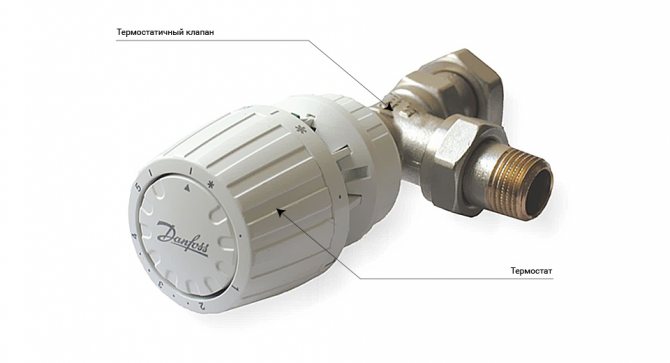
Danfoss thermostats: product range
During its long history of existence, Danfoss has released many models of thermostats, many of which are updated and reissued to this day.
The most popular models are thermal heads of the series:
- RTR 7000,
- RTRW,
- RTRW-K,
- RAX,
- ECO.
Thermostat RTR 7000 (RA 2000)
Thermostats series RTR 7000
have options with built-in and remote air temperature sensor. The design is specially designed for RA class radiators. The capillary tube of the latter reaches eight meters in length.A special outer casing protects the thermostatic element from external negative influences. Almost all models in the series are equipped with a gas bellows, valve shut-off function and frost protection.
Temperature setting range
on average from +5 to +26 ° С.
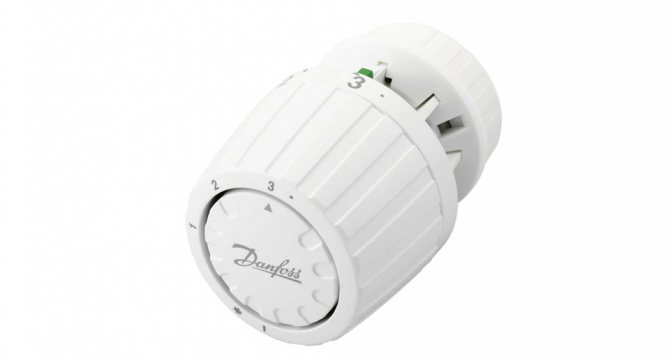

The series includes such models as: Danfoss RTR 7090
with built-in sensor,
RTR 7092
with a remote sensor,
RTR 7094
with a protective cover.
Thermostat RTRW (RTRW)
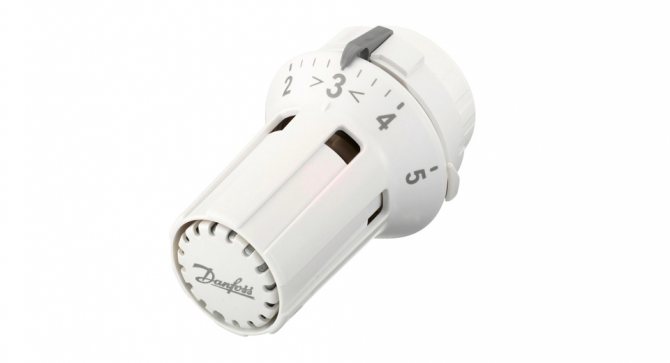
RTRW series thermostats
do not differ much from the RTR 7000. Contains a liquid agent. Also available with external and built-in sensor.
Temperature setting range
varies from + 8 to + 28 ° С.
The RTRW type includes models: RTRW 7080 with built-in sensor, RTRW 7082 with external sensor.

Thermostat RTRW-K (RAW-K)
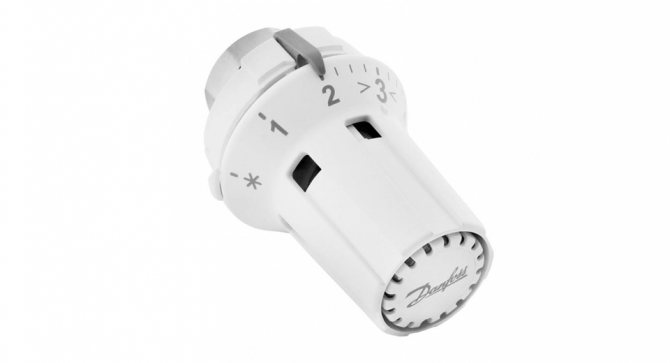
Thermal heads RTRW-K
are practically a copy of the previous thermostatic element. The difference is that RTRW-K are more versatile and suitable for many types of heating batteries, including: steel panel radiators such as Biasi, Delta, DiaNorm, Diatherm, Ferroli, Henrad, Kaimann, Kermi, Korado, Purmo, Radson, Superia , Stelrad, Veha, Zehnder-Completto Fix.

Temperature setting range
from +8 to +28 ° С. The device is equipped with the ability to protect the heating system from freezing.
The RTRW-K series includes: RTRW-K 7084 with built-in sensor, RTRW-K 7086 with external sensor.
Thermostat RAX
Thermostatic head RAX series
Is a thermostat with a liquid built-in temperature sensor. The elegant design of this product is in harmony with even the most sophisticated interior. A distinctive feature of the RAX is the tuning dial with Roman numerals.
Temperature setting range
from +8 to +28 ° C.
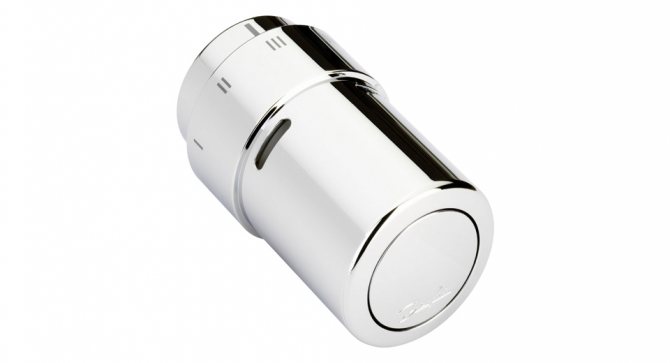

The series has several modifications in the color range of the case: white, black, chrome-plated and steel.
Danfoss Eco thermostat
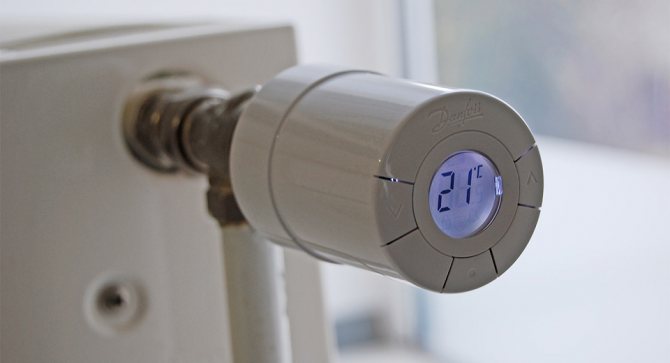
Danfoss Eco
Is an electronic smart temperature controller from Danfoss. The device automatically maintains a comfortable room temperature in the range from +5 to +28 ° C.
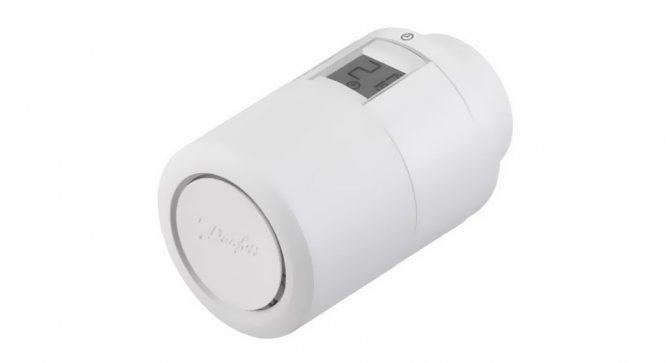

This model is a novelty in the world market among thermostats, which runs on batteries and can be controlled from a smartphone.
The thermal head for the Danfoss Eco heating radiator is equipped with functions such as open window detection, automatic setting and valve self-test.
For example, if the air temperature in the room drops sharply (the flow of cool air from the street), the valve will automatically close to avoid heat loss. Heating of the room will resume when the window is closed.
The first week after installation, the device is calibrated and "memorizes" the moment at which to start heating the room in order to reach the desired temperature by the specified time. To prevent clogging of the control valve over time, once a week, thanks to the device's smart processor, the valve will open fully for automatic flushing.
Also, the device assumes a mode of night and day temperature reduction, and includes all the functions of its predecessors.
The key to a sound sleep is a comfortable air temperature in your bedroom. Danfoss Eco can be programmed so that at night the temperature in the bedroom will be slightly lower, and closer to morning it will rise and make your waking up more pleasant.
Recommended temperature index for each room:
- living room - +21 ° C,
- kitchen - +19 ° C,
- bedroom - +20 ° C.
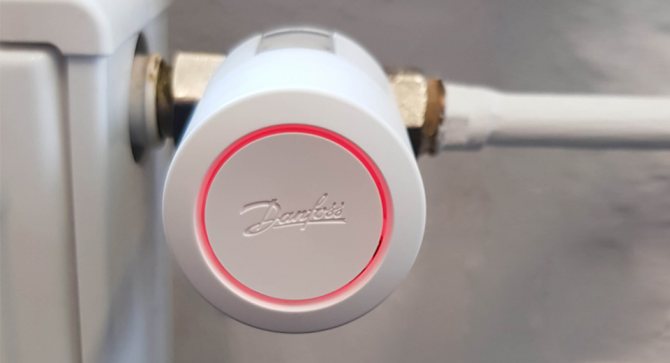

added the ability to remotely control the Danfoss Eco thermostat to the MagicAir air quality monitoring and climate control system.
The MagicAir base station is a compact gadget that monitors the state of the microclimate in the house and helps to save energy.
You can purchase Danfoss Eco at tion.ru. Here are three options for completing the product:
| Danfoss Eco thermostat for MagicAir | Danfoss Eco thermostat + MagicAir base station | 2 Danfoss Eco thermostats + MagicAir base station |
| If you already have a MagicAir base station with a serial number of the format 310030.XXXXXXXXX or 310040.XXXXXXXXXXXXXXXXXXXXXXXXXXXXXXXXXXXXXXXXXXXXXXXXXXXXXXXXXXXXXXXXXXXXXXXXXXXXXXXXXXXXXXXXXXXXXXXXXXXXXXXXXXXXXXXXXXXXXXXXXXXXXXXXXXXXXXXXXXXXXXXXXXXXXXXXXXXXXXXXXXXXXXXXXXXXXXXXXXXXXXXXXXXXXXXXXXXXXXXXXXXXXXXXXXXXXXXXXXXXXXXXXXXXXXXXXXXXXXXXXXXXXXXXXX In | If there is no MagicAir base station | If there are two radiators in the room |
PRICE 3 490 ₽ WHEN PURCHASING A PACKAGE WITH MAGICAIR |
MAGICAIR BASE STATION
|
MAGICAIR BASE STATION
|
| 4 490 ₽ Buy | 13 390 ₽ Buy | 16 900 ₽ Buy |
Installation and connection
Installation of a room temperature controller is carried out in several stages:
- Mounting the regulator on the wall at a height of 150-160 cm away from heating radiators, various heaters, places that are exposed to direct sunlight;
- Connection to the contact group of the cable regulator - the bare and preferably soldered ends of the cable are inserted into special connectors and fixed with screws;
- Laying the cable from the thermostat to the heating equipment in plastic cable ducts;
- Connecting the cable to the corresponding terminals on the boiler control board, the three-way valve actuator on the radiator.
Installing a thermostat
Before proceeding with the installation of the thermostat with your own hands, be sure to shut off the hot water that enters the heating radiator and wait until it drains. Only then should the thermostat be installed.
First, you will need to cut off the heating pipes located next to the heating radiator and remove them. If the tap is installed before the battery itself, it should also be removed. It is necessary to wrap the shanks from the valves of the shut-off and thermostatic types into the radiator plugs. After that, the radiator trim can be installed in the selected place, having previously assembled it. The final stage in installing the thermostat on the radiator will be the installation of pipes, they must be of a horizontal type.
Advantages of using a thermostat
The main advantages of temperature controllers are:
- The ability to maintain a comfortable temperature background in the living room;
- Saving energy carriers used for various types of heating equipment: gas or electricity;
- Increasing the service life of heating equipment - the use of a thermostat significantly reduces the time for switching on and operating the boiler, which extends its service life;
- Low cost and high return on investment;
- Easy to install and use.
Thus, room temperature controllers are very simple, convenient and reliable devices. Maintaining a comfortable temperature background in living quarters, they allow not only to significantly save gas, electricity, but also increase the service life of expensive boilers and other heating equipment.
Ways to check the health of the refrigerator temperature sensor
The first way is directly
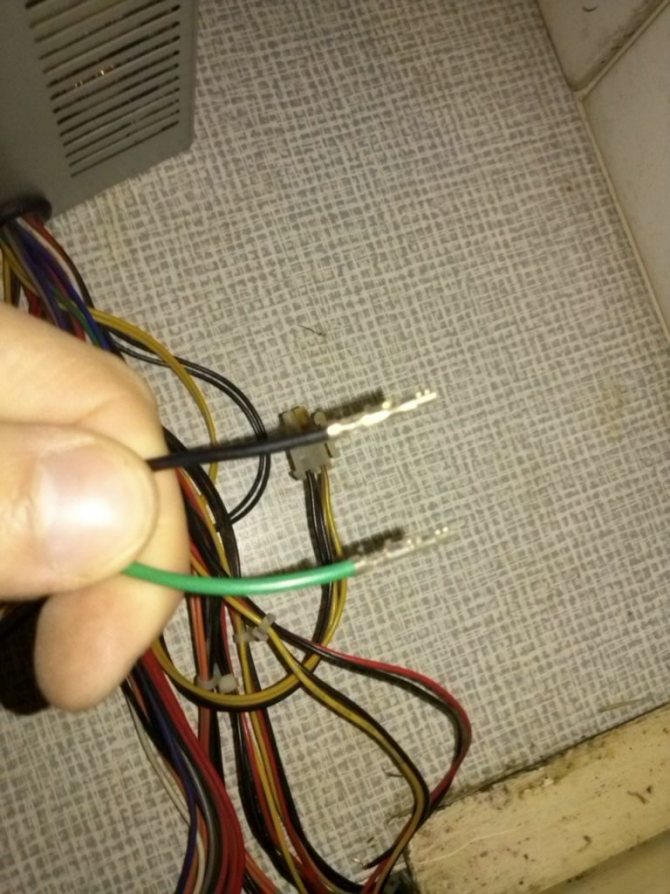

Leave the thermostat inside the refrigerator. Finding the two wires that go into it, disconnect them carefully (so that you can easily put them back in place later) and connect them together. Be careful! There is a high voltage on the wires. All operations with wires should be done only with the motor turned off.
This method is good if the refrigerator won't turn on. He completely checks the thermostat, since all temperature limits are no longer valid.
The second way is to check the bellows
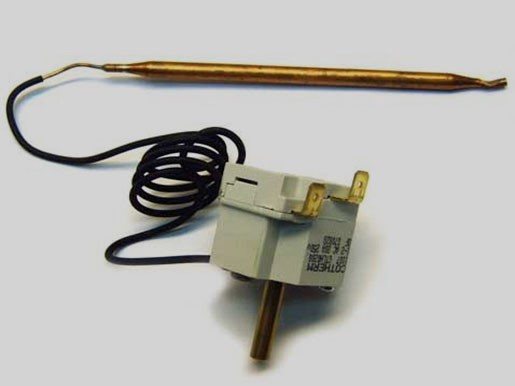

This method allows you to check the regulator without having to remove and disassemble it.However, some basic knowledge of component design is required. Near the small axis, on which the adjustment knob itself is attached, you should find a plate, you need to move it and click it.
If the plate is fixed “tightly” and does not lend itself to shifting (there are no clicks), then the regulator is out of order.
The third way is checking by a tester
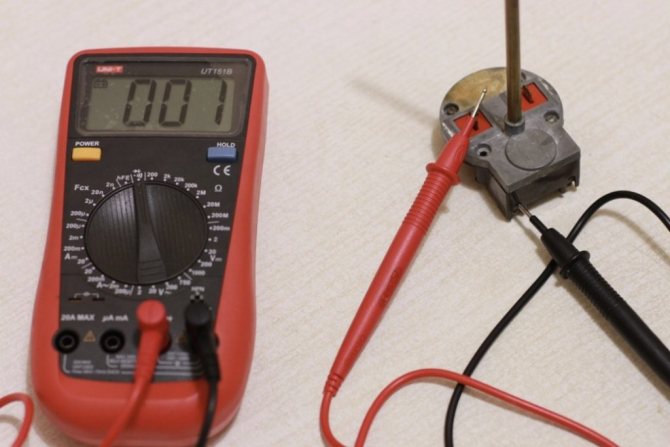

To do this, you need to completely disconnect the refrigerator from the power supply, and then carry out its complete defrosting in accordance with the instructions. Of course, the contents will have to be removed.
After that, you need to turn on the device to the network and turn the thermostat adjustment knob to a position that will allow you to get the lowest possible temperature. If the refrigerator model has a freezing mode, it is recommended to use it.
To test the operation of the thermostat, you need to free the refrigerator from all products, put a thermometer inside the chamber and check its readings after a few hours
In the refrigerator compartment, approximately in the middle, you need to put a thermometer designed to measure the air temperature.
It is better to use a device that allows measurements to be made below zero. The refrigerator is left in this mode for about two hours. After that, you need to check the thermometer readings.
If the temperature in the refrigerator has dropped to about six degrees by this time, there are no problems with the thermostat. But when it becomes noticeably warmer or colder inside this level, the thermostat will have to be replaced.
The fourth way is visual inspection
If, after defrosting, a so-called snow cap forms very quickly inside the chamber, the initial diagnosis of the health of the thermostat can be performed very simply.
The appearance of a snow coat in the refrigerator almost always means that the thermostat is not working correctly, it is necessary to diagnose its condition
To do this, at the time of compressor operation, the adjusting knob begins to turn in the direction of increasing the temperature inside the chamber.
If the relay is working properly, at a certain moment the sensors will fix the required temperature level, after which the compressor motor will turn off. If the engine continues to run, the thermostat needs to be changed.
After such a diagnosis and with a working thermostat, it is recommended to remove all contents from the chamber and let the device run idle for about six hours. During this period, you need to pay attention to the duration of interruptions in the operation of the compressor.
If it is about 40 minutes, everything is fine, you can use the refrigerator as usual.
When the compressor turns on too often or infrequently, you should try to adjust this moment using the relay settings. If this fails, you will most likely have to install a new thermostat.
Video: how to check the thermostat (thermostat) on the refrigerator
What is a thermostat and why is it needed
When the device ceases to function adequately, the symptoms may be as follows:
- the motor runs continuously, the refrigeration device does not turn off;
- a "snow coat" (deposits of ice and frost) is found on the walls of the chamber, the injection is too active, the circulation of freon is increased and the refrigerator freezes too much;
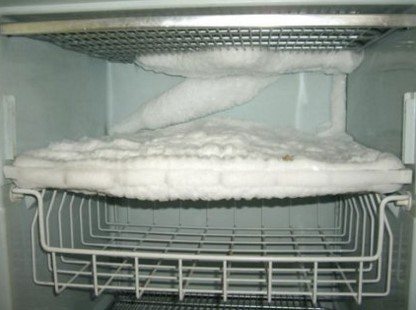

Snow coat: a sure sign of a problem
- it is warm in the refrigerating chamber, the more items you load inside, the worse the space is cooled.
- after shutdown, the motor does not start immediately (it keeps the temperature for a long time and does not restart).
To remedy the situation, you should turn off the device from the mains, perform a full defrost. The contents of the chambers should be removed, then turn on the refrigerator and switch the temperature in the regulator to the full maximum (minimum temperature). A thermometer should be placed inside the refrigerator (do not use liquid, electronic is best).If the thermostat is functioning, then as soon as the thermometer reads that you set, the refrigerator will turn off. If, after reaching the temperature, the motor continues to work and cool the chambers, then the thermostat is defective.
In conditions of constant adjustments, the temperature inside the chamber is constantly changing, the rate of these changes depends on the sensitivity level of the thermostat.
Temperature controllers for all refrigeration systems (including household appliances) are gauge-type devices. They function due to changes in filling pressure. The pressure changes due to temperature differences. Some modern refrigerators contain an electronic thermostat - a much more advanced device that allows you to more accurately record temperature changes and turn off / on the compressor relay.
Thermostats are mechanisms containing a lever system and a set of contacts through which they are included in the general wiring of the device.
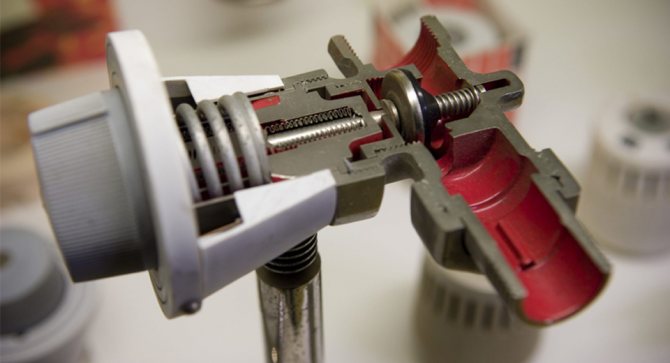
The temperature controller is based on the so-called bellows - an element sensitive to temperature changes, which, with the help of a spring, acts on the general electrical circuit. Thus, when the temperature changes, the bellows transmits a signal to the spring, the spring to the lever, the lever to the main mechanism, and the mechanism acts on the overall electronic system. Of course, the regulator also contains a special gasket that acts as an insulator of the internal components of the thermostat from the external environment (primarily from humidity). The regulator is also filled with a special liquid (chloromethyl) inside.
Refrigerator thermostat operation
The principle of operation of thermostats for outdated models of refrigerators and advanced, modern refrigerators remains the same. That is, any master can answer you that the essence itself has not changed both in the regulation itself and, in principle, in the device of thermostats.
But such a problem in insufficient cold can arise not only when replacing the thermostat, but during the operation of the refrigerator itself. Of course, the thermostat should be adjusted after the warranty period for your refrigerator.
The very adjustment of the refrigerator thermostat is laborious and time-consuming. This is explained by the fact that the work of the performed cycle between turning the thermostat on and off takes a certain time and the gradual stabilization of the temperature in the chamber is slow.
Why install an Omron E5CC thermostat on a muffle furnace
As you can see, the Omron E5CC thermostat is capable of controlling multiple operating functions of laboratory ovens. Its distinctive features are:
- 2Pid regulation.
- Availability of analog inputs.
- Small size.
- The ability to use the RS-485 interface.
- Fault signaling sensors.
- Working with thermocouples of different types.
- Simple instructions for setting up and managing.
- High-contrast LCD display with large-sized numerals visible from afar.
Any laboratory research or work with samples provides for the exact observance of temperature parameters. The use of Omron E5CC thermostats makes it possible to provide the necessary conditions for conducting experiments.
The manufacturer provides technical support for any type of device. Employees of more than 200 service centers around the world will help you quickly troubleshoot and replace the required parts.
Another bonus is the guarantee of a uniform price for devices in all countries.


For all questions regarding the operation and purchase of thermostats, please contact.
