When building private houses, the question often arises whether the additional installation of balconies makes sense. Be that as it may, but a house with a balcony has a more attractive view. Equipping it in a private house, we get not only a place where you can admire the appearance of the area and breathe fresh air, but also get the original design of your home.
Speaking of multi-storey buildings, many of them do not have such structures on the ground floor, and it will not be superfluous to get additional space. Based on this, let's talk about how to implement plans for its installation.
Features of fastening balcony slabs
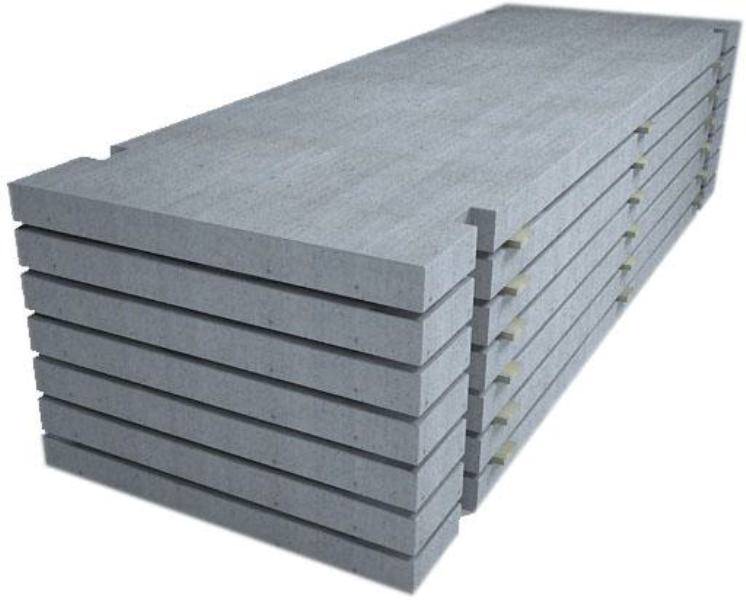
People ignorant of construction believe that the balcony slab is the protrusion of the floor slab. Far from it. In construction, a wide variety of methods for fixing a balcony slab are used:
- clamping or pinching in the structure of the outer wall of the building;
- the use of a cantilever floor slab;
- support on the consoles of columns or consoles of internal walls (in frame buildings);
- suspension of the balcony slab to the internal load-bearing transverse walls or to the ceiling;
- resting on attached reinforced concrete, steel or wooden structures.
In brick buildings, the strengthening of the balcony slab is carried out by the pinching method. Reinforced concrete overhead and underlay elements are bricked into the outer wall of the building, which form a niche for the balcony slab. The edge of the slab adjacent to the outer wall is necessarily thickened. In cases with brick houses, the entry of the balcony slab into the wall is quite large. The slab must be welded to the reinforced concrete elements using steel anchors.
In panel-type houses, the balcony slabs are based on reinforced concrete structures using ceilings. The strengthening of the balcony slab in frame buildings is carried out using beam technology. In this case, there is no load on the building wall, since the balcony slab rests on the columnar brackets.
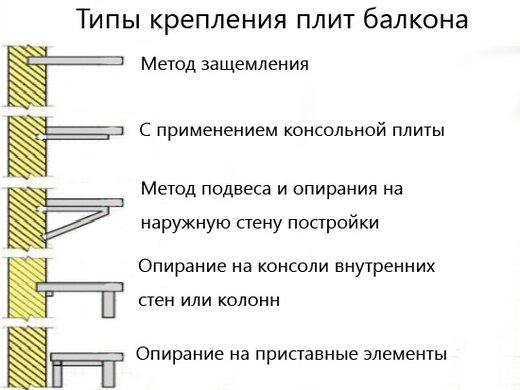
Mounting options for balcony slabs
Why not a solid slab?
It would seem, is it really impossible to make floor slabs immediately with a ledge under the balcony? After all, a one-piece product is always stronger. But this method will shorten the life of not only the balcony, but also the whole house. Corrosion of the reinforcement will penetrate deep into the slab, the overlap will lose its strength. This threatens an emergency and demolition of the house.
And if you pass the balcony slab through the wall?
It seems that the support area in this case will be larger. But building structures do not withstand long-term multidirectional loads. If the balcony slab is passed through the wall, then its inner edge will press against the wall, trying to lift it. This situation threatens with sudden catastrophic destruction.
How to paint a brick?
The simplest solution is to use the original brick wall. You just need to open it with paint or varnish, having previously cleaned it with a brush. After that, sand the surface with sandpaper. If the wall is uneven and with dents, it must be putty. Further, it remains to paint the wall or open it with varnish. Modern water-based paints have antifungal protection. In the same way, you can make the ceiling, taking a paint of a lighter tone for this, white is also suitable.
In what cases is the repair of the balcony slab required
There are several types of balcony slab repair:
Important: Remember, it is difficult for an ignorant person to determine how destroyed the balcony slab is.Defects should be assessed by professionals.
If cracks appear on the surface of the balcony slab, do not cover them with mortar. In this case, it is necessary to find out the degree of corrosive destruction of the reinforcement. The cracks can be very deep, which will not be noticeable from the outside. If minor damage turns out to be shallow, then minor and medium repairs can be done independently.
The need for overhaul of the balcony slab is visible to the naked eye. This is indicated by the destructive appearance and large cracks throughout the slab. Overhaul or emergency repairs to the balcony should only be carried out by professionals.
The following signs indicate the emergency state of the balcony and its slab:
- naked reinforcement;
- the appearance of deep cracks at the junction of the slab with the wall;
- destruction of concrete on top of the slab and its delamination from the bottom of the slab;
- collapse of slab fragments.
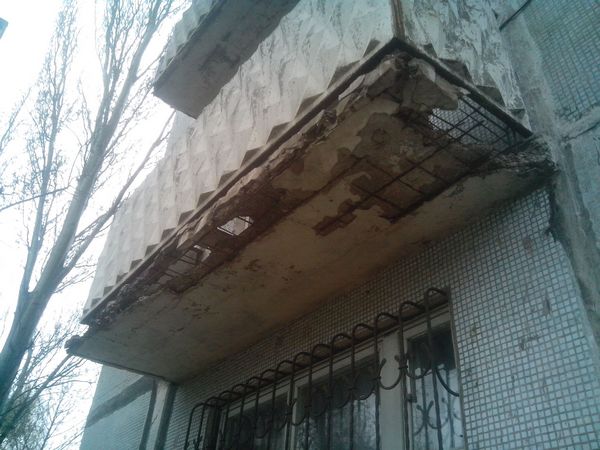

The balcony in this state urgently needs major repairs
In this case, to repair the emergency balcony, you will need more than one unit of special equipment and a team of qualified installers. Such a slab will most likely have to be broken out of the load-bearing wall.
From our article "The difference between a balcony and a loggia" you will learn about the design features of these two building elements.
And how you can beautifully arrange the exit to the balcony, we told on this page of the site.
Arrangement of balconies, loggias, bay windows in buildings with various structural systems.
Balconies:
This is an open area that is fenced off to a partial height.
Arrangement of balconies.
1) For longitudinal load-bearing walls:
- Balcony console slab
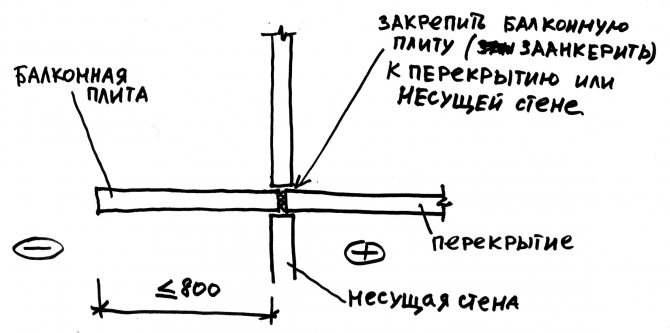

-Console release of floor slab
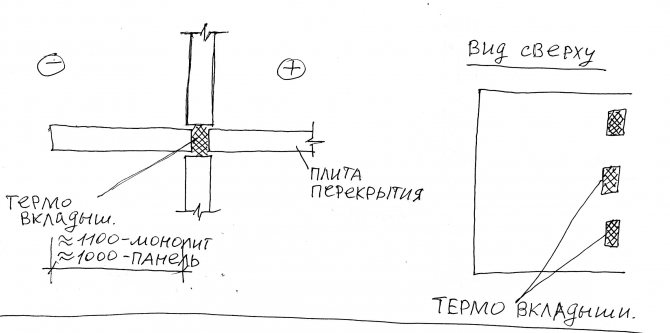

2) For transverse load-bearing walls. Frame walls:
Who is responsible for balconies renovation?
Not a single regulatory document or law clearly states: is the balcony part of the supporting structure or living area? In this regard, the question may arise as to whether the balcony is in an emergency state where to go and what to do? In theory, the balcony slab should be repaired by the management company, and the parapet, railings, and gratings should be repaired by the owner of the apartment. But some confusion in the legislation does not give an exact answer to this question. On this basis, disagreements often arise between homeowners and utilities.
Conclusion: Do not bring the balcony to an emergency state. Any search for the truth will not restore the balcony slab. To avoid accidents, repair the balcony slab with your own hands.
Tips for finding a way out in emergencies
If you notice signs of destruction of the balcony slab, you must inform the utility service about this fact in writing as soon as possible. The document is certified by a specialist of the housing office and registered in the corresponding journal. It makes sense to attach some photos of the collapsing balcony slab to the document. Your neighbors from below must definitely put their signatures in this document.
Then you can proceed as follows: restore the balcony slab yourself, but with guarantees of recalculation of the rent. Or wait patiently for the utilities to take over the repairs. If none of the options suits you, feel free to go to court.
How balconies are repaired
Moisture is the main cause of damage to balcony slabs. Penetrating into the slab, water is able to activate corrosion of the reinforcement. In old houses, the protection of concrete from moisture is reduced, water easily penetrates to the reinforcement. Corroded reinforcement loses its bearing capacity, expands and breaks down the concrete.
Restoring a balcony slab involves several working steps:
Remember that the thickness of the concrete screed must be twice the thickness of the reinforcing mesh, or even more.
In case of severe corrosion of the reinforcing cage, reinforcement of the balcony slab will be required - this is a larger-scale work:
- Rolled steel beams are installed on the sides of the balcony slab and are cantilevered to the wall.
- The mesh is welded to the beams.
- Further, the work described above on pouring concrete begins.
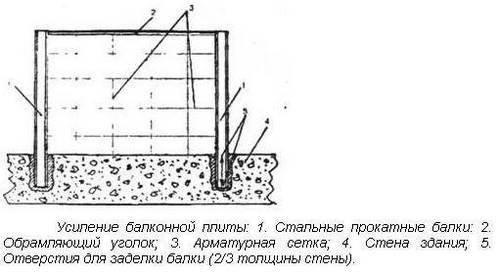

Balcony slab reinforcement scheme
When the reconstruction of the balcony slab is completed, it the surface needs to be waterproofed, which is mandatory if the balcony is open. For this, various waterproofing materials of a roll or coating type are suitable. In particular, Penetron penetrating waterproofing has proven itself well. It is applied to a pre-moistened surface in two layers, after which the surface must remain moistened for three days, and also mechanical influences and temperatures below 0 degrees are not allowed.
Errors when insulating a brick balcony
Experts believe that the most common mistake is the implementation of redevelopment without the consent of the state services. The technical passport for the apartment describes in detail each residential and non-residential space, including the balcony. Therefore, all alterations and transfers are coordinated with the BTI and the heating network.
Frameless glazing does not bring warmth into the room. Experts advise installing a 2-3-chamber double-glazed window on the balcony. The swing doors are easy to clean. The room can be ventilated and mosquito nets can be installed.
Removing the glazing onto the brackets will not increase the balcony space. This method will introduce a new problem. Snow will collect on the visor, and when it melts, it will drain inside. Rainwater will also get inside. This will lead to rapid wear of the materials.
Single-layer insulation will lead to freezing of the balcony. It is not enough to lay one layer of brick or foam block. It is necessary to insulate with special materials.
If the vapor barrier process is ignored, condensate collects in the off-season and in winter. Changes in temperature lead to the appearance of moisture on surfaces. The result is mold and rot. It is difficult to deal with such phenomena, therefore experts recommend equipping a vapor barrier layer.
Installation of balcony railings
Of course, the old fence may still be strong enough. But the overhaul of the balcony slab already implies the installation of a new enclosing structure. In addition, if in the future it is planned to glaze the balcony and its insulation, then it will not hurt to think over a high-quality basis in advance.
When arranging fences, welding is indispensable. Even a beginner can work on a compact inventory welding machine that works from the network. But there are two more options:
- invite a qualified welder;
- fix the balcony railing with anchors, in this case welding is not required.
The frame of the new fence is made of a rectangular shaped tube. This fence is easy to install and will have an attractive appearance. Next, a galvanized steel ebb is attached along the entire perimeter of the balcony slab. This will protect the edge of the slab from precipitation.
Do you know what kind of balcony railings are? Their possible options and materials for manufacturing are described in a separate article.
On the use of another popular type of waterproofing material on balconies and loggias, Aquastop waterproofing, information is available here.
And from this material you will learn how you can independently make a screed on the balcony and what is needed for this.
Outrigger balconies
Residents of city apartments with balconies have a unique opportunity not only to insulate and glaze this area, but also to increase the area of their housing. Now you can install a railing under the glazing with an extension. What does it mean?
When installing the frame of the fence, using a professional trick, you can take out the glazing about 30 cm behind the parapet.If you consider that this action is performed on three sides of the balcony slab, then the increase in space will be significant. This option is especially ideal for owners of very small balconies.
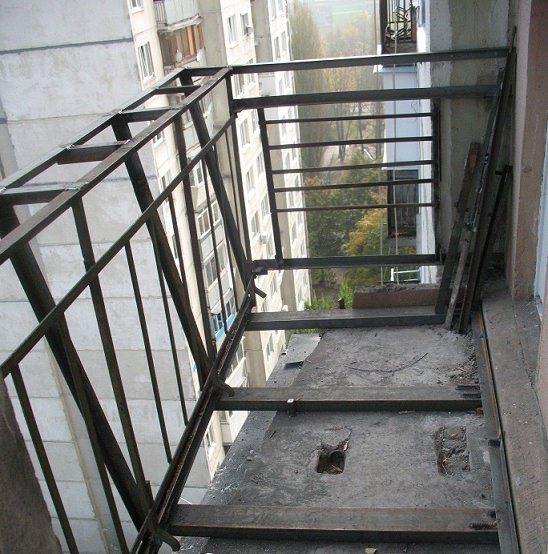

External construction of balcony glazing
Do-it-yourself installation and installation of a balcony
Some residential buildings do not have balconies on the first or even second floors. These apartments have a limited area. However, this problem can be solved if the goal is to attach a loggia to the room. This will significantly expand the space and equip additional square meters to your liking. Of course, assembling a balcony with your own hands is a laborious and costly process. However, with the correct preparation of the project, it is not so difficult to complete it. In most cases, you can do the extension of the balcony yourself, subject to obtaining the appropriate permits.
This is a very important issue, since any redevelopment must be carried out in accordance with the law. If the owners of apartments on the first or second floor begin the process of unauthorized erection of new structures, they will most likely have problems with the building authorities. As a result, they will simply be given a conclusion on the demolition of the constructed balcony.
Preparation of the necessary documents
The most reliable way is to first consult with familiar architects and lawyers. They will tell you who is the best to contact in order to quickly obtain a building permit from the appropriate authority. Most likely, you will need the following list of documents:
1. Papers confirming that you are the owner of the apartment or ownership.
- Information from the Bureau of Technical Inventory containing the floor plan.
- Consent of housing and communal services.
- It is also necessary to collect the signatures of neighbors, thereby confirming that the rest of the tenants are not against the addition of a loggia.
- Redesign drawing or diagram.
- You also need to coordinate your actions with the utilities.
- Obtain permission from the Office of Architecture in your city.
- Submit an application to the district administration.
Types of balcony designs
The supporting plate of the attached loggia can be attached to the wall of the building in different ways.
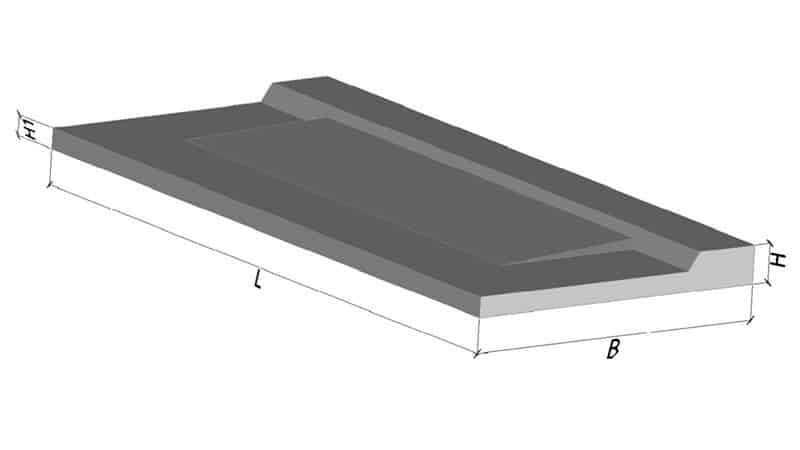

Cantilever plate appearance
In this regard, the following options for the device of architectural elements are distinguished:
- Balconies with a cantilever clamped slab, which in one part enters the wall, as if "jammed" in it. This is how most balconies are built in standard high-rise buildings.
- With a plate on cantilever blocks. They are inserted into the structure of the wall. Such structures are used for the addition of balconies in private houses.
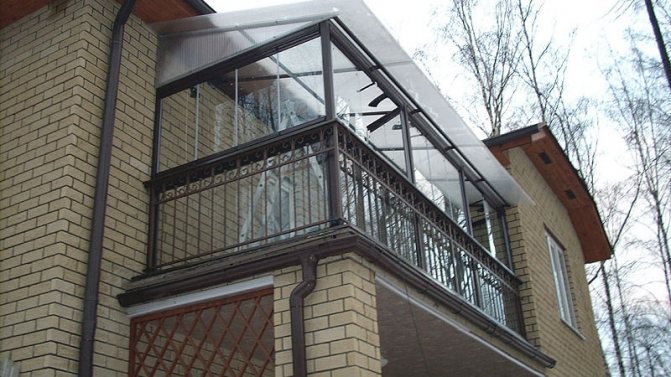

Balcony with supporting structure on cantilever blocks
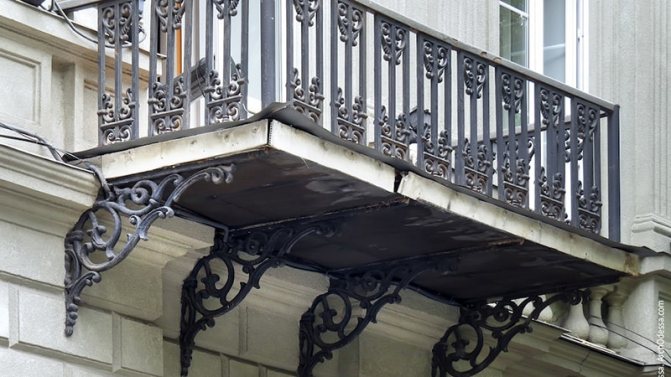

Support of the load-bearing wall of the balcony on the brackets
Run device for floor slabs
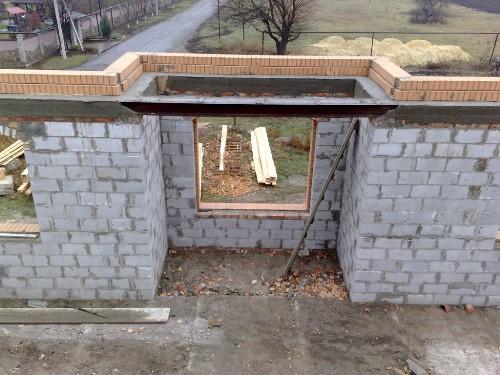

Since from the inside, the balcony is an extension of the living space of the second floor, it breaks the load-bearing outer wall to a length of 3050 mm, as a result of which it turns out that there is no support for the floor slab on the second floor. To fill the gap in the wall, a purlin is made - a large load-bearing lintel.
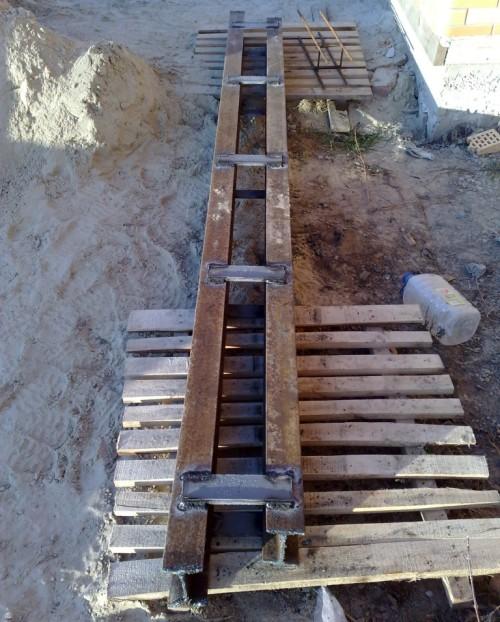

You can make a run by connecting two I-beams with a height of 160 mm. They are connected to each other by electric welding.
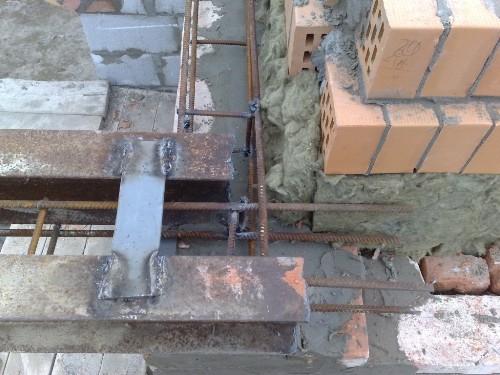

In order not to break the reinforced belt along the perimeter of the building during installation, the I-beams have different lengths. To strengthen the run, a reinforcing cage made of ribbed rods with a diameter of 12 mm is installed in its middle, and a formwork is attached to the I-beams from below, into which concrete grade 200 is poured. Concrete must be poured into the run in parallel with the pouring of the main reinforced concrete belt.
Such a girder is smaller in comparison with a reinforced concrete one.Its height is only 160 mm, while the height of the reinforced concrete girder would be 300-400 mm. It depends on the height whether the run will protrude from the wall in the room and how much. If extra protrusions are not included in your plans, it is better to replace the girder with a double-shelf girder - the same girder, only with shelves on the sides, on which the floor rests.
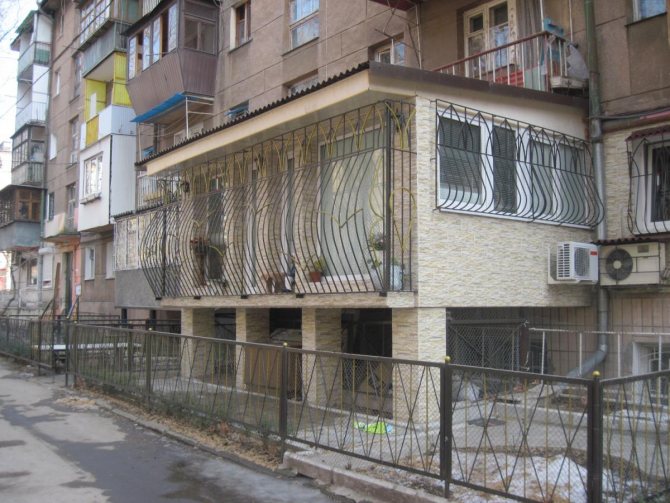
Installation of a loggia on the first floor
The problem of the lack of additional space is relevant in most cases for owners of apartments on the lower floors. Often, installing a balcony with your own hands is just a necessity.
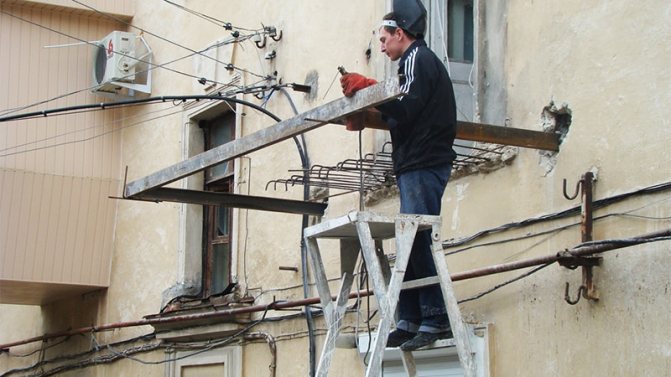

Self-installation of the balcony
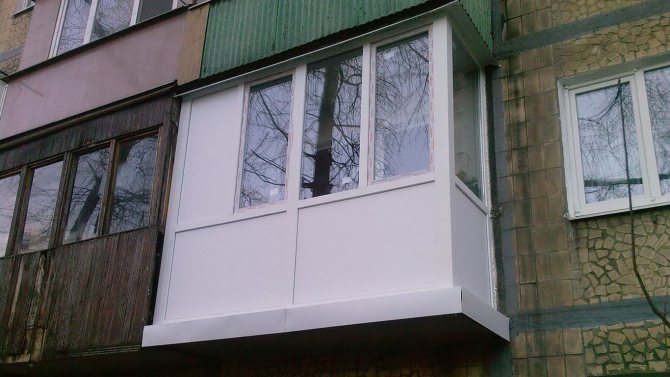
In this case, two types of extensions are used - suspended and attached structures.
Suspended balcony structure
To install such a balcony on the first floor, you will need a metal frame, which will be fixed on the wall of the house. This frame is made from corners of a certain size. At the base will be products 60X60 mm, for the railing, corners of 45X45 mm will be required. In this case, an isosceles right-angled triangle should turn out at the base.
After completing the welding process, you need to screw the base to the wall using anchor bolts. Reinforcement should be attached from above to the protrusions of the base. This metal frame will become the basis for the loggia floor. Then they attach the fence, dismantle the window and equip the doorway in the wall. When the base of the suspended balcony is ready, proceed to the construction of the floor. This will require wooden logs. It is better to insulate the floor immediately, and then lay out a decorative coating. A sheet of metal should also be welded from below for greater strength. Profiled sheets are suitable for exterior decoration. The next stage is glazing. This process is no different from installing windows on conventional balconies.
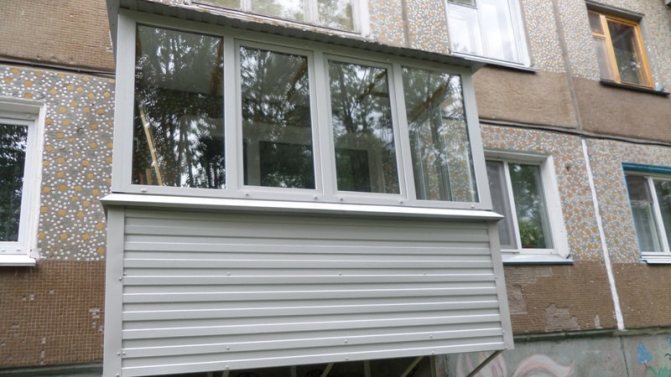

Standard balcony on the first floor
If it is necessary to increase the area of the extension, a balcony structure with a take-out is installed. In this case, you need to take into account the appearance of the future loggia. Therefore, the appropriate design or finishing of the support frame will be useful.
Attached balconies
Most often, do-it-yourself installation of a loggia is carried out using an attached type of construction. An extension is made to the facade, and the entire structure of the balcony is supported by a foundation.
Attached structures have their advantages: they allow a large outreach from the wall and allow you to increase the area of the loggia.
Work is being carried out from the foundation. First, markup is applied. It is important to avoid mistakes, check all parameters with the diagonals. After that, they dig a hole under the foundation and reinforce the basic blocks of the base in it. It must be borne in mind that the depth of the pit will be greater than the depth of freezing of the earth. In height, the foundation of the balcony and the building itself must be arranged at the same level. On the external cladding, the foundations of the superstructure and the house should also be in harmony. It is necessary to maintain the unity of style.
Then the walls of the loggia are made with brickwork. In height, it should coincide with the balcony board of the house. The ideal thickness is 250 mm. The brickwork itself adjoins the wall as closely as possible.
The second floor balcony slab can form the base of the roof. In the event that the extension is much larger in size, it is necessary to mount a separate roof.
After that, the entrance is cut through, the balcony block is installed, the room is insulated. When decorating an opening, do not forget that the balcony door always opens into the room.
Preparation of a brick balcony for the installation of insulation
Any space before work is first freed from things. They dismantle the shelves and disassemble the cladding of the brick balcony. The sequence of preparatory work:
- Strengthening the parapet. If a metal fence is installed on the balcony, it is laid with bricks or blocks. The thickness is kept at the level of 10 cm. If brickwork is already laid out on the balcony, the material and seams are checked for strength.If necessary, dismantle and clear the space on the balcony.
- Reinforced concrete floors are cleared of debris. Carefully inspect for chips and cracks. Damage is moistened and putty.
- They carefully plan the arrangement of a brick balcony. If necessary, lay the back wall with a brick. The opening is ennobled with a window block made of wood or metal-plastic. If the balcony was previously glazed, the structure is checked for accident rate. An audit is carried out and sagging is eliminated.
- Along the perimeter of the window block, the gaps are blown out with polyurethane foam so that there are no gaps left. After the material has completely dried (usually 12-24 hours), the excess is cut off with a sharp clerical knife.
- They remove construction debris and thoroughly remove dust from all surfaces with a vacuum cleaner. The ceiling, floor and walls are primed. The surfaces are now ready for further thermal insulation work.
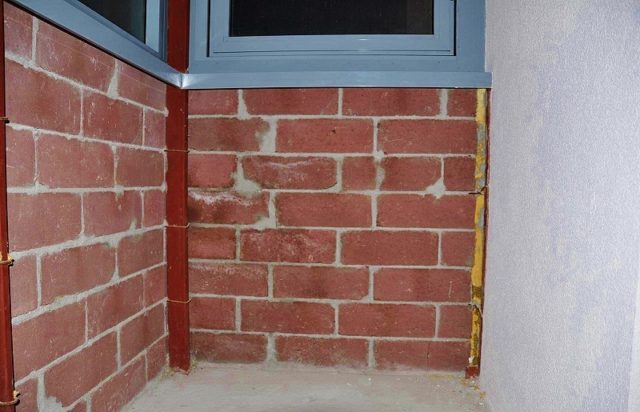

The ceiling, walls and floor are thoroughly cleaned of debris and dust using a broom and a vacuum cleaner
After completing the preliminary work on clearing the premises, measurements are made and the necessary materials are calculated. To insulate a brick balcony, the following tools are required:
- level;
- wooden beams or metal profiles for lathing;
- polyurethane foam or glue for tile insulation;
- self-tapping screws;
- screwdriver;
- grinder or saw;
- moisture-repellent deep penetration primer or bituminous mastic for waterproofing;
- if necessary, waterproofing film and vapor barrier;
- finishing cladding.
External and internal finishing
It is very important to ensure that your new loggia is protected from the harmful effects of moisture. The waterproofing process can take place using different materials and technologies. For example, balconies are pasted over with roofing material, a coating based on liquid rubber, polymers and bitumen is used. The walls are primed and impregnated with special water-repellent compounds. During waterproofing work, you should also think about installing an external cornice.
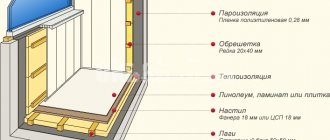
If the attached balcony is planned to be turned into a living room over time, it is necessary to insulate it well. In some cases, complete insulation is advisable, including, in addition to the walls, the floor and ceiling. To do this, a frame of metal or wood is installed, a layer of waterproofing material is laid on top, then a heater, on which a vapor barrier is then applied in the form of foam or polyethylene. Balconies are insulated mainly with polystyrene, mineral wool plates or penoplex.
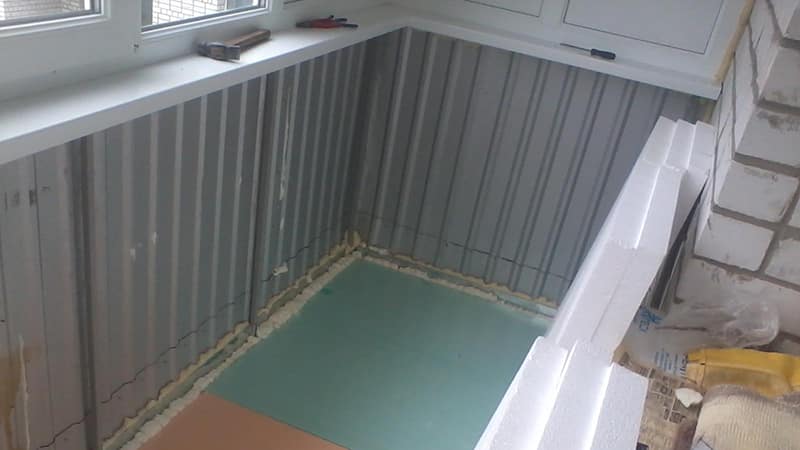

Thermal insulation of the balcony with foam
These methods have some differences in properties and prices, however, in general, all of them can reliably protect the extension from cold and condensation on the walls.
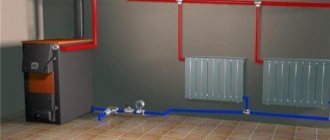
It is advisable to provide a heating system on your balcony. As a rule, having decided to build and equip a balcony with their own hands, most people want to make something original and functional out of a new room in an apartment. It can even be a greenhouse or a small garden on the loggia. To prevent capricious plants from dying, a special temperature regime must be observed. Therefore, heating on the balcony will not be superfluous.
Today, underfloor heating technology has been successfully used for a long time. If you install such a system on the loggia, you can safely sleep in such a room, even in the winter cold.
When making out the exit to the balcony, do not forget to think in advance about the place to which you will move the heating radiators.
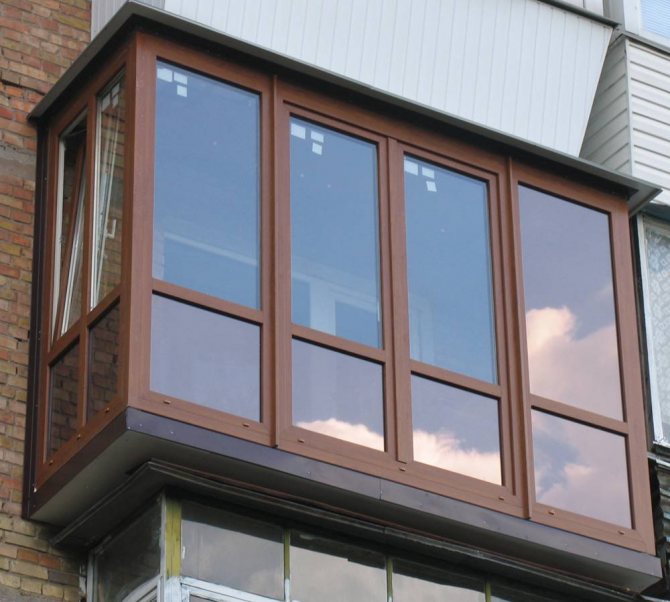
The next step in arranging a homemade loggia is its glazing. The choice of window systems is wide enough - from wood to sandwich panels. Practical plastic windows are in good demand. Some people choose original frameless glazing for their balcony. Glasses can also be purchased in all varieties. Today, both ordinary glass and tinted ones are used. Stained glass also remains in trend. It can increasingly be seen not only in offices, but also in residential premises.The installation of such a window leaf provides the owners with a stunning view from the balcony. During the glazing procedure of the loggia, it is useful to take care of good sound insulation. This should be taken into account when purchasing double-glazed windows.
At the end comes the turn of the interior cladding of the extension. A wide variety of materials are used for covering the balcony. Their choice is determined by the personal preferences of the owner, his financial capabilities and the design of the planned room.
The ceiling can be finished with clapboard, suspended or even whitewashed. Today, many people prefer to sheathe it with sheets of drywall. Then such a ceiling can be painted or wood panels can be added to it.
The choice is unlimited for wall decoration. As a rule, these are standard plastic panels, siding, lining. Many people cover the walls with thick vinyl wallpaper.
Tile, laminate and carpet are suitable for balcony flooring. In this case, you can choose not only ceramic tiles, but also porcelain stoneware. It is resistant to low temperatures, does not crack even when moisture gets on its surface, since it has a dense non-porous structure. However, it is more advisable to choose such a coating for open non-glazed balconies.
Finally, with the interior cladding finished, you can move on to furnish and decorate your seating area. It is important to think over the design of the room in advance and arrange all the details taking into account the chosen style.
The construction of the balcony can be completed within one month. However, this is the minimum time required to carry out such work. In general, you can install a loggia or balcony on your own. An insulated room with high-quality waterproofing and glazing can become a cozy corner for rest and sleep, a work room or perform other useful functions in the house.
Balcony wall construction
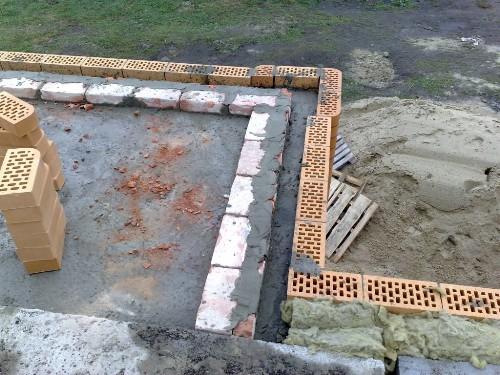

After pouring the slab, you can start building the walls of the balcony. Since the slab is located below the floor, one row of masonry is laid out on it. The masonry can be made of backing bricks, but in this case the cold will penetrate into the room, since brick is a poor insulation. It can be replaced with foam or aerated concrete, shell rock or other solid insulation.
The distance between the front and backing masonry is filled with mineral wool. Insulation layer thickness - 100 mm. For the reliability of the balcony wall, it is better to insulate with mineral wool twice: inside and on the inner surface between the wall and the plasterboard sheathing.
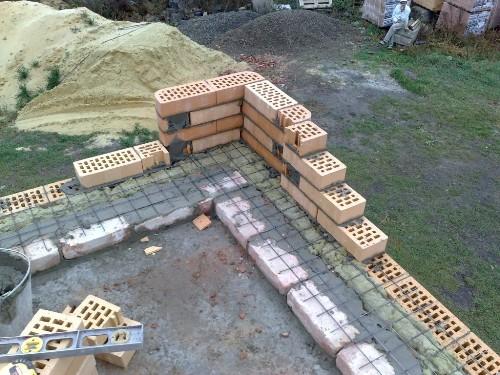

For bandaging the backing and front masonry, a masonry mesh with a cell size of 50x50 made of wire 3 mm thick is used. The pilasters are tied to the backing masonry using a wide mesh, which is laid at intervals in 8 rows of the front masonry. Every 4 rows of the front masonry, the pilaster is tied only with the front one.
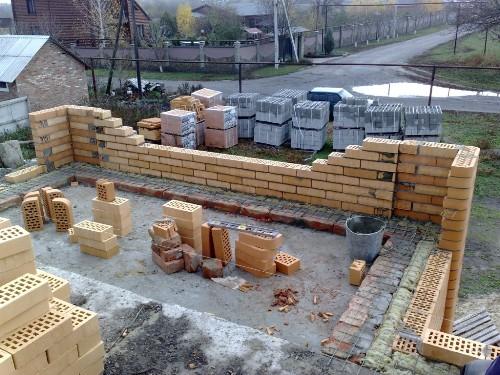

The sequence of wall construction is as follows. After 8 rows of front masonry, the space between the masonry is filled with insulation (mineral wool).
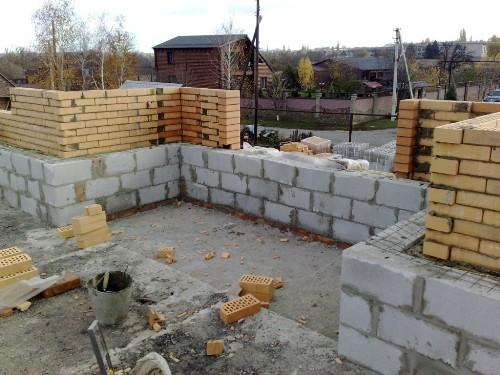

Then 3 rows of backing are built from blocks with dimensions of 180x180x390 mm. The clutches are tied together with a net, and the process is repeated anew.
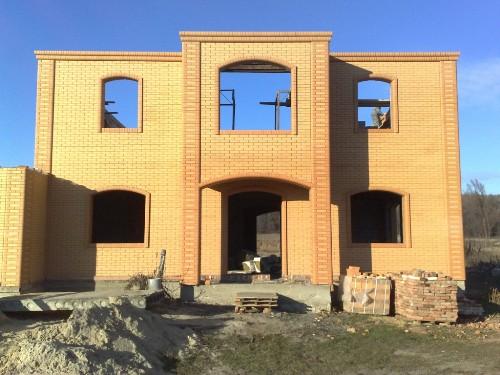

The balcony window, like the windows and the entrance doors of the house, is arched. Its dimensions are 1880x1872 mm, the radius of the truncated arch is approximately equal to the radius of the arch under the balcony. Around the edges of the window, a frame is laid out of dark brick with a rounded corner, from which the columns were built. An arch is drawn from it.
A dark brick cornice with a rounded corner is laid out along the upper row of walls. The cornice will be double, common to the whole house.
The relevance of a balcony in a private house
Even at the design stage of the house, it is advisable to decide whether you need a balcony, and if so, how much. Most often, balconies are loved by city dwellers who are not yet accustomed to their own garden. After all, the advantages of a balcony are undeniable:
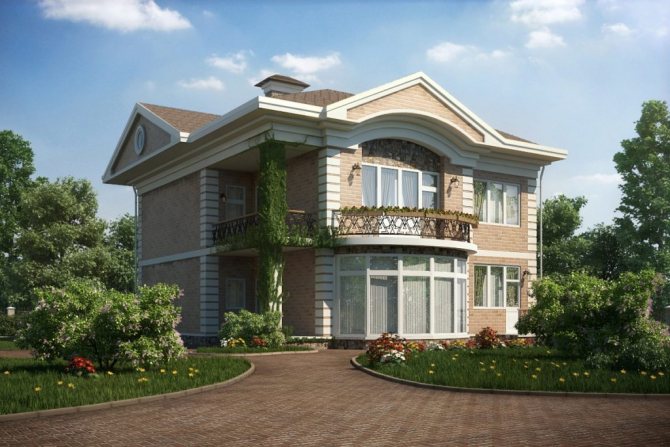

- aesthetics - a house with terraces and loggias looks much more spectacular;
- convenience - those who like to smoke before going to bed will definitely appreciate going under the open sky;
- functionality - a balcony can become a roof for a veranda or a porch under it;
- additional space - for a small plot it is much more profitable to make a wide balcony, under which you can arrange a flower garden.
But there are many disadvantages of the balcony in a private house. So, for morning coffee, it is much more convenient to go out onto the terrace, and not go up to the second floor back to the room. Gatherings with friends are also transferred to the gazebo, making the balcony an exclusively decorative part of the facade. And the financial side of the issue does not speak in favor of balconies - such a house will cost much more.
Which balcony design to choose?
Having decided on the construction of a balcony, it is worth considering well its design and location. It can be a cantilever (hanging in the air), an attached or a balcony located in the attic, resting on the walls of the house (options 1, 2 and 3 in the photo). Constructive solutions differ in the way of fixing the balcony slabs:
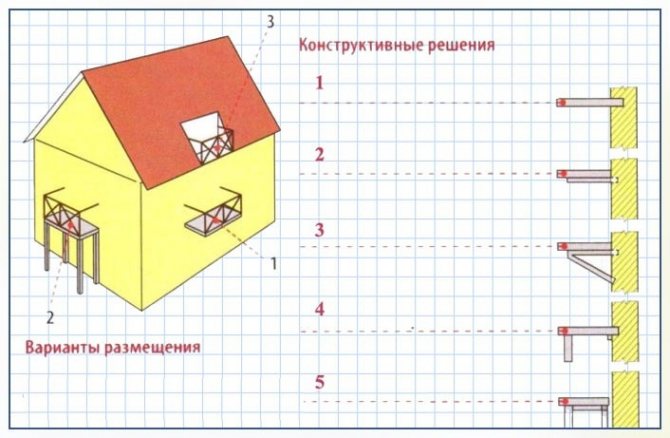

- A slab pinched in the wall - suitable for concrete and brick houses, but contraindicated for buildings made of aerated concrete due to its weight.
- Slab resting on beams clamped in the wall - suitable for any house, depending on the material chosen.
- Slab resting on brackets - triangular supports can be attached to an already finished building, and a variety of options will allow the balcony to fit into any design.
- A slab with a support only at one end is a variant of a slab cantilevered in the wall, but, thanks to additional supports, a balcony can be made of any width and even for houses from aerated concrete.
- A balcony on four pillars is, in fact, a high extension on its own foundation and independent of the rest of the building, which can be erected after the completion of the construction of the house.
Cantilever-clamped slab is used only for balconies up to 1 meter wide. The balcony on the beams can be slightly wider - up to 1.2 m, and on the brackets, a width of 1.5 m is permissible. But using the supports, you can not limit yourself and build a whole terrace.
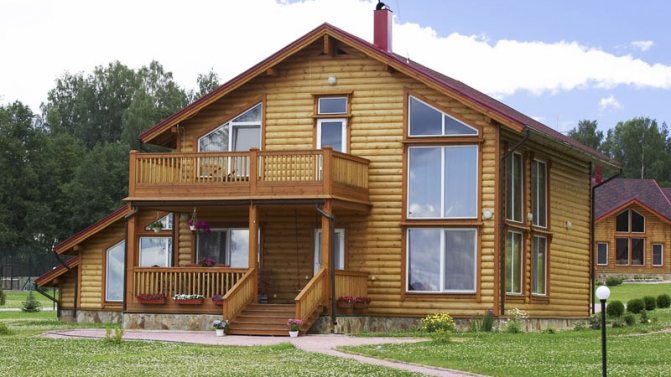

So that a table and chairs can be comfortably placed on the balcony, its width cannot be less than one and a half meters.
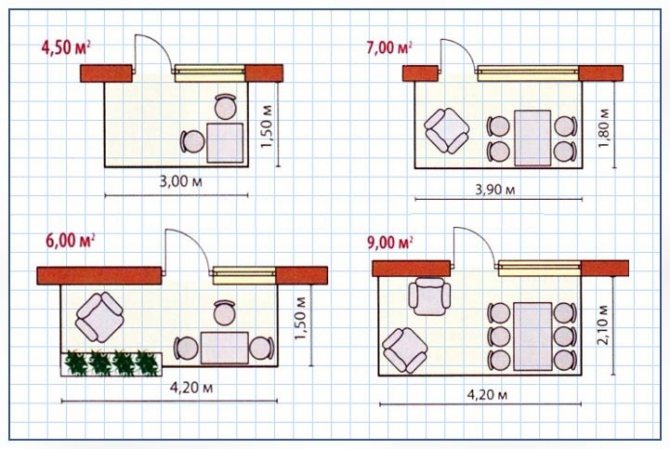

In this case, it is advisable to immediately install a visor that will protect from the sun and rain. It should protrude beyond the perimeter of the balcony platform by at least 10 cm in front and 20 cm on the sides. If this is the windward side, then the visor must be at least doubled to protect it from slanting rain.
A garden swing with an awning roof will come in handy on a balcony without a visor. It is desirable to choose folding models with coasters for drinks. In winter, the swing just folds up and stows away into the house, and in summer it is a great place to relax, where you can even sleep.
How to choose the right insulation
Modern manufacturers provide a wide selection of insulation materials.
There are three groups:
- Sprayed - ecowool and penoizol. Innovative and effective insulation. A pneumatic installation is used for application. The disadvantage is the high cost and the need for special equipment.
- Soft - basalt and glass wool. The most popular insulation. During installation, small fragments of fiber fall off. Produced in rolls and slabs. The insulation has different thicknesses and densities. Additionally, a waterproofing layer is required.
- Rigid - polystyrene, polyurethane foam, expanded polystyrene and improved modification of Penoplex. Insulation is produced in plates of different thicknesses and densities. The material cuts off cold air well in winter and warm air in summer. The insulation has a high density and thermal conductivity.
Mounting the balcony on cantilever beams with supports
If professional calculations are needed to install a balcony slab on beams, then using additional supports, you can confidently build a balcony with your own hands.Stages of building a wooden balcony:
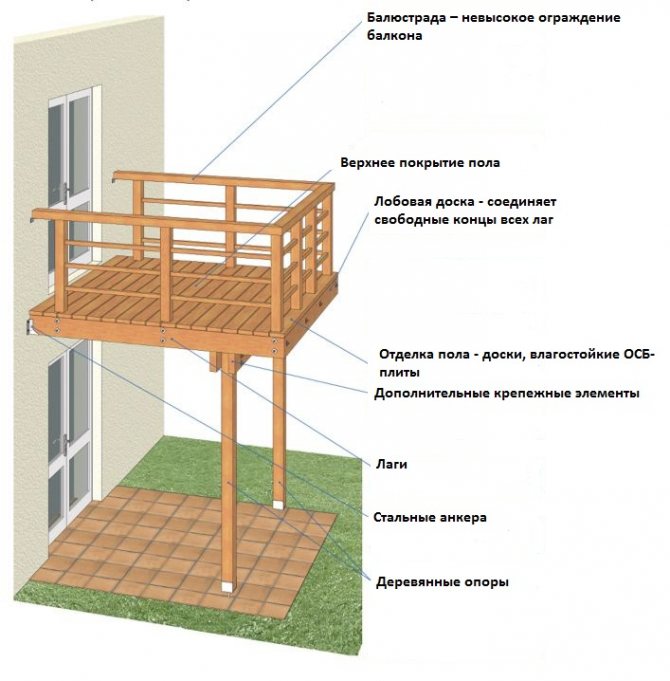

- The choice of supports. This can be both wooden pillars with a cross section of 14x14 cm, and concrete supports. The foundation for the supports can be shared with the house or separate. The first option is suitable for arranging a terrace under a balcony. In the latter case, the depth of the foundation should be below freezing of the soil. The tree must be resistant to decay - larch and oak are great for supports.
- Digging or drilling holes. They should be at least 10 cm larger than the future posts.
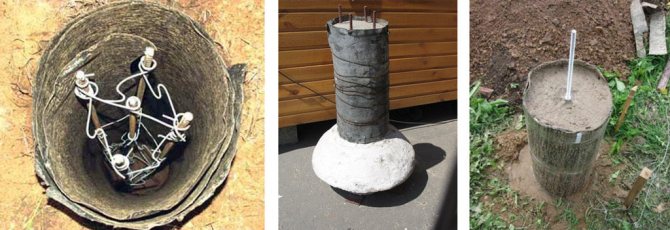
- Wooden poles are treated with antiseptics, and the lower part is covered with bitumen so that the waterproofing of the ground part is at a height of 15 cm. A cushion of sand and gravel is placed under the wooden support, and the lower part is concreted. After the solution has hardened, the pillars are covered with soil and rammed.
- Concrete or brick supports require a full-fledged columnar foundation. To prevent the heavy balcony from "going" into the ground, the lower part of the foundation is made 10 cm wider than the upper one, for which the formwork is installed in the form of a truncated cone.

- Longitudinal beams with a cross section of at least 5x25 cm are laid on the supports. The bars are placed on the edge and attached to wooden supports with self-tapping screws, and to brick or concrete supports - with dowels. Between themselves, the beams can be overlaid with metal brackets or clamps.
- After that, cantilever beams are inserted into the previously left holes with a step of 0.7-2 m, which rest on the longitudinal beams. The tree is treated with antiseptics, and the ends that enter the wall are wrapped in roofing material.

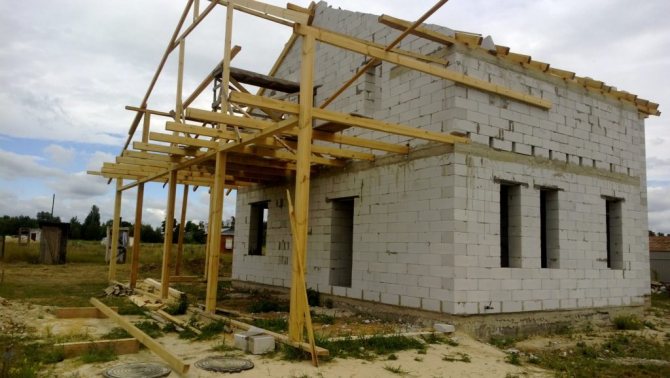
The walls of a wooden house are sealed with a membrane wind-waterproofing. The holes in the brick wall are filled with concrete, and the joints must be sealed with a sealant.

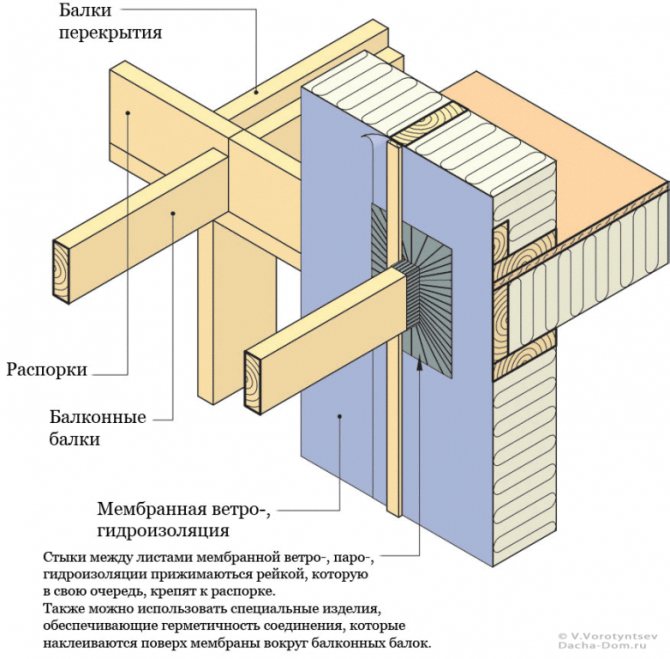
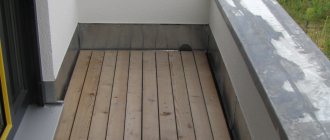
- On the cantilever beams, lathing beams with a section of 5x10 cm are laid, and a wooden flooring is placed on top. It is advisable to choose boards that are resistant to moisture or to cover them annually with waterproof paint or varnish.
The balcony fence is made at least 1.1 m high. If it is planned to be solid, a gap must be left between the fence and the balcony slab for water drainage. Even at the stage of erecting the supports, the installation of the balcony should be planned with a slope of 2% towards the drain - otherwise the water will linger on the floor.
The principle of constructing a concrete balcony is the same, only channels are used instead of wooden beams, and a small groove should be made along the entire edge of the bottom side of the slab - a “drip”. It protects the walls of the house from water droplets that can drain from the balcony and reach the junction of the balcony with the house. Without such a groove, any waterproofing will be ineffective, and in case of heavy oblique rain, the entry points of the channels into the wall will get wet.
Formwork for the device of the reinforced concrete belt of the balcony
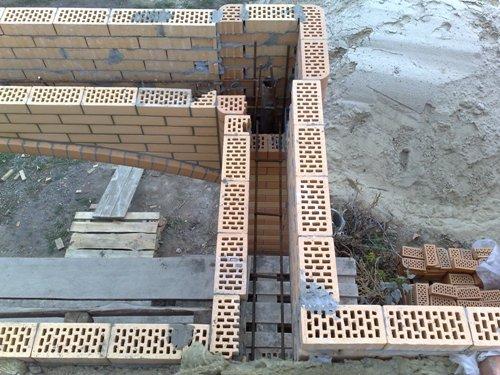

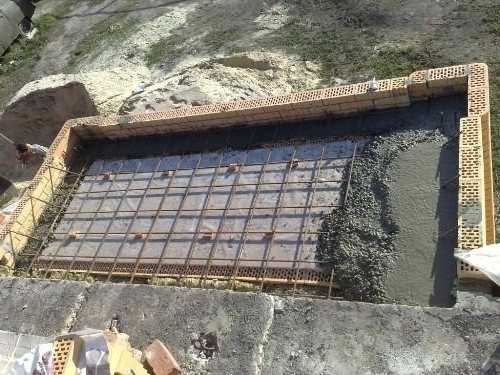
Next, the formwork is placed on the sides of the balcony between the walls of the front masonry, where there are no arches, into which the reinforcing mesh will fit and the concrete will be poured. The mesh is knitted with a knitting wire made of rods with a diameter of 12 mm; for transverse reinforcement, rods of 10 mm are selected.
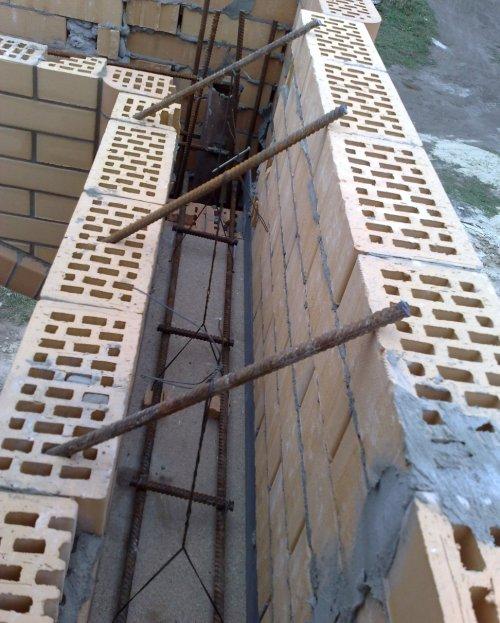

The formwork, cut from chipboard, is fixed from below with a knitting wire, which is tied from above to pieces of reinforcement.
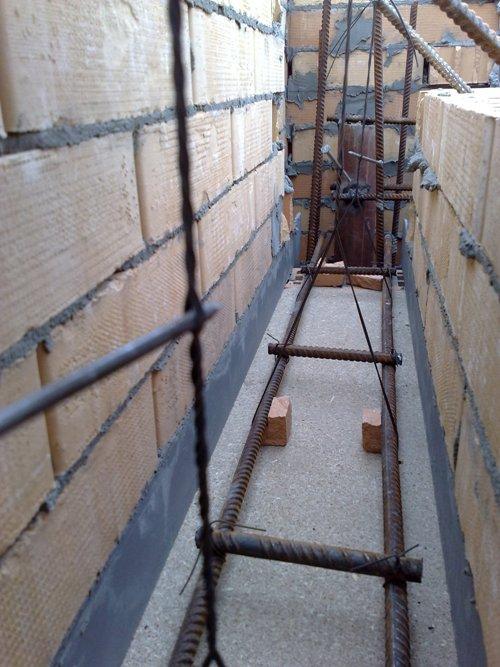

For better fixation, the wire is tightened with a nail, then the formwork will firmly press against the masonry, and will not deform under the weight of the poured concrete.
The reinforcement mesh is laid in the formwork, resting on fragments of bricks, so that when concrete is poured it is completely in the solution, without contacting the bottom and not looking out, which can cause rust on the metal.
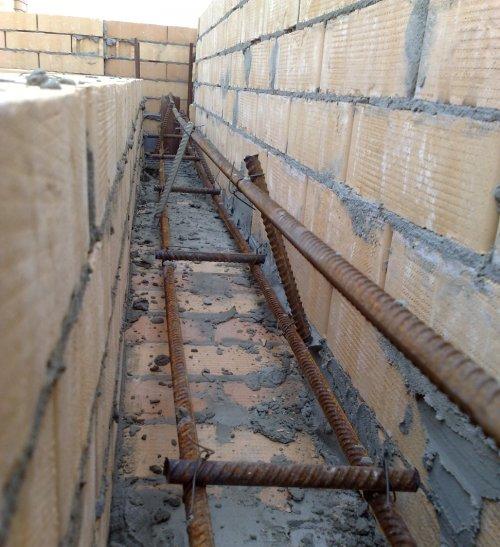

To create a frame over the arch, three veins of the “monastery tightening” reinforcement are tied with 10 mm thick reinforcement. The result should be a triangular frame.
Features of the addition of a balcony on supports to the finished house
If the house is built and is already inhabited, and you really need a balcony, you can simply attach it! It can be erected both on a strip foundation and on a columnar foundation.The depth of the foundation is standard - below the freezing of the soil.
Expansion joint device or rigid connection?
The lighter foundation adjacent to the main building cannot be connected "tightly", but only with the help of an expansion joint. Otherwise, with inevitable shrinkage, one of the foundations will inevitably be destroyed.
To do this, after installing the formwork close to the old foundation, any elastic material is laid - hard mineral wool or expanded polystyrene with a thickness of 1-2 cm and concrete is poured. After the new foundation has solidified, the joint is filled with an elastic sealant.
At the same time, if both foundations are structurally identical, and the soil is stable and not subject to seasonal heaving, the foundations can be connected rigidly with the help of reinforcing brushes driven into the old concrete.
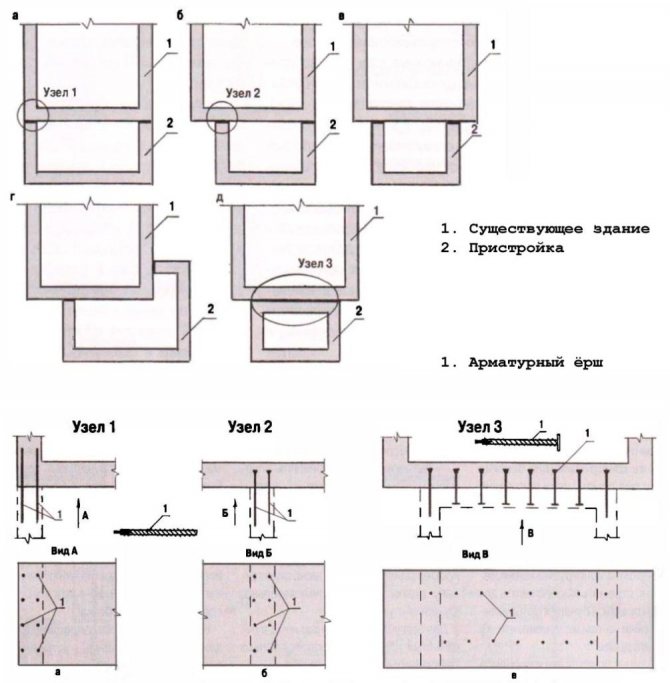

In this case, the formwork is placed close to the building and is filled with a cement-sand mixture.
If there is no confidence in the stability of the soil, it is rational to apply a compromise option that combines an elastic and a rigid connection. For this, steel brushes are fixed in the foundation with a layer of glue, which will provide the necessary mobility without destroying the concrete. Building sealant is applied to the entire surface, and the free ends of the ruffs are closed with plastic sleeves.
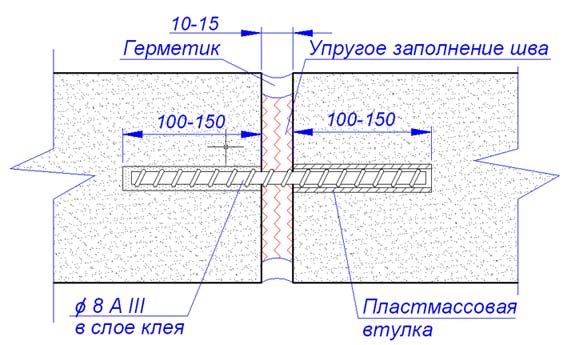

How to connect a balcony to a wall?
How to make an "attached" balloon? There are two mounting methods:
In the first case, the principle of construction practically does not differ from a balcony on cantilever beams. Unless these beams do not rest on the walls of the house, but on a support board. Such a balcony will not be able to withstand heavy loads, therefore it is not recommended to install furniture on it.
If you use slopes - wooden brackets with an additional transverse bar fixed to them, the reliability of the structure increases. The tree itself is quite plastic, so there is no need to worry about different shrinkage and deformation of the walls.
If you need a concrete balcony, you cannot do without a second row of supports.
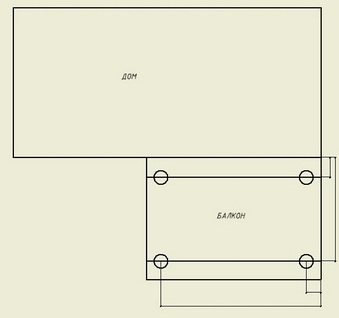

In order not to rent heavy equipment for lifting the finished concrete slab, you can make a formwork and pour the slab yourself:
- Metal corners of 100 mm are laid on the supports - for internal and external brickwork.
- The laying is done up to the level of the future balcony slab. It is important not to forget - so that water does not flow into the room, the floor on the balcony should be slightly lower.
- A reinforcing mesh is knitted between the masonry, and chipboard is attached from below - this will be the formwork of the outer belt.
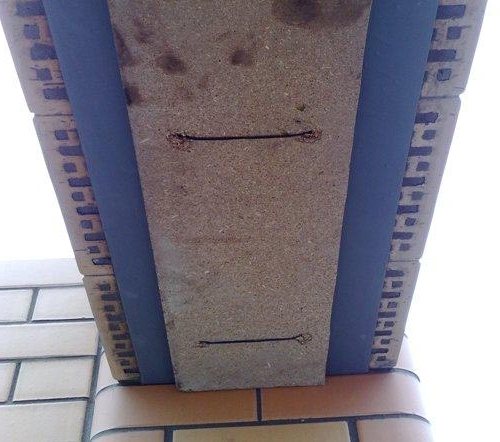

The formwork for the slab is also made of chipboard, from the lower side it is supported by beams, and the upper side is covered with a film to protect it from moisture.
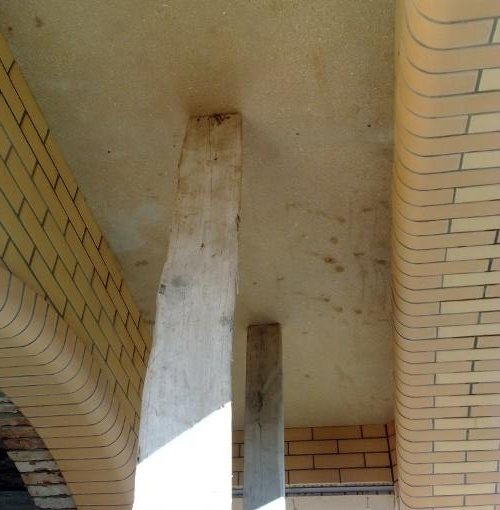

First, the outer belt is poured and only after it is filled - the plate. To prevent the balcony from "moving away", ruffs fixed with elastic glue are driven into the wall, the wall itself is covered with insulation, and the free ends of the ruffs in plastic sleeves are poured together with the stove.

Do not make a solid wall on an open balcony - rain and melt water will stagnate, it will have to be removed manually each time. Wrought iron railings look much more impressive.
If you want to make a small hinged balcony, the video describes the basic principles of reinforcing mesh construction and its attachment to the wall:
Truncated arch between columns
As noted above, there will be a truncated arch above the aisle between the columns. The windows and entrance doors of the house also have arches, which corresponds to a single stylistic solution. The radius of all arches should be the same, the only difference is in height - this will create a single facade pattern.
Monastic puff between the columns
The difficulty lies in the fact that a truncated arch resting on columns, the distance between which is 3 m, creates significant loads on the supports, not only vertical, but also lateral. Despite the fact that the columns are quite strong with a reinforced concrete core inside, lateral loads will spread them apart and bend. The entire arch will be about 350 kg, 175 kg for each column. The supports will withstand such a load in the vertical direction without problems, but additional measures are needed to protect against deformation caused by lateral loads. For this, the so-called "monastery tightening" is used between the columns. This additional structure, which resembles a large brace, will pull the columns together in the opposite direction to the loads from the arch. Also, the tightening will take on the weight of the superior building.
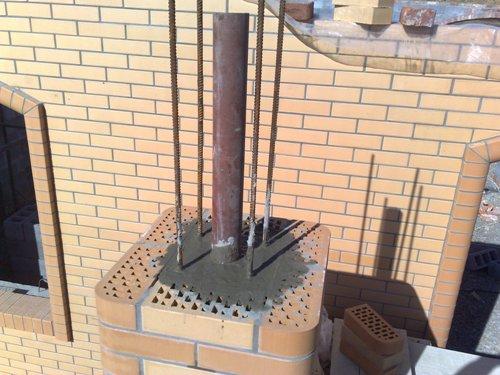

When the height of the columns reaches the level of the arch placement, a mortgage in the form of a thick-walled pipe is inserted into them and poured with concrete of grade 200. The pipe should go inside the column by 250-300 mm, its outer part should be 200-250 mm high.
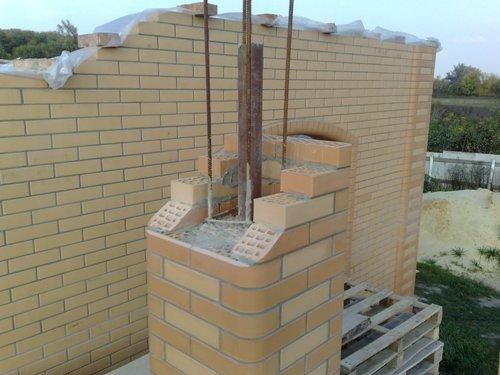

On the top of the columns, heels are built - supports for the future arch. A pre-prepared wooden template for a truncated arch is installed on the finished heels - it was circling. You can read about how to make it in the article on making arches.
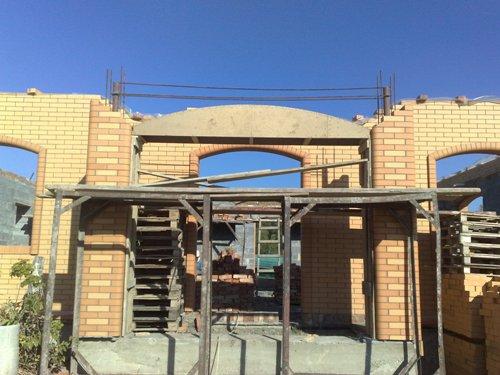

Pipes protruding from the columns - embedded for "monastery tightening" - are interconnected by three rods of reinforcement using electric welding.
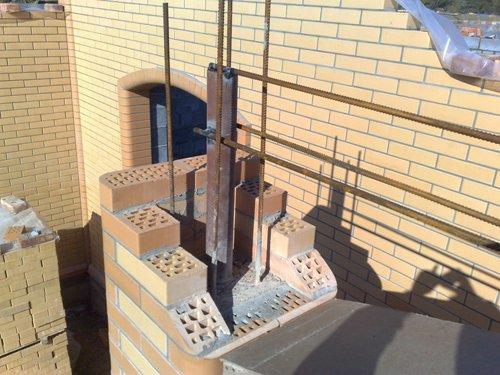

For this, ribbed reinforcement with a diameter of 12 mm is selected.
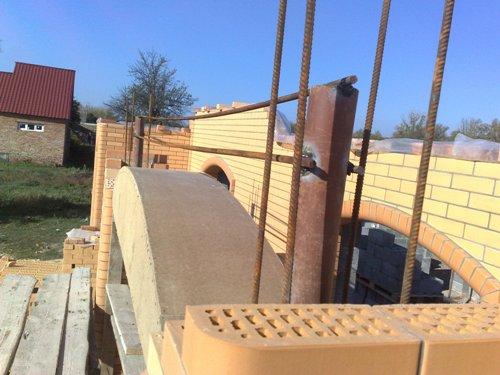

The height of the reinforcement at the top of the arch should be 130-140 mm, so as not to interfere with the laying of bricks when the arch is set.
Thus, the upper parts of the columns are securely fixed by the "monastery tie", which will not allow them to disperse to the sides under the influence of the weight of the arch.
