How to install a thermostat for a warm floor and other issues
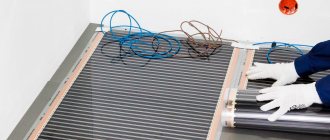
Underfloor heating is not new in a modern home for a long time, but for an ordinary ordinary user, this equipment still raises a lot of questions about installation, maintenance and repair. One of the main elements of an electric heating system is a thermostat, which is paired with a temperature sensor. The sensor takes readings of changes in the environment and transmits them to the regulator, which in turn makes adjustments to the operation of the warm floor. It is these two elements of the heat supply system in the house that we will try to consider from the point of view of an ordinary user.

Where to install the thermostat when installing a warm floor?
When choosing a place to install the thermostat, the following considerations should be followed. The thermostat must be installed on the wall in a convenient and accessible place. It is also important to take into account the fact that when arranging furniture, you can block access to the device with a large sofa, wardrobe or other interior item. It is unacceptable.
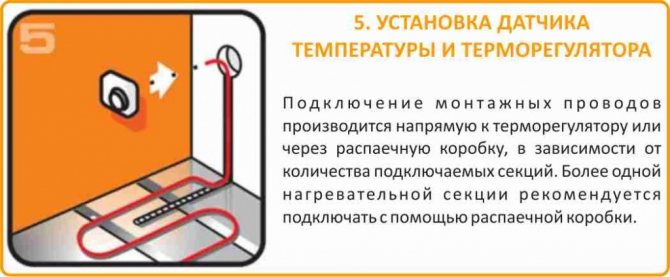
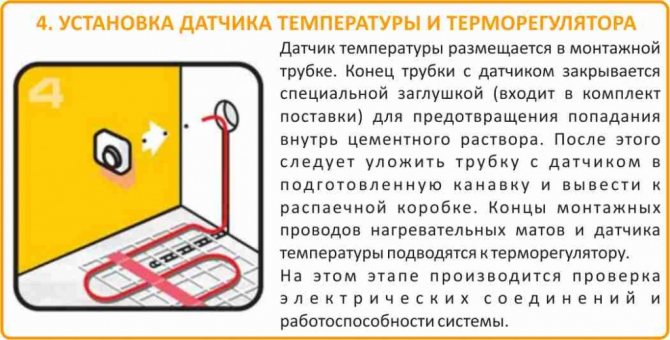
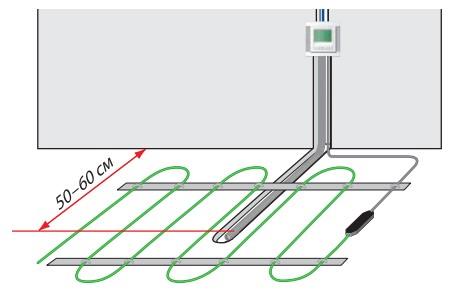
The temperature sensor is located in the screed inside the corrugated pipe. Uncured cement or tile adhesive should not come into contact with the sensor. If necessary, the user or the repairman should be able to replace the equipment that has failed the thermal sensor.
A thermostat designed to regulate the operation of a heated floor in rooms with high humidity (sauna, bath, pool, bathroom) should be located outside the room.
The diagram below offers basic recommendations and dimensions for installing the thermostat and sensor.

Why doesn't the floor heating thermostat turn on?
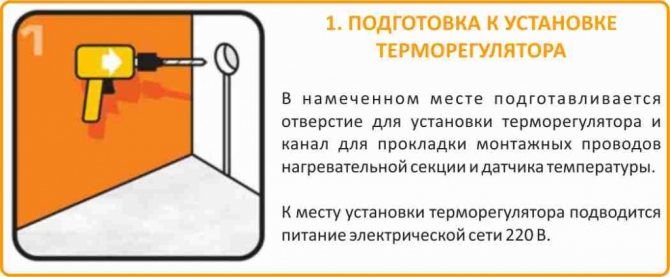
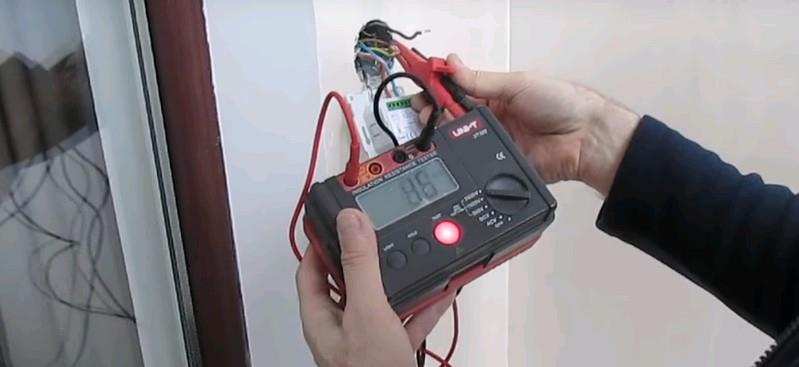
A popular question from the “why” series is that the floor heating thermostat does not turn on / does not work. To find out the reasons for such an incident, it is necessary to check whether power is supplied to the regulator terminals. To do this, having previously disconnected the machines in the switchboard, dismantle the filling of the thermostat from the mounting box. Turn on the power again and use a tester to check the presence of voltage at the supply terminals. If there is no voltage, then the fault should be looked for in the wiring, and not in the underfloor heating system. If during the check it turned out that the phase cable is connected to the zero terminal of the regulator, then it is necessary to perform a phase change, i.e. just swap the wires. If power is present, the wires are correctly phase-separated, but the display of the thermostat does not light up, then the device itself is out of order. To restore system operation, the thermostat must be replaced.

Why doesn't the floor heating thermostat turn off?
Another common problem in the operation of underfloor heating is that the thermostat does not turn off and, accordingly, the system works around the clock. In this case, the thermostat does not turn off, because it does not go to the set heating mode. Most likely - the thermostat itself is faulty, in order to finally make sure of its breakdown, set the maximum heating temperature. If in this case the device does not turn off, then it is definitely faulty and requires replacement.
Why is the warm floor heating with the regulator turned off?
In fact, there may be several reasons for this behavior of the heating system.
First reason - this is the inertia of the warm floor.It does not cool down instantly, it takes some time, about 1 hour, so it seems that after turning off the warm floors continue to warm up.
The second reason - the heating system is somehow connected directly, bypassing the thermostat. In this situation, it is necessary to put in order the electrical wiring and everything will work as it should.
Why does the underfloor heating thermostat click?
Clicks of the thermostat are a sign of turning on / off the warm floor. If the thermostat “clicks” frequently, it means that during the heating installation you installed the temperature sensor too close to the heating elements. The floor does not have time to heat up, and the sensor already reacts to temperature changes. The mounting point of the sensor needs to be changed. Loud clicks of the thermostat are typical for a situation when the conductive contacts are loosely tightened in the corresponding terminals.
See more
Share on social networks:
Thermostats are widely used both in underfloor heating control systems and in air conditioning and ventilation control systems, as well as in anti-icing and snow melting systems. Regulators are used in underfloor heating systems both for comfortable (additional) floor heating in rooms with other heating sources, and for main heating, when a warm floor is used as the main and only source of heating.
Overview of thermostats
Maintaining a constant floor temperature
Easy programming of floor temperature
For open wiring
In this article, we will talk about the regulators that are used for underfloor heating. Comparison of thermostats for anti-icing and snow melting systems in another article.
Connection procedure
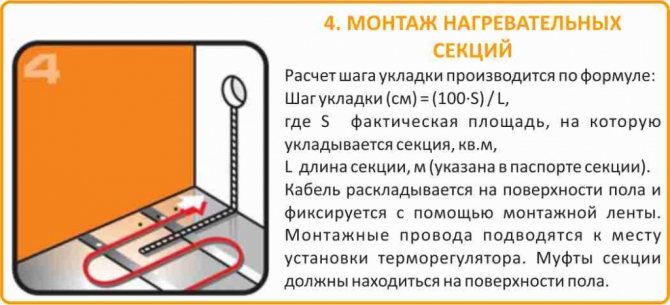
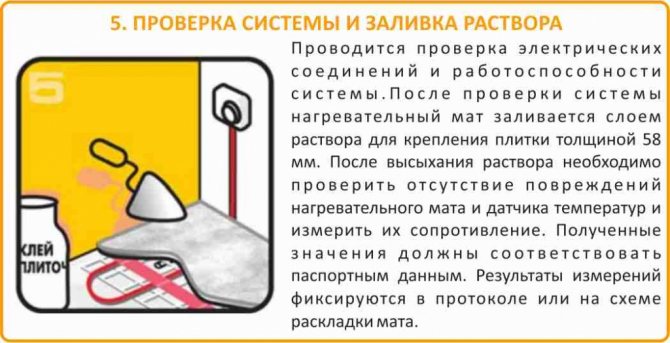
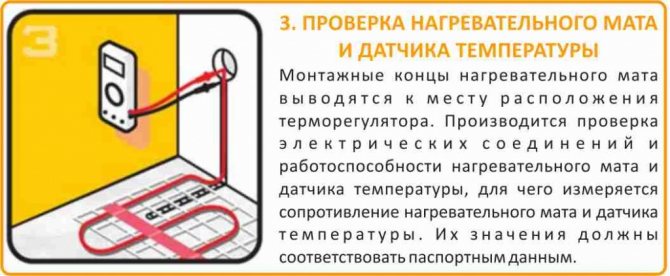
After laying the heating elements and bringing the sensor wires and the heat-generating cable, as well as the electrical network, to the installation site of the thermostat, the Teplolux regulator must be connected.
Installation of Teplolux cable systems is carried out in the following order:
The connection is carried out through an RCD, that is, a residual current device, with a rated current of 30 mA. It fits into the electrical panel. All work is carried out with the mains disconnected.
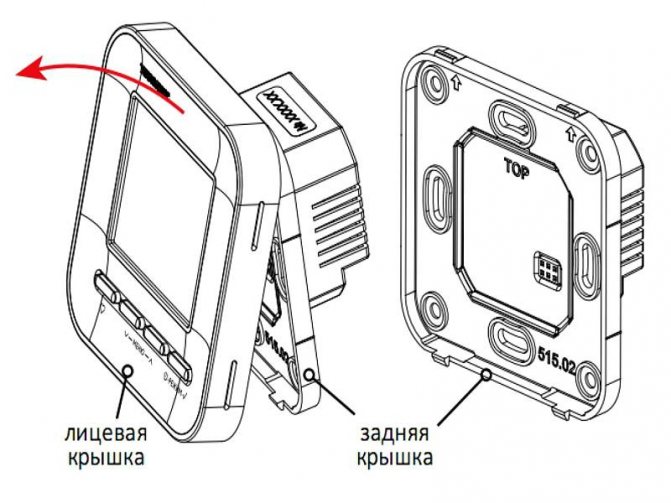
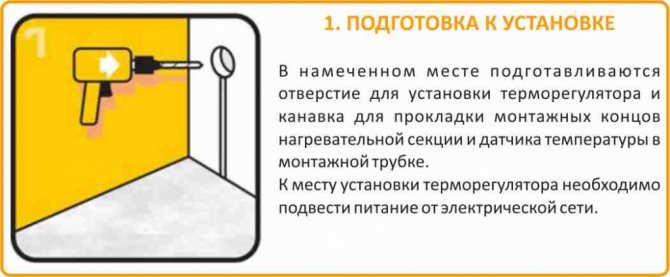
A mounting box for the thermostat is installed in the prepared hole. Then the front cover is removed. The body shows the connection diagram of the Teplolux regulator, in accordance with which the connection is made. And more information can be found in the instructions.
The installation wires have different colors that inform about its purpose:
- brown (white, black) - phase (L);
- blue - zero (N);
- yellow-green - ground.
For Teplolux devices, the connection is made as follows:
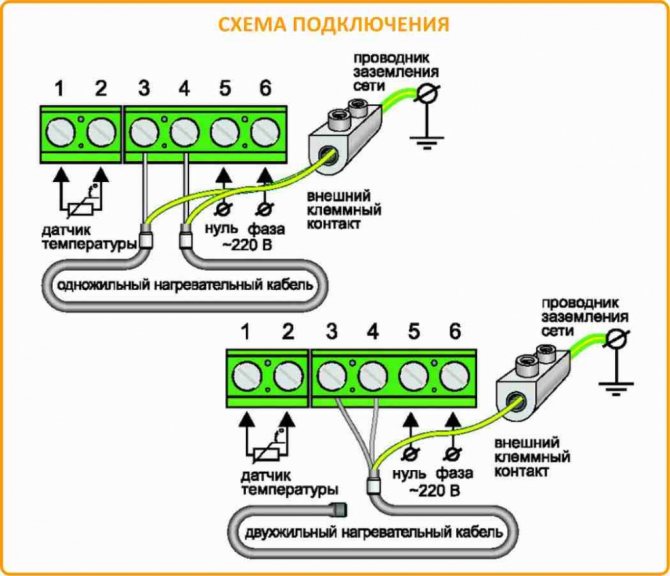
- A sensor is connected to terminals 1 and 2. It is not necessary to observe the principle of polarity here. The connection is made in any order.
- A 220 V mains wire is connected to terminals 5 and 6. The phase (an indicator is used to determine it) is fed to 6, and zero to 5.
- The heating section or mat is connected depending on its type: single-core or two-core. In the first case, the conductors in insulation are connected to terminals 3 and 4, the uninsulated conductor, that is, the shielding braid, to 5. In the second case, the phase (conductor in brown insulation) is fed to pin 3, zero (blue insulation) to pin 4, shield lead (yellow-green) - 5. If the network is three-wire, the grounding conductors are connected to the common ground loop through the PE terminal.

Then the back cover is inserted into the box and fixed with two screws. The front panel returns to its place. After that, the system is checked for performance. For this, the electricity is first turned on, and then the thermostat.
It sets the minimum heating level.Then it switches to maximum heating, while a characteristic click of the circuit closure should be heard. Within 1-2 minutes, it is checked whether the section is heating or not. The shutdown is performed in the reverse order.
Installation of Teplolux heating mats is carried out in the following order:
Overview of Devi thermostats for underfloor heating
Thermostats that control underfloor heating operate basically according to the same principle: activation and deactivation of the heating cable by a temperature sensor.
The algorithm for triggering the underfloor heating for all controllers is as follows: the sensor, sensing the temperature drop on the floor, changes its resistance, and when the floor temperature drops below the set value, the thermostat closes the contacts of the enabling relay and starts supplying 220V power to the underfloor heating heating cable, and this heating the cable, accordingly, heats up, and with it the floor structure heats up.
The floor temperature sensor under the influence of heating begins to change its resistance in the opposite direction, and when it reaches the temperature set in the regulator (i.e. when the floor heats up to the one you defined in the temperature regulator), it gives a command to turn off the relay. The warm floor begins to cool down.
The cycle is repeated an infinite number of times. The only difference between programmable regulators: they control the time of day and day of the week, and if you and your household are not at home or you are sleeping, and the regulator knows about this through the settings you have set, then the heated floor will not turn on. In addition, some controllers have a built-in air temperature sensor.
Connection procedure
After laying the heating elements and bringing the sensor wires and the heat-generating cable, as well as the electrical network, to the installation site of the thermostat, the Teplolux regulator must be connected.
Installation of Teplolux cable systems is carried out in the following order:
The connection is carried out through an RCD, that is, a residual current device, with a rated current of 30 mA. It fits into the electrical panel. All work is carried out with the mains disconnected.
A mounting box for the thermostat is installed in the prepared hole. Then the front cover is removed. The body shows the connection diagram of the Teplolux regulator, in accordance with which the connection is made. And more information can be found in the instructions.
The installation wires have different colors that inform about its purpose:
- brown (white, black) - phase (L);
- blue - zero (N);
- yellow-green - ground.
For Teplolux devices, the connection is made as follows:
- A sensor is connected to terminals 1 and 2. It is not necessary to observe the principle of polarity here. The connection is made in any order.
- A 220 V mains wire is connected to terminals 5 and 6. The phase (an indicator is used to determine it) is fed to 6, and zero to 5.
- The heating section or mat is connected depending on its type: single-core or two-core. In the first case, the conductors in insulation are connected to terminals 3 and 4, the uninsulated conductor, that is, the shielding braid, to 5. In the second case, the phase (conductor in brown insulation) is fed to pin 3, zero (blue insulation) to pin 4, shield lead (yellow-green) - 5. If the network is three-wire, the grounding conductors are connected to the common ground loop through the PE terminal.
Then the back cover is inserted into the box and fixed with two screws. The front panel returns to its place. After that, the system is checked for performance. For this, the electricity is first turned on, and then the thermostat.
It sets the minimum heating level.Then it switches to maximum heating, while a characteristic click of the circuit closure should be heard. Within 1-2 minutes, it is checked whether the section is heating or not. The shutdown is performed in the reverse order.
Installation of Teplolux heating mats is carried out in the following order:
Maintaining a constant floor temperature
Mechanical controls for internal wiring (for concealed installation in apartments, when the wiring is hidden in the wall under plaster). The models differ in the number and nature of floor temperature sensors.
All mechanical thermostats work on approximately the same principle: maintaining a constant warm temperature on the floor. The underfloor heating is switched on and off using a button, and the floor temperature is controlled by a wheel.
Temperature sensor at the thermostat:
- located in the floor (this is a remote sensor),
- a temperature sensor in the controller is built into the housing and reacts to changes in the air temperature (not the floor),
- has two temperature sensors - a remote floor sensor and built-in air sensors, respectively, the regulator operates from a combination of these two temperature sensors.
An additional function for thermostats is control of a temperature sensor, a green green LED at the moment when the underfloor heating is not being carried out signals that everything is in order.
More details
Easy programming of floor temperature
A programmable regulator is a more complex regulator model to control compared to mechanical thermostats.
Setting up a programmable regulator during operation is usually intuitive, but at first you may need instructions to learn all the possibilities of the regulator and how to properly control them. However, this nuance more than compensates for the economical consumption of electricity, because the heated floor will work only at certain hours of certain days of the week.
To set the operating time of the underfloor heating, the thermostat has built-in programs, from which the user selects the most suitable one and sets the operating hours on his own. The following algorithms are possible from the built-in programs:
- maintaining the same temperature on the floor both day and night on any day of the week
- automatic lowering of the floor temperature day and night
- automatic lowering of the floor temperature only at night
- automatic lowering of the floor temperature during the day and at night on weekdays, on weekends only at night.
Each day of the week is divided into 4 time periods: morning, afternoon, evening and night. The start and end times of each part of the day are programmed independently.
In addition to time programming, the user can configure the parameters for selecting a temperature sensor:
- underfloor heating operation based on the floor temperature sensor in rooms with existing heating
- operation of underfloor heating according to data from air and floor temperature sensors in rooms where underfloor heating is used as the main and only source of heating
- operation of underfloor heating without a floor sensor using one air sensor.
As additional options for the thermostat, you can name such useful functions as setting the maximum and minimum floor temperature, child protection with locking buttons using a hidden button (you must press it with a paper clip or a pin), frost protection in rooms that can cool down to outside temperature maintaining a minimum air temperature of + 5 ° С, hard reset of the thermostat with a return to factory settings in case of incorrect programming, warning about a malfunction of the regulator (clock failure due to a power outage, overheating of the regulator, break and short circuit of the temperature sensor, floor overheating above the set temperature).
More details
Preparation and commissioning
When setting up underfloor heating, a thermal head is used in the form of a conventional tap, which is installed for water supply and reverse flow. Such a system is not assessed unambiguously:
- firstly, saving finances for the installation of the circuit is a plus;
- secondly, complications in operation, that is, frequent use of the thermal head disables it, an early replacement is required.
We recommend: What are the characteristics of Shtein underfloor heating?
A convenient device is called a flow meter (or rotameter), which is installed near the collector at the circuit holes. Adjustment in this situation is the control of device readings (0.3 ... 0.5 liters).
The first start, done correctly, reveals weak points, malfunctions, possible malfunctions in the floor heating system.
Every year, with the onset of a cold snap, heating is started.
For open wiring
Thermostats for open wiring are simple mechanical thermostats, in fact they are analogs of thermostats for hidden wiring - both are designed to maintain a constant floor temperature with switching on and off on command from the floor temperature sensor in the controller (floor and air).
The main difference between such thermostats is that they are designed for open wiring (for example, in a country house, where the wires are laid openly along the wall or in a cable channel).
In addition, it can be added that a regulator with a floor sensor is more convenient to use for warm floors in city apartments, a regulator with a floor and air sensor is more convenient to install in country houses, where it can control not only the floor temperature, but also the air temperature in the room.
More details
More on the topic:

