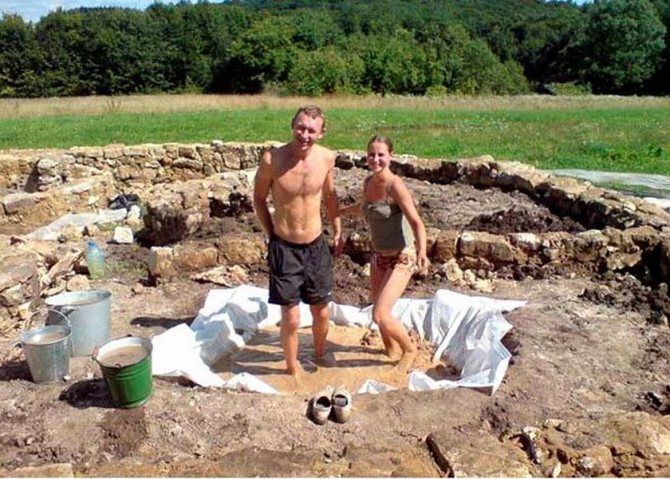
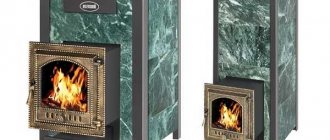
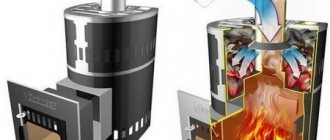
What owner of his own suburban real estate does not dream of taking a steam bath or just relaxing near the fireplace admiring the burning of an open flame. But a pleasant rest is preceded by work on the construction of a stove device. And in order for the work to be successful, you need to figure out what kind of clay to use for laying stoves and what qualities it should have. At the same time, thanks to the various impurities included in the clay: lime, sand, mica and other components, the plasticity and fat content of the clay solution for the oven is determined.
What kind of brick can you make yourself
By handicraft, you can make three main types of clay bricks:
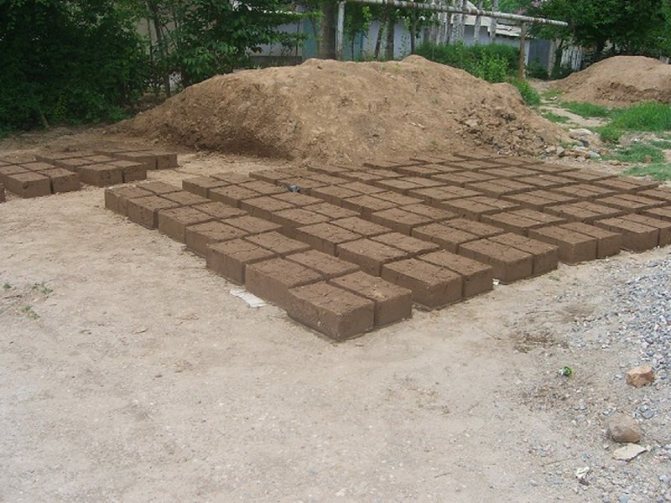
- Raw brick - unfired brick. In terms of its qualities, it may not be inferior to red fired brick, if good clay was used, the composition of the solution was correctly selected and the drying regime was carried out without disturbances. Sand and other fillers are introduced into the composition (no more than 5% of sand and 20% of the total filler). Such a brick is used for small outbuildings.
Raw brick has a low moisture resistance, so the outer walls need protection. This is plaster, facing with fired bricks. The overhang of the roof over the raw brick wall should be at least half a meter. Raw brick can go through the firing stage, then its mechanical strength increases significantly. More details about the manufacture of raw bricks in the next part.
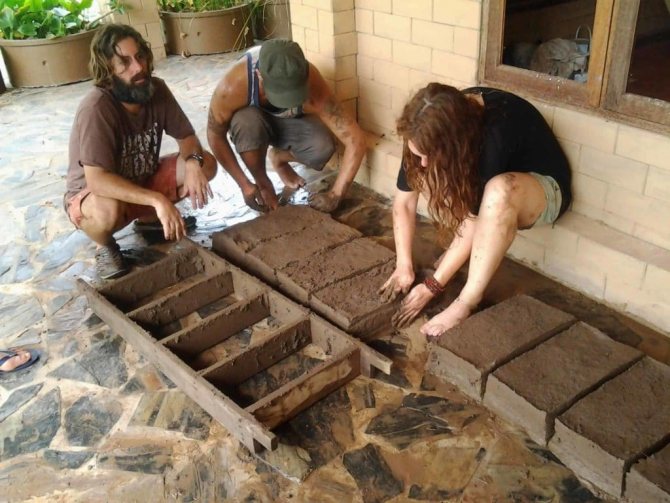
- The adobe brick differs from the usual raw brick, only by the presence of straw in the composition. A homogeneous mixture of clay, sand, straw and water, this is adobe - a completely eco-friendly composition. Bricks are already formed from adobe and then dried by the natural method, but in compliance with certain rules, which are detailed in the article on the independent production of adobe bricks. For hot and dry climates, this is the best option when building a small house, in which, even in the heat, it will not be stuffy.
- Ceramic brick is a raw brick that has gone through a firing cycle in a special or home-made oven. How to make a fired brick yourself, to equip a brick kiln right on your suburban area can be found here.
These types of bricks have one base, common casting / shaping technologies. And the first task for those who decided to make bricks on their own is to find clay in the right amount, experiment with proportions.
Clay → Brick → Kiln
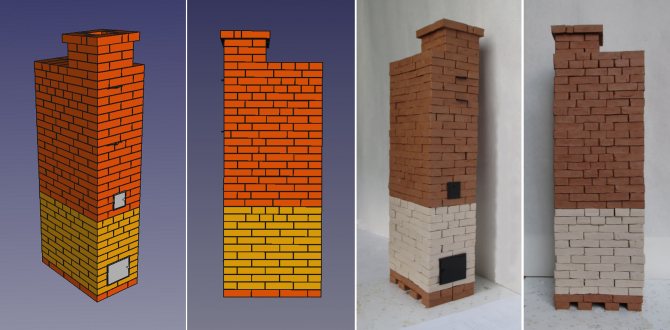
In this article I want to describe my experience in working with clay, making bricks from it (in 1: 6 format) and creating a reduced model of a typical heating furnace PTO-2300
.
Introduction
Let's start with childhood. I grew up in an oven-heated house. Chopping firewood, stoking the stove, tongues of flame in the firebox, the noise of the wind in the chimney in winter, the nuances of adjusting the draft by the blower and stove dampers, I have absorbed from an early age. It was only in adulthood that it was possible to return to the opportunity to sit by the fire again, to throw some firewood. At the same time, a desire was born to understand the design of furnaces; their types and purpose; features of operation; the difference and advantages / disadvantages of one type of heating from another.
The reduced format, a kind of miniaturization, was deliberately chosen - with the same cognitive effect, we win in terms, volumes of materials used, efforts made, transportation costs, required areas, etc. And you can always increase the scale.
Clay
The oldest natural resource discovered by mankind. Anything was built from it: wall and roofing materials, stoves, houses, structures and structures, household and kitchen utensils, toys, crafts, works of art. It is everywhere, you can get it in any area, the available reserves are huge.
For several months of research, I managed to find three clay quarries in the immediate vicinity (and I found out about three or four potential-possible ones, but did not visit). In them I dug up clay of different quality and color. I bought two more types of refined professional modeling clay in the store. The color palette of clays in nature is very diverse - from white and black - to the entire spectrum of red-yellow, as well as green, blue, etc. By the way, green clay was the first I met just 200 meters from my house!
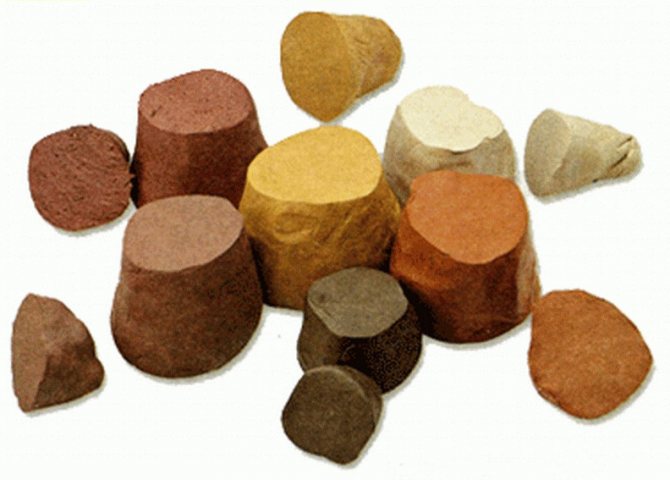

The most important thing, if you start extracting clay on your own, is cleaning it from sand, organic impurities, debris and other inclusions. To denote this process, a special term has been coined - extermination. The technology is very simple: the accumulated clay is dissolved in water and passed through a series of sieves with increasingly fine mesh. Large particles are separated, and at the exit we have a suspension with fine clay particles. After settling, draining excess water and final drying of the clay, we obtain raw materials for further experiments.
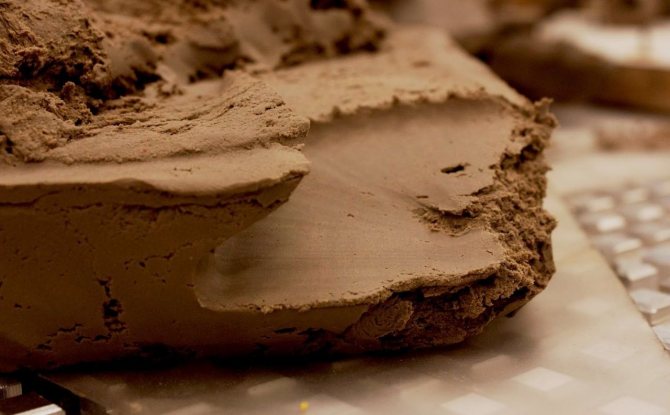

You can store ready-made clay in plastic bags (without losing the necessary moisture) for years. And so this product does not deteriorate at all - over time it only gets better.


Bricks
Having molded a few bricks by hand, I realized that this is an unnecessarily laborious path. In addition, the variation in size turned out to be too critical. It was necessary to take up the manufacture of the form, introduce standards.
In parallel with the manufacture of the form, I "combed" the Internet, articles and books on the subject of what technology can be used to massively and quickly make bricks. The oldest and simplest is hand molding. Extruding the clay mass using augers or hydraulic pushers was also considered, but these too ambitious plans were left for the future. 

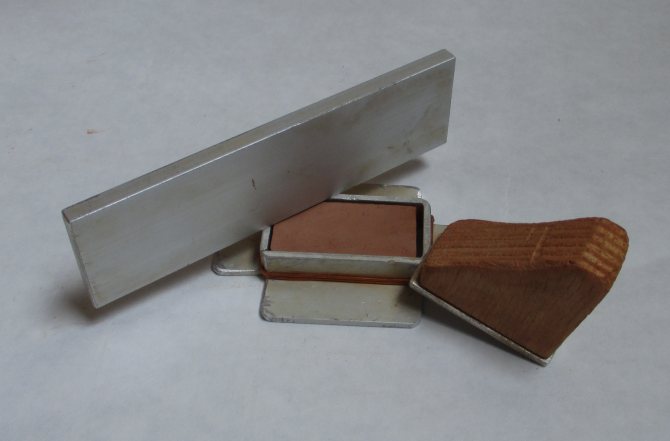

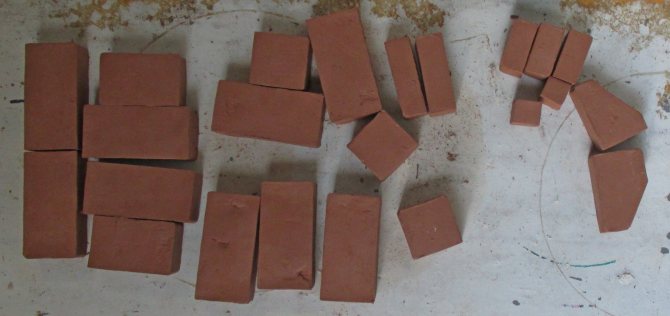
I figured that the oven requires about 300 full bricks (or, about 500 with halves, quarters and other parts). As a standard, in an hour and a half I was able to make about 20-25 bricks. Those. at about 18-22 pm for tamping clay into a mold and pressing the finished product onto a shelf for drying - and a complete set of products for assembling the oven is ready!
I used a fairly dense, hard clay, smoothed out all the folds-irregularities, cut the quarters-halves in parallel (and also figured out the need for them). Therefore, this process was extended. Piece-by-piece production is the most time-consuming.

Law of "Square - Cube"
Choosing a reduced scale of bricks, in practice I felt the law of "square - cube", which says:
If a physical object is enlarged in size while maintaining the same density of the material from which it is made, its mass will increase in proportion to the magnification factor to the third power, while its surface area is the square of the scale factor.
Example
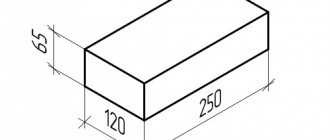
: A real standard brick has dimensions of 250x120x65 mm and a weight of 3600 grams. The density of the brick is equal to 1846 kilograms per cubic meter. Let's reduce its size by about 6 times. We get the linear dimensions 42x20x11 mm and a weight equal to 17 grams.
Those. a change in linear dimensions in a 1: 6 ratio led to a change in weight in a 1: 211 ratio. Anyone can repeat the experiment at home.
Practical conclusions (in relation to my experiment) - the mass of the entire furnace model will be no more than 5-6 kg. Which is very convenient for building, carrying and storage.Bricks of this size are not yet miniature (tweezers and a magnifying glass are not needed), but they are no longer "cyclopean" - dragging extra weights and allocating half a room for a "construction site" is not required. Everything is assembled quickly and conveniently on a table or windowsill.
Burning
Firing - do not touch yet. For masonry, the strength of the raw brick is enough. Roasting requires access to fire and ovens. In IT terms, these works can be separated into a separate subsystem and studied later. In the meantime, we believe that in the method Burning()
there is a temporary "stub" that always returns "true".
Bake
I started building the furnace by studying the theoretical and practical experience of mankind. On this topic, everything has been worked out in detail for a long time - fuel is expensive and it is costly to burn it (in all respects). Therefore, people came to a number of optimal designs that allow you to get maximum heat from a unit of firewood, coal, peat, etc.
I chose a typical heating stove as a sample. PTO-2300
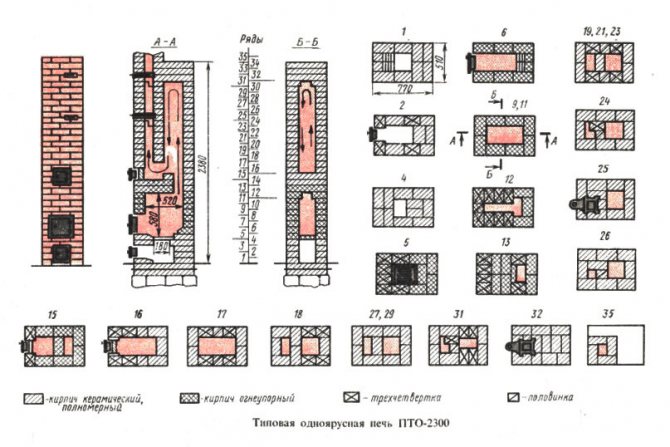

Design parameters:
- weight - 1260 kg
- area of heat transfer surfaces - 5.5 sq. m.
- convective system - bell
- chimney - top-mounted
- type of finishing - jointing
Functional parameters: Heating capacity (with firebox for firewood):
- with a single firebox - 1400 W
- with double firebox - 2300 W
Heating capacity (with anthracite firebox):
- with a single firebox - 1600 W
- with double firebox - 2500 W
Consumption of materials:
- ceramic bricks - 210 pcs.
- fireclay brick - 76 pcs.
With regard to heating stoves, the situation looks as follows: it is worth distinguishing between a firebox (a place where combustion processes take place with the formation of heat) and a heat exchanger (places where heat is removed from heated gases).
The firebox, as a rule, is made of fireclay bricks (in my model it is a white brick), and the heat exchanger (or a system of channels, an array of stoves that store heat) is made of red bricks. The need to use fireclay bricks is caused by the high temperatures generated during combustion.
Different types of fuel require a firebox of different sizes, shapes and designs. And different air supply. In the case of burning coal and brown coal, peat requires a smaller firebox and a blower is required - air supply from below, through the grate.
I designed a stove for wood heating, so I took a larger firebox and chose a hearth type of wood burning. In our area, household stoves are not heated with coal and peat (they are simply not available) - they use only firewood.
The laying itself is very simple. If you do not use a binding solution, but simply type the furnace construct in rows, of course. Brick to brick, brick to brick ... We're making a model, not a real sample, right? So you don't have to worry about joining the seams. In addition, you may want to burn these bricks in the future or use them in another project.
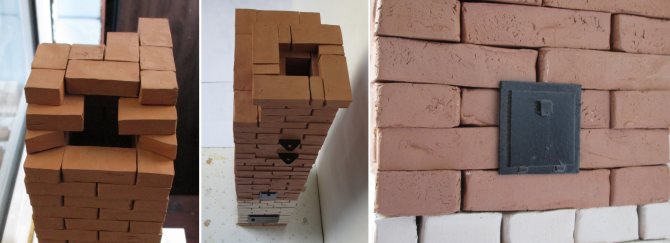

By the way, stove-makers say that a properly designed stove does not require mortar in order for all its elements to be held together in a single monolithic structure. Those. the sealing of the seams is needed only to ensure tightness and protect people from the ingress of combustion products into the dwelling.
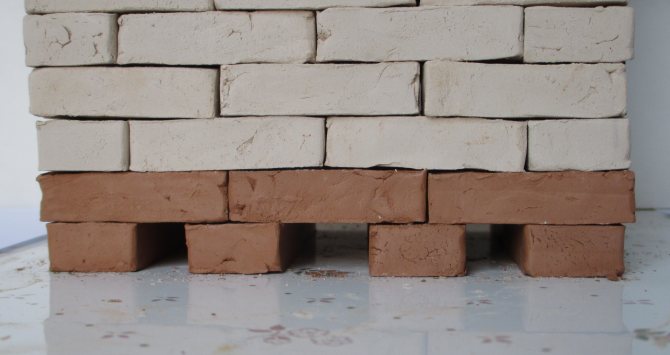
At the bottom of the stove I did trenches
- small warm air ducts connected with the room in the underfloor part, through which the air of the heated room circulates. Shants increase the heat transfer of the stove and eliminate overheating of the floor on which the stove is installed.

Fittings
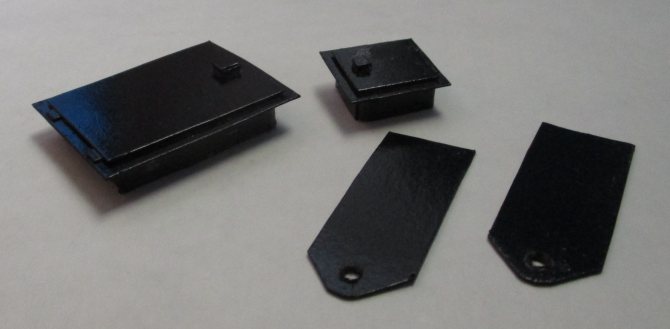
Initially, I wanted to mill the furnace and cleaning door from duralumin, and cut the view valves out of tin. Then he changed his mind and quickly assembled and glued these cardboard parts. It is much easier and faster to fit in the dimensions and fit the appearance using this technology. We cover everything with glossy paint from a spray can, wait for drying - we get the products we need.

Grate or hearth furnace?
Initially, in ancient times, all ovens were built with hearths. In the process of evolution, man has improved the furnace by adding a grate to it (for burning different types of fuel). There are heated discussions about which furnace to build - grate or hearth.
In grate furnaces, firewood is stacked on a grate (grate). The grate, accordingly, serves as the bottom of the firebox. Primary combustion air is supplied through the grate for fuel.
In the hearth furnace, firewood is stacked on the hearth. The hearth is called the blank floor of the firebox. In the hearth furnace, primary air is supplied through the firebox door.
I opened a row advantages
exactly
hearth furnace
(compared to grate, when using firewood as fuel):
- the cold core disappears from the furnace (air duct under the grate). The entire mass of the furnace heats up more evenly
- firewood burns almost completely, higher efficiency, we get more heat
- less soot and ash is produced
- the bottom of the stove is heated not only by the flame but also by embers
- a low level of condensate in the chimney is ensured, tar does not flow. No unburned fuel particles enter the pipe.
- combustion in this case occurs from top to bottom, the fuel burns more slowly, more evenly, because only the top layer burns, and not the entire mass (as with grate combustion)
Design in 3D
Before starting work, I made a complete model of the furnace in a 3D modeling program. I use FreeCAD (but any other will do, of course). This made it possible to see the upcoming "volume of work", to study the nuances of masonry, to imagine the complexity of individual operations and to visualize the desired result. And, of course, I really liked the 3D design process itself.
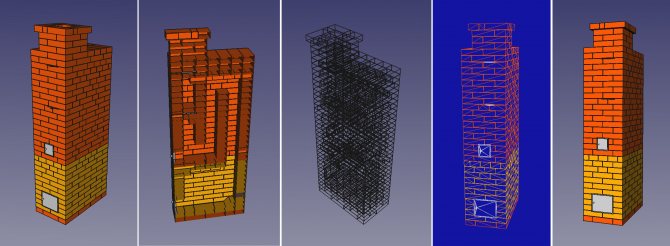

In terms of time: it took four to five evenings to create a model of the furnace (one and a half to two hours of work on average). And this is taking into account the development of virtual masonry technology. The second time, I think I did it faster. By comparison, I spent ten times more time on the actual work itself. The benefits of 3D modeling and design are evident.
If it is not possible to embody the idea live, you can do it virtually. The brain does not care whether it works with the image or its real embodiment. The pleasure (endorphins) we get is almost the same.
Conclusion
There is always a place in life for dreams, the embodiment of your unique ideas and extraordinary projects. Live life to the fullest, don't be afraid to let your fantasy fly and follow it.
What clay is needed to make bricks
The term "oily", plastic clay was given for its characteristic shine on the cut of the clay layer. Matte, even cut - clay of slightly less plasticity. A rough cut indicates a slight plasticity - such clay is used without adding a softener. In other cases, additives are used.
For the manufacture of bricks, clay that is too oily or, conversely, not greasy (skinny), is not suitable. Oily clay dries for a long time, gives strong shrinkage, warps, and after drying, defects in the form of cracks appear on the bricks. A lean clay brick will not have strength, the lack of plasticity will prevent the brick from forming, such a building material is less frost-resistant. Let's consider several methods for determining the "fat content" of clay.
Previously, as well as before determining the plasticity, and before the working batch, the clay should be cleaned of impurities, especially from inclusions of lime rocks, if the brick will be fired.
Features of clay mortar for masonry oven
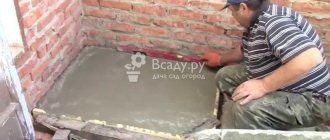
For the construction of a brick kiln, a plastic clay mortar is used. In most cases, this mixture is prepared in equal proportions. That is, 1 part of clay is mixed with an equal proportion of sand. At the same time, a small amount of water is poured into such a solution - about a quarter of the volume of clay.
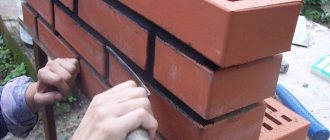
I would like to note that with the correct preparation of the solution, it will have good plasticity and a normal percentage of fat content. At the same time, laying bricks on such a solution will be of high quality, and the seams between the rows will be thin. Thanks to the thin seams, they will not crack, and the oven will last a very long time. Well-prepared building mix in the future does not get enough sleep at the joints and easily withstands exposure to high temperatures.
On the advice of experienced stove builders, it is very important to use quality water. So, when using hard water, the quality of the clay solution deteriorates greatly. River or rainwater is considered ideal for mixing mortar for laying a stove. And as it turned out, in practice, this moment significantly affects the quality of the building mixture.
How to determine the fat content of clay
Primarily there are two ways to determine the degree of fat content:
- The first way is pretty simple. The clay, diluted with water to the consistency of sour cream, is thoroughly mixed with a wooden stick. And the thickness of the clay adhered to the stick will be a barometer of its fat content. The optimal layer is 2 mm, adhered in lumps. Excessively oily clay will stick with a thicker layer, and skinny clay will not grease, it will only cover the stick with a layer of up to 1 mm.
- The second method involves kneading a little clay with water to the state of plasticine. When the clay dough stops sticking to your hands, form an even ball (5 cm in diameter) and place it on a smooth surface. Task: slowly flatten the ball with an even board - to the middle of the diameter.
A ball of very skinny clay will crumble, the appearance of cracks at the edges will indicate a low-plastic composition. A very greasy, plastic clay will resemble a neat cake without cracks. However, products made of such clay, including bricks, are easily molded, beautifully molded, but during the drying process they are strongly deformed and cracked.
How to correctly determine the proportions of additives in clay for homemade bricks
To be sure of the necessary plasticity of the clay and calmly start your own brick production, the experiment should be continued (and who said that it would be easy and simple?). But this is only if the first tests showed that the clay is oily and requires the addition of sand. If the clay is too skinny, then you should look for a greasy clay and mix it with your preforms. In any case, it is necessary to determine the proportions of the additives.
In handicraft production, sand, chamotte (lean additives), sawdust (burn-out additives for burnt bricks), straw (for adobe bricks) are often used as additives.
The proportions, the composition of the additives in the mass will have to be determined empirically. To do this, we prepare several portions of the same volume of clay, but with a different ratio of additives. It is important here not to get confused and to write down the proportions used. Next, you should knead each sample, adding water to a plastic state.
From each sample we make a ball and a cake. After natural drying for several days, the samples that did not withstand drying and cracked did not pass the primary selection. The composition remained too bold. The second round is carried out by throwing from a height of 1 meter onto the floor those samples that did not crack during drying. In those samples that did not pass the strength test, the clay turned out to be too low in fat. Specimens that have passed the drying and mechanical strength tests with dignity will serve as your benchmark for the percentage of additives.
You can read about the manufacture of each type of brick in the following articles of the block "Brick with your own hands", and our construction company reminds that with our construction team any work will progress faster. A house insulated with ecowool is always warm, cozy and environmentally friendly.
Using clay with sawdust as insulation
The advantage of clay with sawdust as a heater is that it prevents heat loss in winter and helps to maintain pleasant coolness in the room in summer.
One of the main advantages of such a means of insulation as clay with sawdust is that this option can be used in almost any area: both where it is hot most of the time, and where the temperature drops to critically low temperatures. Clay mixed with sawdust not only prevents heat loss in winter, but also helps to maintain pleasant coolness in the room in summer. In addition to the unique thermal and waterproofing properties, this material is very durable and at the same time environmentally friendly. Some private developers prefer clay precisely because of its environmental safety, because not all modern building materials are trustworthy in this regard and can be used to decorate the interior of the premises.
However, it should be noted that fixing a house with clay mixed with wood waste is far from the easiest way to insulate. There are many factors that influence the effectiveness of insulation using clay and sawdust. Firstly, it is very important to properly prepare the mixture, since if the proportion is violated, the finished material will not set and, accordingly, will sprinkle very quickly. Secondly, it is necessary to correctly apply the insulation to the walls in order to achieve the maximum effect.
Clay with sawdust is used mainly for ceiling insulation, that is, in an area where there will be no significant load on the coating.
If wall insulation is planned, it is better to use reeds or straw instead of small sawdust. It is believed that it is preferable to use reeds mixed with clay, as mice do not like it very much. The thing is that in this case, straw or reeds will serve as additional reinforcement, thereby increasing the bearing capacity and strength of the entire insulation layer.
