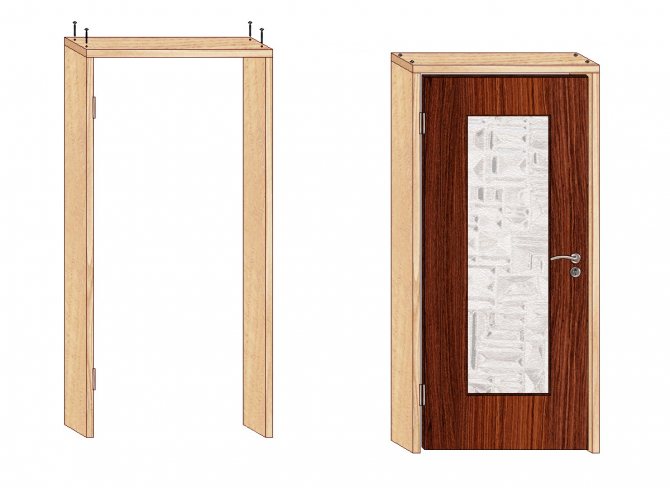
How to assemble a door frame?
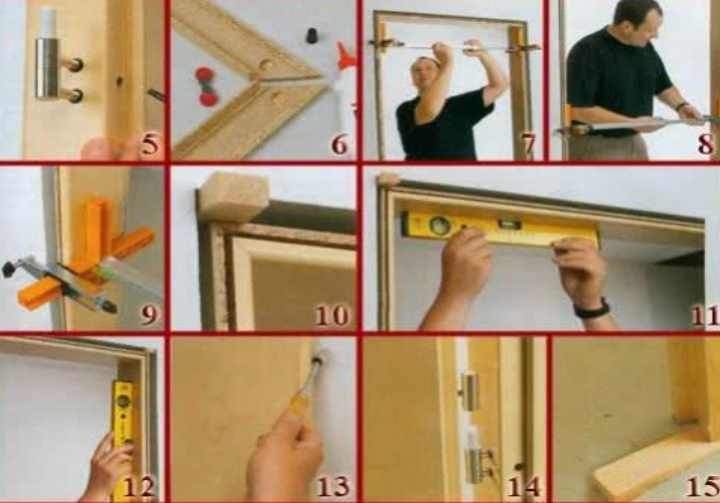
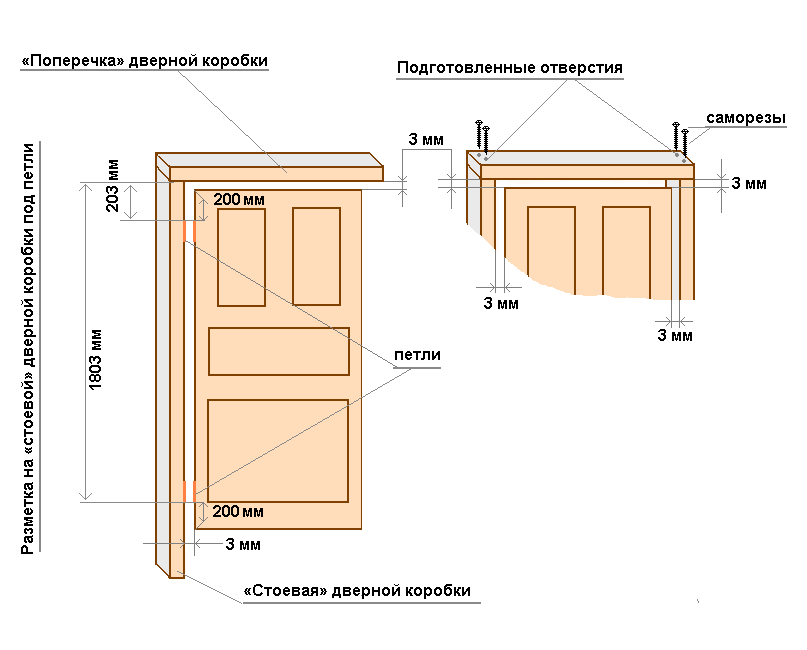
The assembly diagram will help to make a door frame from blanks correctly.
- The elements are laid out on a flat surface at the same level.
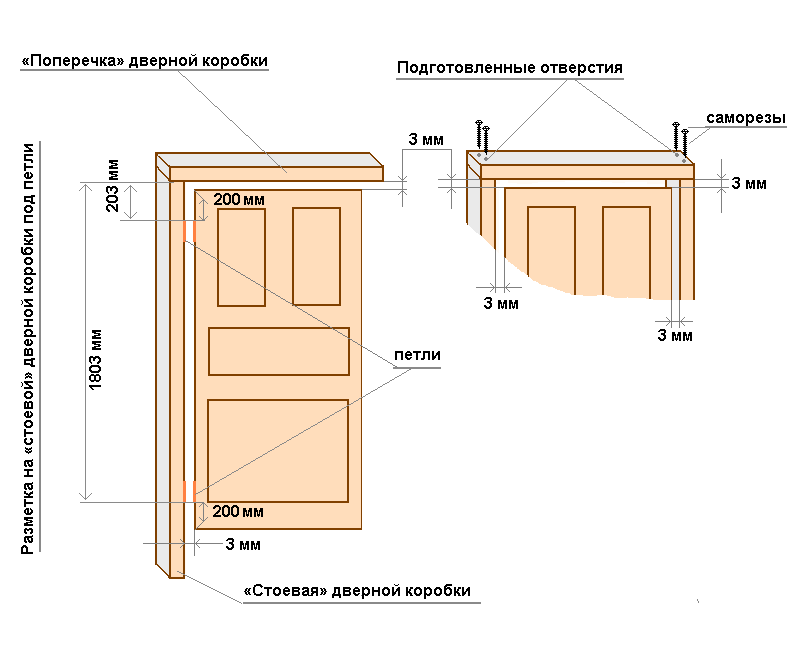
- Correctly mark the door frame.
- The ends of the bars are cut at an angle of 45 or 90 degrees.
- Determine the position of the loops and mark them on a vertical stand. Measure 200 mm from the bottom and from the top. Which side depends on the right or left door opening.
- If the hinges are mortise, they make a notch with a chisel and fix them. The overhead hinges are simply screwed into place.
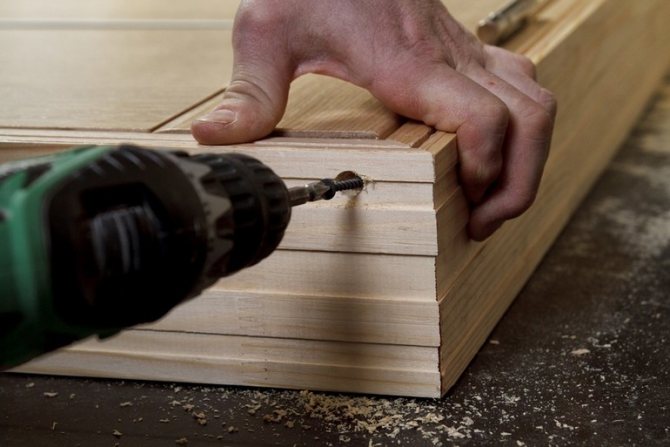
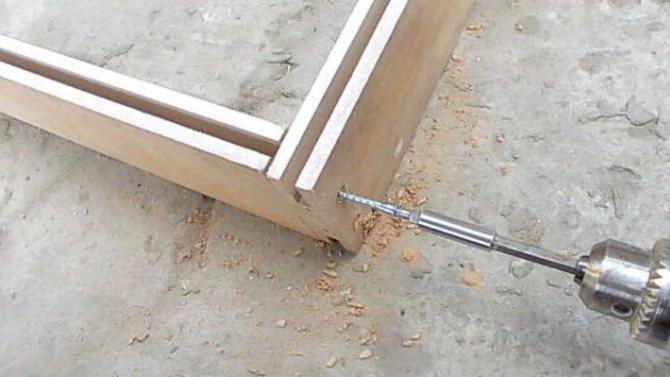
- The bars are tightened with self-tapping screws. The procedure is carried out carefully, because, a little overdoing it, you can damage the elements.
- Finally, insert the door leaf, align and check if there is a desired gap between it and the structure.
The box must be enlarged with the help of an extension, if the width of the wall is more than 70 mm, and the platbands are placed on both sides.
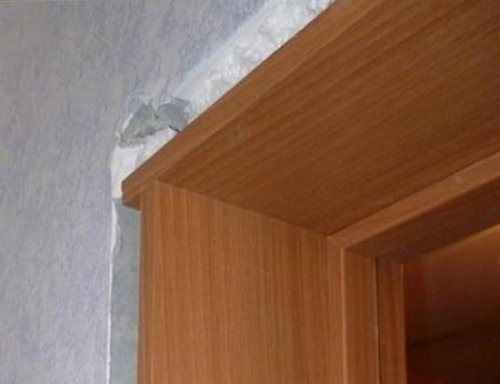
How to saw down a door frame at 45 degrees?
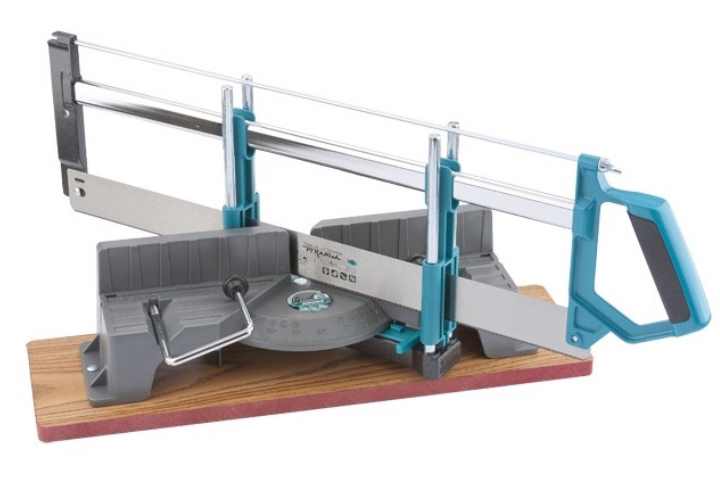
Elements with a rounded section are cut at an angle of 45 °. In order to make the correct cut, use a miter box or a miter saw with a rotating table.
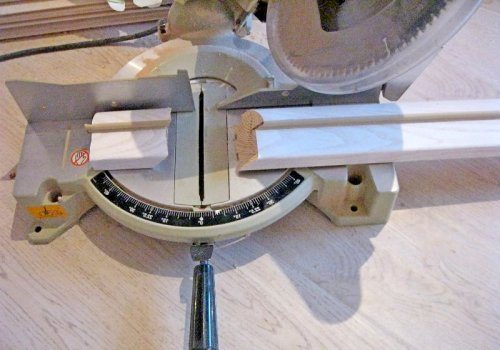

Do-it-yourself doorframes can be assembled without the use of special tools. In such cases, you can saw off the desired angle without a miter box, using a ruler and a protractor for marking.
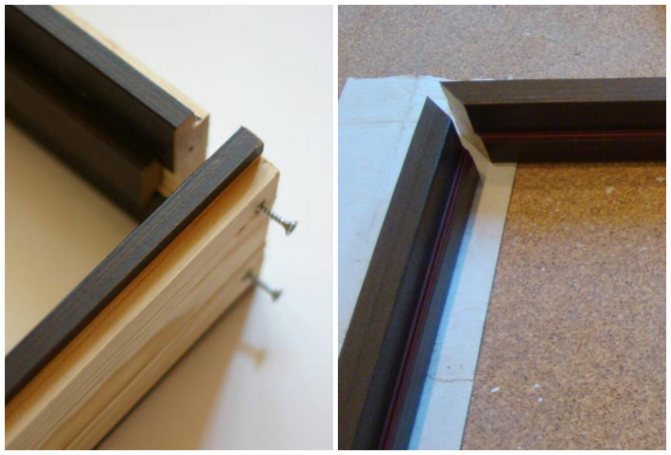
When performing installation, the structure is fixed with self-tapping screws, which are screwed in at an angle.
Assembling the box at a 90 degree angle
With this option, the assembly of the door frame is easy and quick.
- It is necessary to saw off the required size of the racks and the horizontal crossbar at a right angle.
- Choose an extra part of the vestibule.
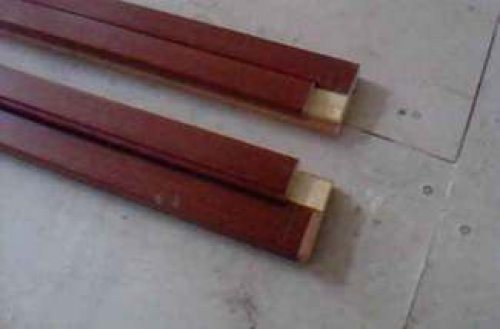

Place the elements of the box on the floor, align and fix at the ends with self-tapping screws (2 in each).
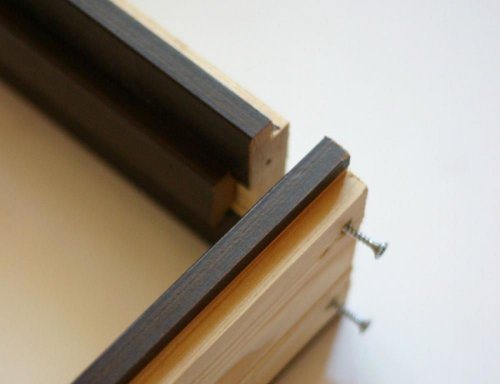

In order for all sides to maintain parallelism, you can attach the door to the door frame and check how it will stand in the opening. The connection of the door frame at 90 degrees is considered by specialists to be a quick installation technology.
Assembling the box with a threshold
There is no significant difference between installing door frames with a threshold and without it. Thresholds have recently lost their relevance. But, despite this, such a system has a lot of fans. This is explained by the fact that it is stronger and more reliable than a structure without a lower transverse bar. Such systems can withstand significant loads and are suitable for installing solid wood doors. Thresholds are considered a prerequisite for bathrooms. Regardless of what type of construction is chosen, each person will be able to assemble the frame of the interior door.
- Prepare vertical and horizontal strips in advance.
- Cut at 45 or 90 degrees.
- The prepared elements are placed on a flat surface.
- In turn, fasten the racks and crossbars with self-tapping screws.
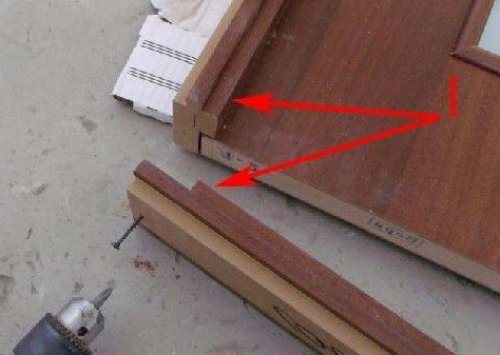

How to install the box?
Before proceeding with the installation of the structure, a tool for installation is prepared:
- Roulette;
- Laser level;
- Pencil;
- Square;
- Chisel;
- Hacksaw.
In addition to the tool, materials will be required, including polyurethane foam and a bar for the box itself.
How to assemble a door frame?
To assemble the box correctly, prepare a flat horizontal surface. It is preferable to carry out the work on the floor, with a soft substrate underneath to avoid damage to the elements of the box during assembly.
When assembling an MDF structure with your own hands, first saw off the upper crossbar, depending on the selected door width. Be sure to provide an allowance for the free movement of the sash. Then all the elements of the box are cut off.
To make the design perfectly flat, all the elements from which the MDF box is made are laid out on the floor. First, the vertical elements of the sack are placed, next to them is the upper crossbar. There must be a right angle between the top bar and the vertical bars. All elements are laid on the edge. If the angle differs from the straight one in a larger or smaller direction, it will not work to install an MDF door frame in the opening.
To prevent accidental displacement of the elements relative to each other, false strips are inserted into the mounting grooves. After all the planks take their place, the door leaf is laid. So that there is a uniform gap between the frame and the door leaf, cardboard of the same thickness is placed in it.
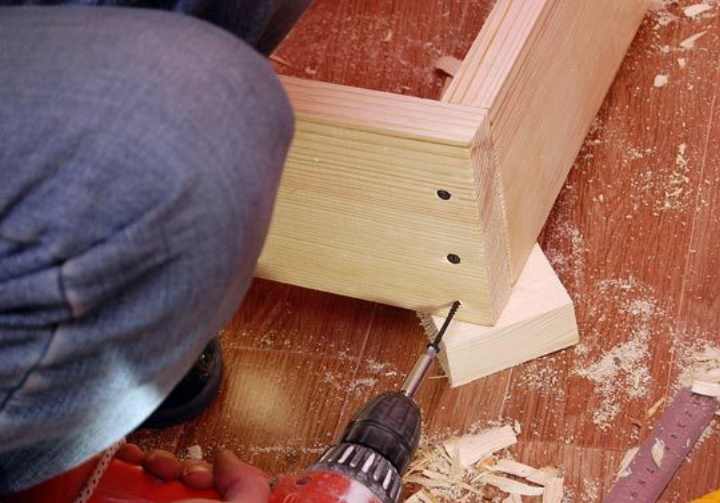
After the box has been given the required shape, the upper crossbar is connected to the uprights. For this purpose, special self-tapping screws are used, designed for fastening wooden elements. When choosing an attachment point, you should choose points as close to the center as possible. Two screws are enough to connect two adjacent elements.
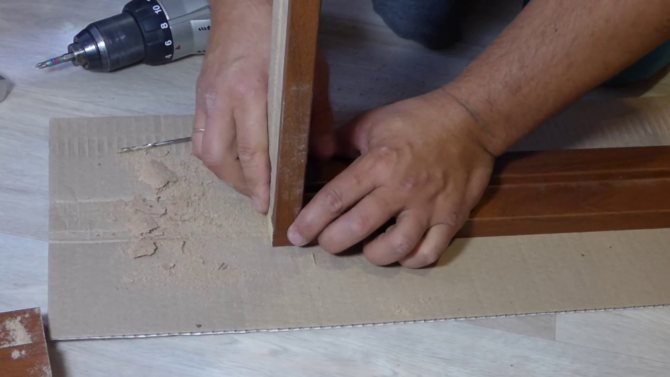
Advice! Considering that in the process of fastening individual elements, MDF can crack, pre-drilled holes of small diameter, into which the screws are then tightened.
Having assembled the U-shaped base, the width of the structure is controlled. After that, the excess material is cut off to ensure that the height of the structure to be installed is matched. When determining the height of the box, the presence or absence of a threshold is taken into account. Having cut off the vertical posts of the required height, they fix the spatial position of the box elements relative to each other.
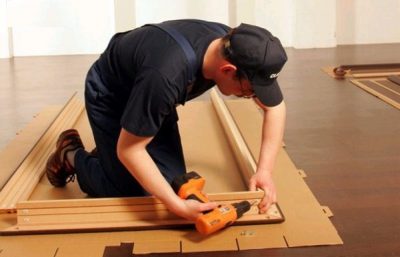

Assembling the box
If a structure with a threshold is mounted, it is placed in the right place and fastened to the vertical posts. In the absence of a threshold, when assembling the box, a mounting plate is used, which will help temporarily fix the relative position of the elements. The box assembled in this way should ideally fit the doorway. Having securely fixed all the elements, you can install it in place.
Methods for connecting elements
The vertical and horizontal bar are interconnected in three different ways:
- On a thorn;
- At an angle of 45 degrees;
- At right angles.
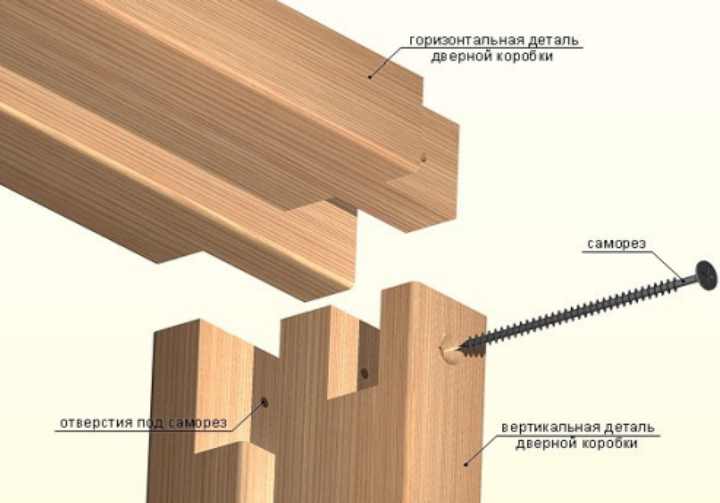
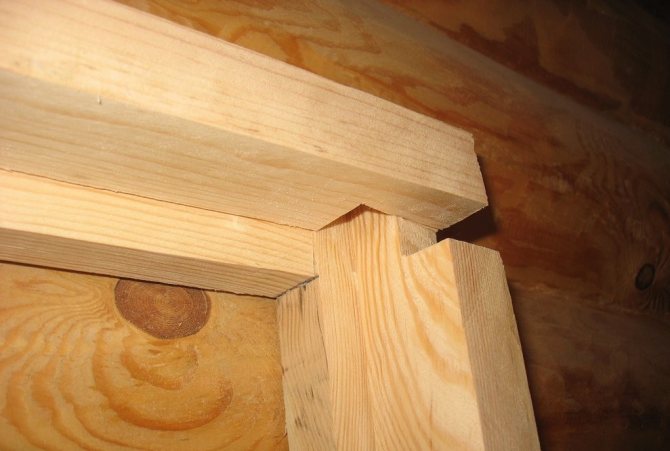
The tenon connection method is the most laborious option of all. For its implementation, special equipment is required, with the help of which a groove of the desired shape is milled. But in terms of strength characteristics, the formed connection is the most reliable. Before assembly, spikes and depressions are cut out at the ends of the mating parts, with which you can ensure their snug fit to each other.
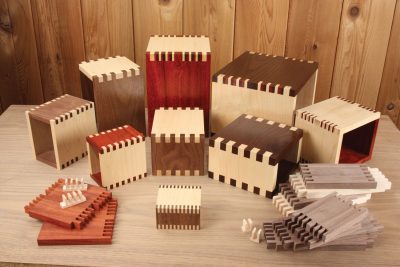

Thorn connection
The assembly of the elements on the spike is performed using glue. To ensure rigidity and strength, fasteners are additionally used, screwing self-tapping screws into both parts at the same time. When choosing this connection method, keep in mind that after connecting the vertical and horizontal parts, their linear parameters will decrease by the thickness of the panel. This nuance is important when fitting elements.
The variant with the connection of the cross member and the vertical plank at an angle of 45 degrees is a little simpler. To ensure a snug fit of the horizontal and vertical strips, at the place of their connection, a part of the material is removed at an angle of 45 degrees. For work, it is better to use a breadboard knife, which allows you to cut off even thin layers. The crossbar and the vertical stand are placed at right angles and connected with self-tapping screws. As an additional connection method, glue is used, which makes it possible to more reliably fasten the elements of the box together.
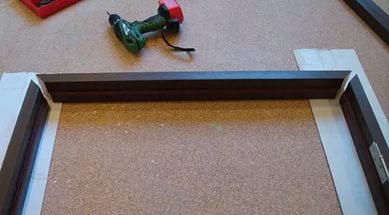

45 degree joint
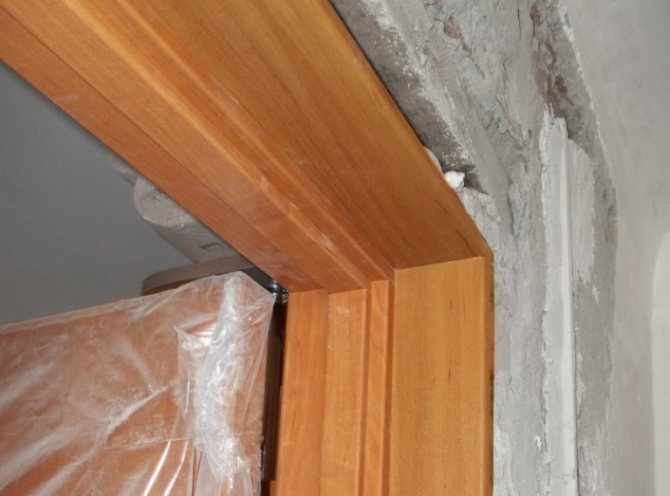
The option of connecting the crossbar and vertical slats at a right angle is the simplest. For those who are assembling their box for the first time, this method of connection is best suited. In this case, the horizontal bar is attached to the ends of the vertical posts with two or three through self-tapping screws, after having drilled holes.
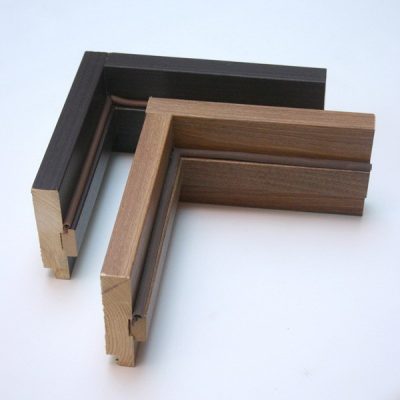

Right angle connection
Dimensions and equipment
Interior doors are available in standard sizes, but standards vary from country to country.
Speaking about standards, it is necessary to take into account the following parameters:
- a living space will need a canvas 0.6-1.2 m wide, 2 m high;
- bathroom - 0.6 m wide, 1.9-2 m high;
- in the kitchen, a canvas more than 0.7 m wide, 2 m high.


The width of the door will depend on the parameters of the opening PHOTO: stroikadialog.ru
When, during the replacement of the canvas, the opening does not correspond to the standard dimensions, the craftsmen use special extensions.
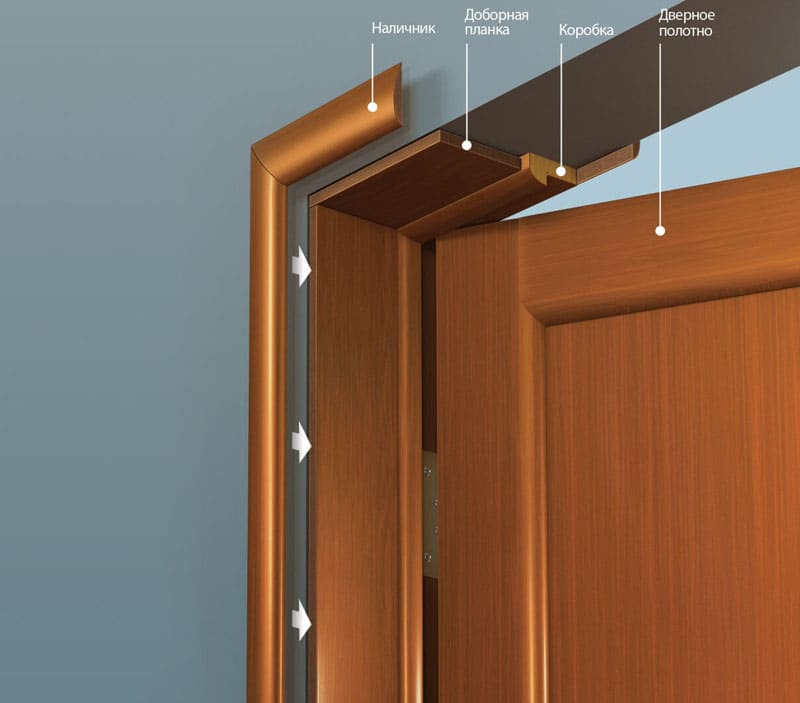

When choosing a door, emphasis is placed on the complete set PHOTO: radadoors.ru
There are 3 types of assembly:
- Replacing the canvas. In this case, the box is purchased additionally;
- Replacing a door with a box. Everything is in the complete set, however, the box, usually assembled from separate boards, is not assembled;
- Door block. Replacement of the entire structure is carried out by a master.
With the same quality of door leaves, the cost of such sets will differ significantly.
Dismantling
If the doors are not installed in a new room, but the structure is replaced. Then you can install the door frame with your own hands only after the old one has been removed. The door frame is dismantled in the following order:
- The platbands are removed, and the elements of the box are disassembled.
- Fasteners and anchor bolts are unscrewed.
- The strength of the opening is checked and, if necessary, it is strengthened.


It is worth very carefully disassembling the door frame in order not to damage anything and thereby increase the volume of installation work in the future. If it is necessary to replace the door frame, it is recommended to dismantle it in advance so that there is time left for preparing the opening. It is almost impossible to remove a door frame without damaging it. Therefore, after removing the old components, you will need to install new ones.
Assembly
At the second stage, you need to correctly adjust the dimensions of the parts. To do this, you need to measure the height of each side and the width of the opening. For a visual assessment of the situation, you can put the planks against the wall and mark the places where you need to shorten them.
If the installation of the box is made by means of a diagonal connection, you need to cut off the edges of the planks. Since it is quite difficult to correctly determine the degree and saw down the door frame, be sure to use a miter box, then the assembly will not be difficult.
Before putting the door frame into the opening, it is necessary to check its dimensions with the dimensions of the canvas. To do this, you need to fix all the parts on the floor.
Since the door frame can be assembled as correctly as possible only in a horizontal position, lay the slats and canvas on the floor. The assembly begins with an assessment of the coincidence of dimensions. To do this, lay out the details around the perimeter of the door. If everything converges, you can proceed to fastening the elements.
Door frame assembly requires precision and care
How to assemble the door frame depends on the type of connection. If a straight line is used, you need to join the protrusions with the grooves. With a simple diagonal, the planks are connected using nails. If you know how to correctly and quickly assemble a door frame with your own hands, there should be no problems with the rest of the work. Check the correctness of the dimensions and the presence of a small clearance for free movement of the blade Only then can the installation of the box itself be carried out directly.
Installation of the canvas
When the box is leveled and secured, it's time to move on to installing the door leaf. First, hinges are screwed onto the door. Most often, for interior doors, split hinges are offered, which have a removable or hinged rod. One-piece hinges are also sold, but they are now practically not used.
If hinges with a fixed rod are used, then everything is very simple - the canvas can be easily put on and removed from the box. To do this, you just need to carefully raise the door to a small height.
If it does not rise (and on some door models this is really not easy to do), then a one-piece type of hinge and a removable rod are used. For the installation of these types of hinges, they are also fixed with self-tapping screws on the box, and then screwed to the door leaf. If the rod can be pulled out of the hinge, then it is simply removed and the web is removed.
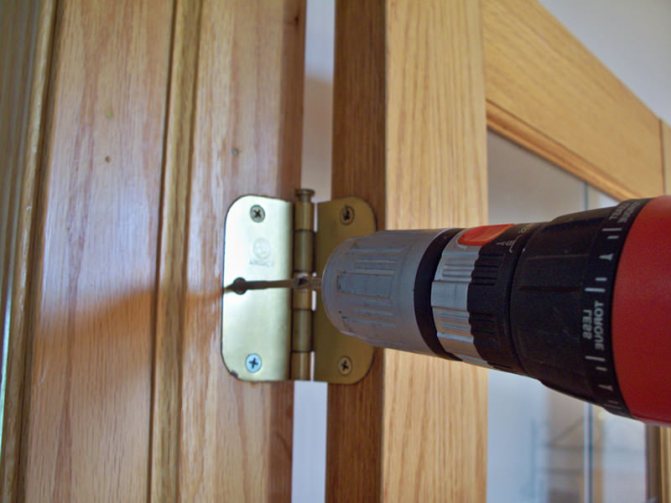

When the hinges are installed, you can proceed to hanging the canvas. It is better to perform this operation not on your own, but with someone's help. One person will hold the canvas, the second will install the one-piece loops or direct the canvas into place (if the loop is collapsible).
Dismantling the old door leaf
Before starting work, it is advisable to prepare an accompanying tool. Most often, such items are present in every home: a hammer, an electric drill, a grinder, a jigsaw, a level, and also a chisel. After all the accompanying tools are at hand, you can dismantle the old door. This procedure should be performed in the following sequence:
- First of all, it is necessary to remove all the fittings present on the structure, with the exception of the hinges. Here it is necessary to carefully remove the old handles and locks, which, if desired, can be used on the new door leaf.
- Modern hinges, which are used for interior doors, will easily allow you to remove the canvas. If any of their other varieties are installed, which do not allow easy removal of the canvas, then they should be unscrewed one by one. In this case, they start from the topmost screw, since starting dismantling from the bottom, you run the risk that the canvas will remain hanging on the last screw, which will have an adverse effect on the hinges.
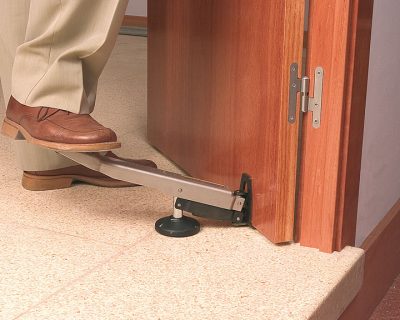

Removing the door leaf
- Next, you should completely disconnect the hinges from the frame and door leaf and inspect them for defects. If there are none, then they can be used further.
- After that, you should unscrew the box from the doorway. This is only necessary if the new canvas differs in size from the previous design.
- As soon as the box is dismantled, it is necessary to thoroughly clean the opening from such elements as polyurethane foam, plaster, and other contents.
Further, if necessary, work is carried out to narrow or expand the interior opening. However, more often than not, people try to get a door leaf of the same size as the previous one.


Empty doorway
How to take measurements
To assemble a high-quality structure, it is important to correctly measure the dimensions, otherwise, the door will not fit in the box. There are several rules for taking measurements at home:
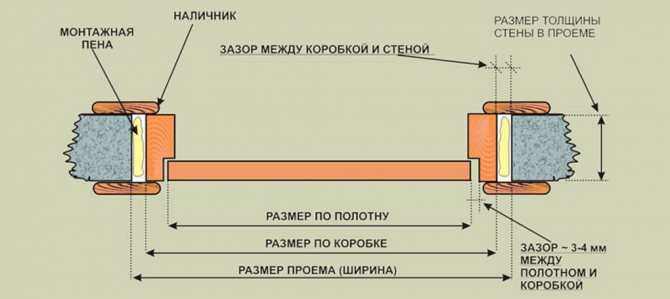
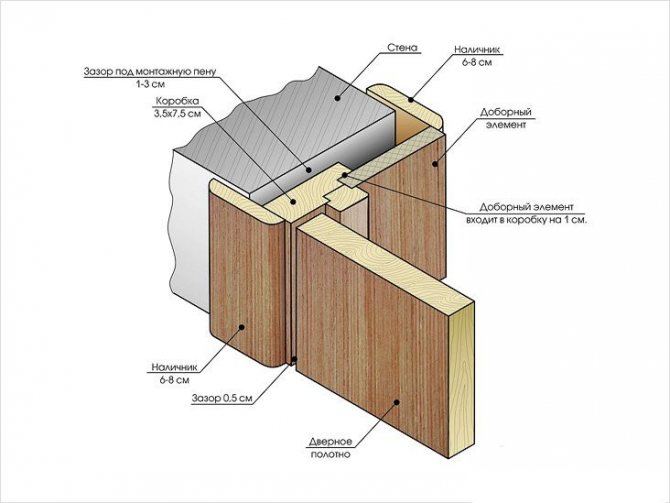
- First of all, the doorway is measured, the external parameters of the box should exceed it by 70 mm. As for the internal parameters, a gap of 3 mm around the perimeter must be maintained between the door leaf and the edge of the frame.
- There is a separate rule for the gap located at the bottom, its height can be from 10 to 15 mm. This is necessary to ensure air circulation in the room, which is especially important for closed rooms like a bathroom or a closet. When installing sliding doors, it must be borne in mind that profiles will be installed.
- Often, during the construction of baths, the owners do not make a large gap at the bottom of the door, this is permissible, but, in this case, it is necessary to carefully measure the threshold of the door with a level at the corners.
These parameters are mandatory, if a discrepancy is found, the doorway must be expanded or reduced. It is easier to work with artificial openings made of drywall.
Fastening the door structure
To fasten the door leaf to steel hangers, metal fastening elements are used, designed to connect frames for gypsum plasterboards. At least 4 such mounts are required.
Do-it-yourself installation of a door frame of an interior door in a wall opening step by step:
A completely finished door leaf (already with fittings) is hung on hangers fixed in the frame. Spacers made of cardboard are inserted into the gaps between the canvas and the frame of the box. After that, the hangers are screwed on the outside of the door frame.
Next, the door block is inserted into the wall opening, fixed with wedges. The structure is leveled and the attachment points of the suspension are marked. In these areas, the material is selected, that is, a depression is made for the plates. After that, the door is aligned again and the plates are fixed to the wall.
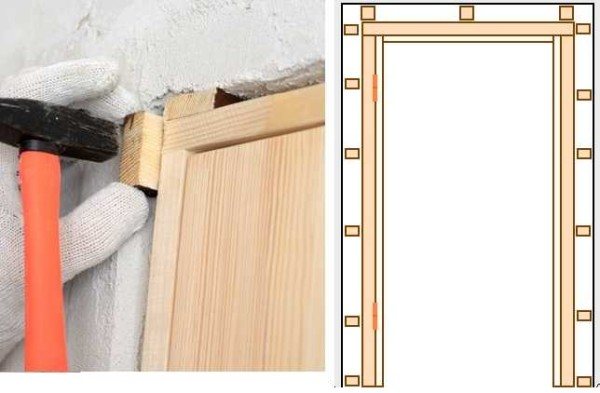

Depressions with inserted hangers must be plastered, and the resulting voids must be filled with construction foam.
If a through installation is used with the help of anchors, holes are made in advance for such fastenings on the side of the frame profiles. To do this, markup is performed first. 2 anchors are fixed on each side.
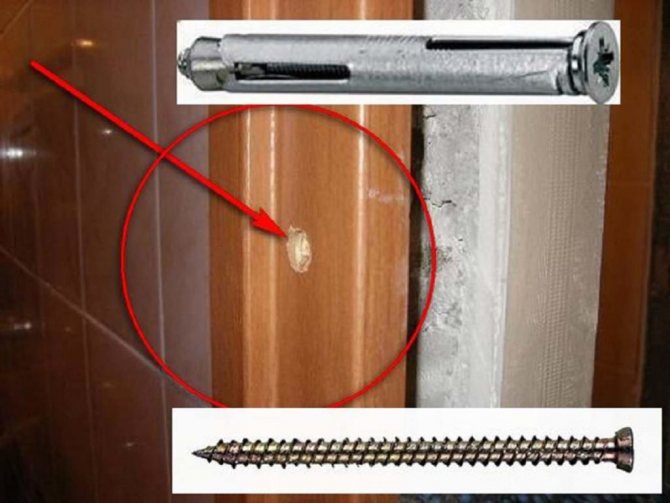

At the point where the attachment is located, a hole with a diameter of 14 mm is first drilled with an electric drill (for a plug), then a hole with a diameter of 10 mm (for an anchor). Next, the door box is installed in the opening, fixed and drilled holes for the anchor in the concrete wall of the opening. Installed anchors are closed with platbands.
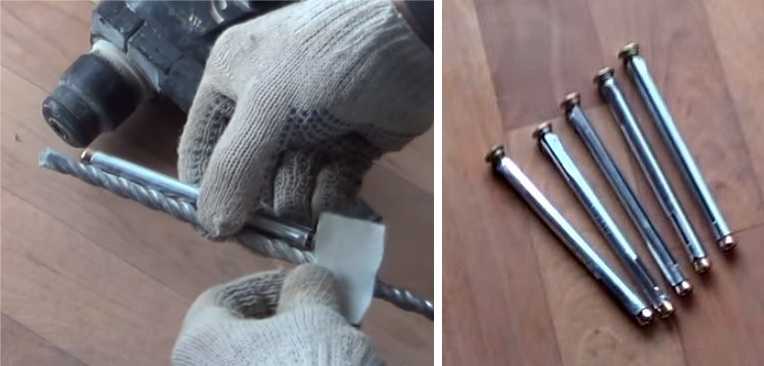

This method of fastening is strong enough, respectively, more reliable.
Planting the box on construction foam
Assembled doors (frame, door leaf suspended on hinges and spacers between these elements to maintain the required gap) are installed in a previously prepared opening. The structure is adjusted vertically and horizontally using a building level and a plumb line. After that, wooden stakes are inserted between the box and the wall of the opening to fix it.
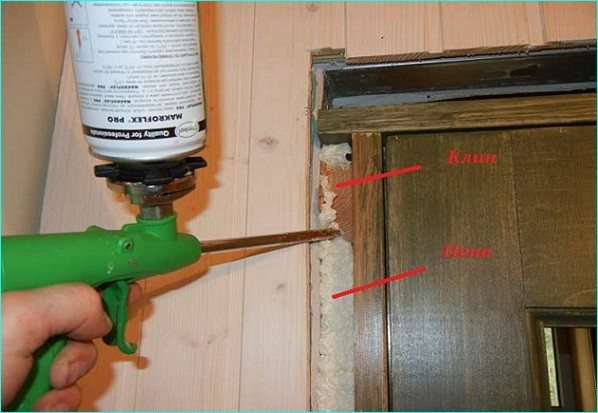

It is recommended to treat this stage responsibly in order to avoid skewing the doors in the future. The gaps between the door frame and the wall are filled with special construction foam. It is recommended to do this carefully in small portions and in thin layers until the free space is completely filled.
Preparing the doorway
Suggesting first ordering a new door, and then removing the old one and preparing the opening, experts emphasize that if these operations are reversed, then for 1-2 nights the apartment will be without an entrance door. Practice shows that even professional measurers make mistakes when determining the size of the opening in the presence of old doors.
As a result of incorrect measurements, you will have to spend the night without doors for several days. Therefore, it is necessary to choose: either the correct dimensions of the door frame under the opening, or possible troubles in case of mistakes.
Dismantling the old door
Disassembly of any door begins with the removal of the leaf. If it is on detachable hinges, it is enough to lift the door with a pry bar. Non-separable hinges are removed from the box with a screwdriver - self-tapping screws are unscrewed. It is preferable to start from the bottom.
The wooden box is sawn at the center of the side posts and removed with a crowbar. To remove the metal box, the grinder cuts the fastening fittings: anchor bolts or lugs
After releasing the box from the fastening, it is carefully squeezed out or knocked out.Too much force is dangerous - walls can be damaged
Dismantling the old door.
Opening preparation
Removing the old door is the initial stage of installing the front door to the apartment with your own hands. Further:
- platbands, old polyurethane foam, insulation, pieces of plaster remaining on the slopes, spacer wedges are removed, and all protruding metal elements are cut off. The threshold is disassembled;
- the vertical of the wall inside the opening is checked with a plumb line. If there is a blockage inside the door of more than 1 cm, it must be removed with a puncher and a chisel - there will be difficulties when installing the door frame;
- existing in old houses, a quarter in the doorway is removed. This can be done with a grinder with a diamond disc, which is very noisy and dusty, or drill holes around the entire perimeter with a small puncher with a small step, and then knock out the remaining concrete with a hammer and chisel. Pencil markings of the cutting line will help to simplify the work;
- measurements of the height and width of the opening are taken, after which an order is made for the manufacture of doors;
- the ends of the walls in the opening are carefully examined. If necessary, the protruding parts of the wall material are knocked down by hand (hammer and chisel) or cut off with a grinder. Loose bricks and crumbling concrete are removed. Voids and crevices are treated with a deep penetration primer, and then sealed with cement mortar (1 share of Portland cement, 3 - sand). In this case, small potholes can be ignored, and large ones can be laid with pieces of brick;
- the next step for those who live in old houses: inspection and repair of the floor under the door frame. There is a wooden bar mounted there, which becomes rotten from time to time. It needs to be removed. After that, there are two options: put a new block or close up this place with a brick and fill it with a cement-sand mixture;
- if the wall is made of lightweight concrete (gas silicate blocks, expanded clay concrete, etc.) or is less than 15 cm thick, the walls of the opening are scalded with a metal frame. Such an operation is often necessary even if the house is panel;
- the opening ready for installation must be 4-5 cm wider than the manufactured door (20-25 mm on each side). Such gaps provide high-quality installation and insulation, increase the strength and reliability of the structure.
Strengthening a doorway made of gas silicate blocks with a metal crate.
What is a door frame for?
The door frame is the part of the structure in the doorway that ensures the door is correctly positioned. In appearance, it resembles a frame. Installation of interior doors is impossible without door frames.
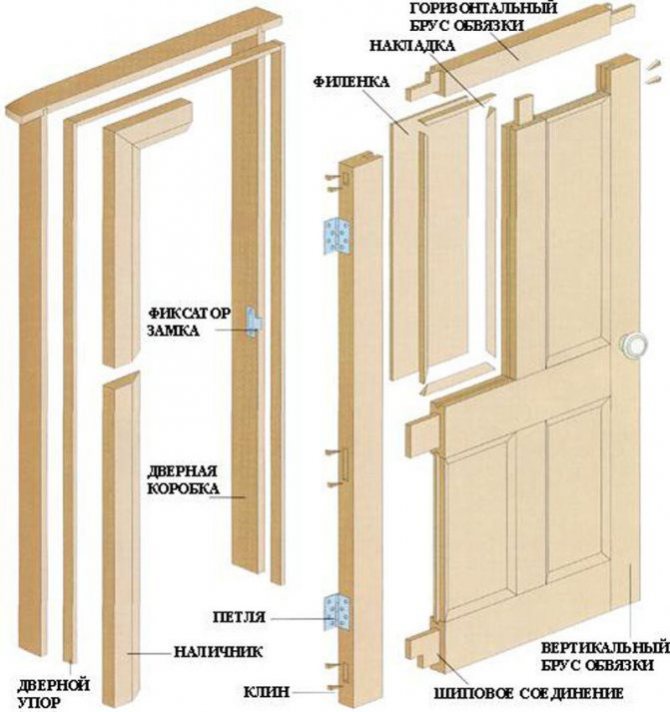

Door frame ensures correct door installation
The door frame consists of three parts - two lateral and one transverse. If necessary, you can make a nut. Although now neat metal sills are installed on the floor coverings, which can be purchased along with laminate or linoleum.
To make the door frame yourself, you should start by taking the necessary measurements and selecting the material.
Household repair No. 1
Choose trusted craftsmen without intermediaries and save up to 40%!
- Fill out the application
- Get offers with prices from the masters
- Select performers by price and reviews
Submit your assignment and find out prices
When purchasing doors, you should be aware that the interior block will become a real designer, which must be properly assembled. Such designs of the door interior frame make it possible not to immediately determine the side of the fastening and the insert of the locks, but to do it on the spot, seeing the doorways in front of you.
The assembly of the door frame can be done by a craftsman or on your own. To assemble a door block, you must clearly understand what methods should be used to install interior doors.
How to assemble a door frame?
The assembly diagram will help to make a door frame from blanks correctly.
- The elements are laid out on a flat surface at the same level.
- Correctly mark the door frame.
- The ends of the bars are cut at an angle of 45 or 90 degrees.
- Determine the position of the loops and mark them on a vertical stand. Measure 200 mm from the bottom and from the top. Which side depends on the right or left door opening.
- If the hinges are mortise, they make a notch with a chisel and fix them. The overhead hinges are simply screwed into place.
- The bars are tightened with self-tapping screws. The procedure is carried out carefully, because, a little overdoing it, you can damage the elements.
- Finally, insert the door leaf, align and check if there is a desired gap between it and the structure.
The box must be enlarged with the help of an extension, if the width of the wall is more than 70 mm, and the platbands are placed on both sides.
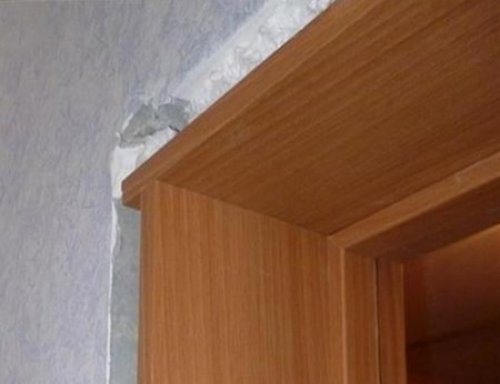

How to saw down a door frame at 45 degrees?
Elements with a rounded section are cut at an angle of 45 °. In order to make the correct cut, use a miter box or a miter saw with a rotating table.
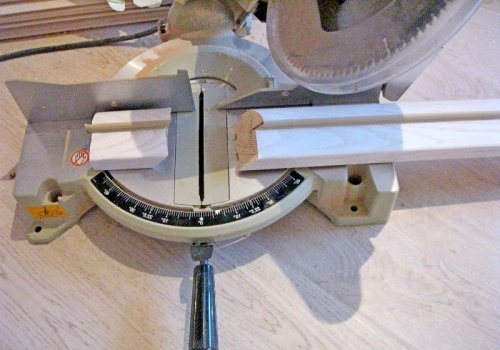

Do-it-yourself doorframes can be assembled without the use of special tools. In such cases, you can saw off the desired angle without a miter box, using a ruler and a protractor for marking.
When performing installation, the structure is fixed with self-tapping screws, which are screwed in at an angle.
Assembling the box at a 90 degree angle
With this option, the assembly of the door frame is easy and quick.
- It is necessary to saw off the required size of the racks and the horizontal crossbar at a right angle.
- Choose an extra part of the vestibule.
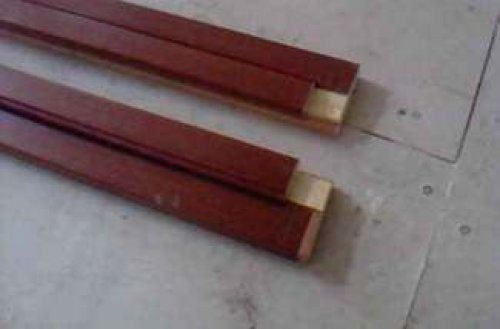

Place the elements of the box on the floor, align and fix at the ends with self-tapping screws (2 in each).
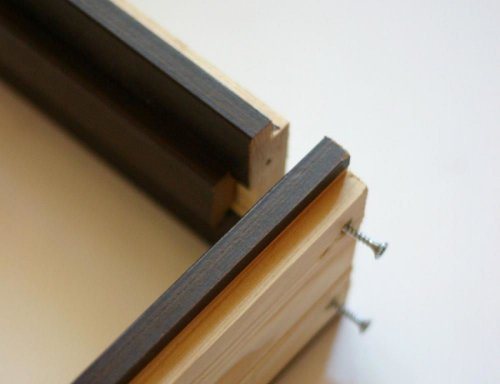

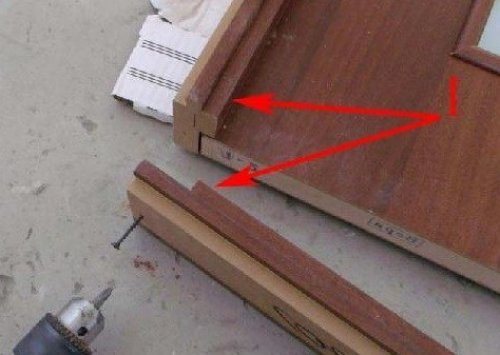
In order for all sides to maintain parallelism, you can attach the door to the door frame and check how it will stand in the opening. The connection of the door frame at 90 degrees is considered by specialists to be a quick installation technology.
Assembling the box with a threshold
There is no significant difference between installing door frames with a threshold and without it. Thresholds have recently lost their relevance. But, despite this, such a system has a lot of fans. This is explained by the fact that it is stronger and more reliable than a structure without a lower transverse bar. Such systems can withstand significant loads and are suitable for installing solid wood doors. Thresholds are considered a prerequisite for bathrooms. Regardless of what type of construction is chosen, each person will be able to assemble the frame of the interior door.
- Prepare vertical and horizontal strips in advance.
- Cut at 45 or 90 degrees.
- The prepared elements are placed on a flat surface.
- In turn, fasten the racks and crossbars with self-tapping screws.

Fasteners of platbands
Installation of overhead strips is carried out in different ways:
- finishing carnations;
- self-tapping screws;
- liquid nails.
When installing with finishing nails, the distance between them should be about 50 cm. The carnations are driven in to a depth of 2 cm. The flaws are masked with a wax pencil.
When installing platbands, they must be cut at an angle of 45 degrees to connect the parts. Docking can be done at a 90 degree angle.
Interior doors can be divided into several types
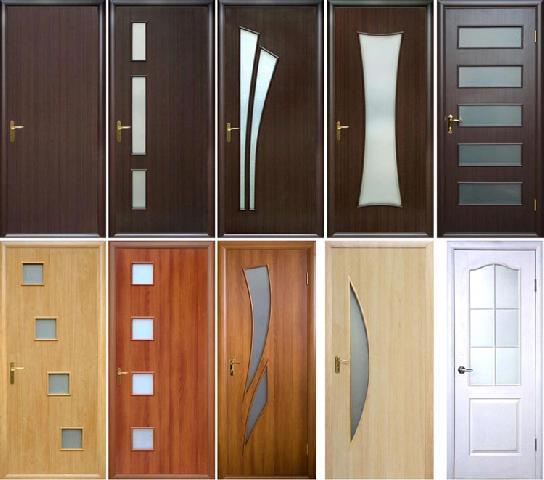
On the market, manufacturers of door structures offer a fairly wide range of models. Finished interior doors can be made from different materials. The most common types of materials are: fiberboard, MDF, natural wood.
Helpful information:
- How to build an attic with your own hands
- DIY sliding door installation
- Do-it-yourself septic tank from eurocubes
- Country toilet with your own hands for 7500 rubles.
- Do-it-yourself parquet looping
- Do-it-yourself roof made of corrugated board
1. Fiberboard - door: the frame is made of wood, and sheathed with fiberboard sheets with lamination.The advantages of such doors include: low cost relative to other types, low weight, which makes it possible to deliver them from the point of sale to the house on our own, ease of installation. Considering these points, they are popular among buyers, due to which their wide assortment is most often presented in stores.
Of the minuses, the low strength of the fiberboard itself can be noted, because of which the door breaks and becomes unusable quite easily, poor resistance to moisture, the door can twist. Therefore, we do not recommend installing it in bathrooms with a weak hood, this material loves dry rooms.

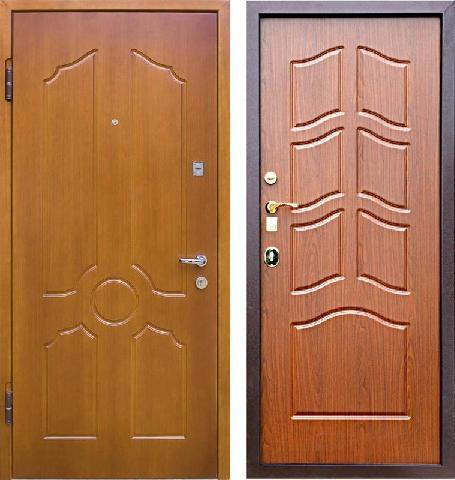
2. MDF - doors that are made from this type of material are the most suitable option when choosing a ratio of quality and price. Obvious advantages over doors made of fiberboard are high strength and resistance to moisture, a higher level of sound insulation. The cost of such a door is several times higher than fiberboard doors.

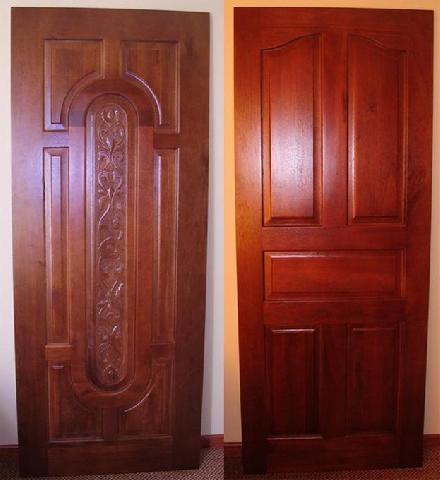
3. Natural wood - interior doors made of this material are the most durable. Their price directly depends on what kind of wood was used for their production. Doors made of precious woods are used for installation in rooms with an author's design, they will perfectly fit into a classic interior. The width of the interior doors is matched to the dimensions of your opening.

The list of interior doors by type can be supplemented with all-glass doors, metal-plastic, steel, but these types are not very popular among the general population, therefore they are not included in the article for a detailed description.
Types of door frames for interior doors
The correct interior door should stand in a reliable door box, because its quality will determine how long the door will last, as well as the design of the doorway of your room. Door frames can be divided into three main types.
1. Box made of fiberboard. It looks pretty decent, but when choosing a box made of this material, the strength of the entire structure will be questionable. The middle of the box bar bends from its own weight, not to mention the possible deflections from the weight of the door leaf itself. Since the main components in the composition of fiberboard, in a simple way, are glue and paper, it must be borne in mind that they are very fragile and not durable. It is not recommended to hang doors made of wood and MDF on them due to their heavy weight.
Interior doors-accordion: options from different materials


2. Box made of untreated wood. The cost is at the level of fiberboard boxes, but unlike the latter, boxes made of dry profiled timber have a higher strength. Therefore, when choosing between fiberboard boxes and untreated wood boxes, we recommend choosing the latter. It is also necessary to consider that you will need additional materials for the final finishing of the box.
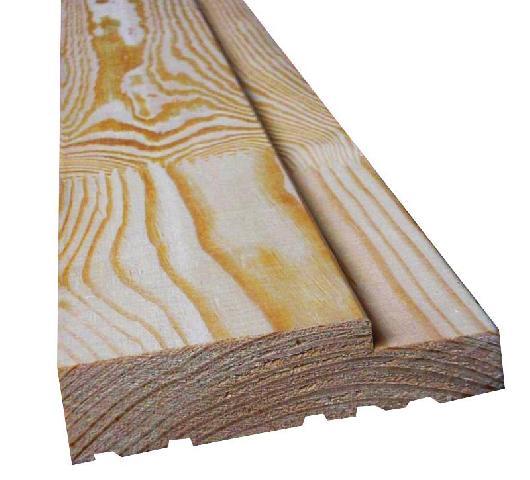

3. Box made of laminated wood. No final finishing required as it is already laminated with paper. And here there is one important point, when choosing such a box, the quality of lamination is very important. If thin paper was used for this, there is a high probability of scuffs, scratches, cracks, the coating loses its appearance. Perhaps a better option would be a box made of untreated wood with self-finishing and painting.
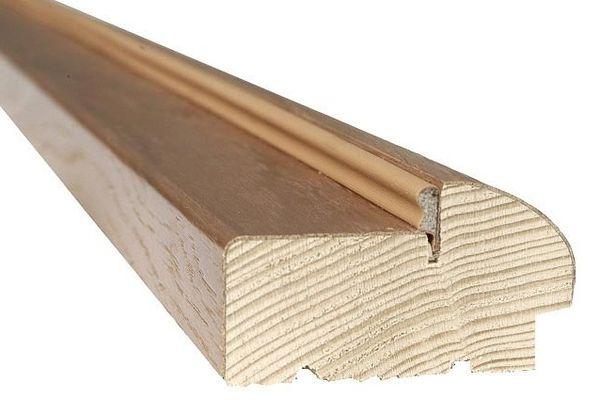

Also, the entire doorway of an interior door may require additional processing after installing the doors. Everything will whistle from your opening, its size, the location of the door in it, the interior of the room.
For such processing, you can use an additional strip and platbands. The required kits can be purchased at the store. We recommend that you decide on their need after the final installation of the door in order to understand what kind of final finishing you need.After all, the purchase of additional materials is an additional cost, which in the end may not be necessary.
Door assembly
After the box is ready, proceed with the installation. If this is a swing door, then hinges are screwed to the canvas. The insert is performed as accurately and accurately as possible, otherwise the operation of the installed door will be difficult.
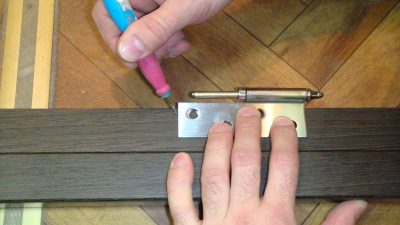

Determination of the position of the loops
It is advisable to do the inset using a special tool. To do this, the folded loops are applied to the canvas, stepping back from its ends about 25 cm, and circle them along the contour. At this point, the excess material is removed to a depth sufficient for the hinges to be flush. When determining the location of the hinges, the direction of opening of the sash and the type of fittings used are taken into account. Loops are inserted into the prepared nests and screwed with self-tapping screws.
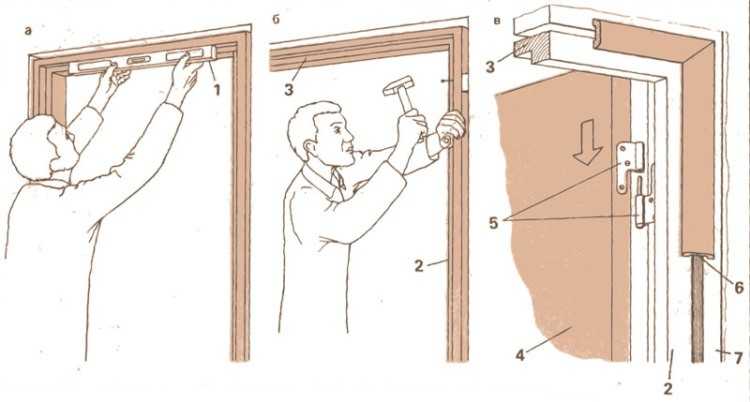
The prepared box is inserted into the doorway, while monitoring its spatial position without fail. Even a slight deviation in the vertical or horizontal plane is unacceptable. This will cause the sash to open or close spontaneously. Having decided on the position of the box, it is temporarily fixed with wooden wedges.
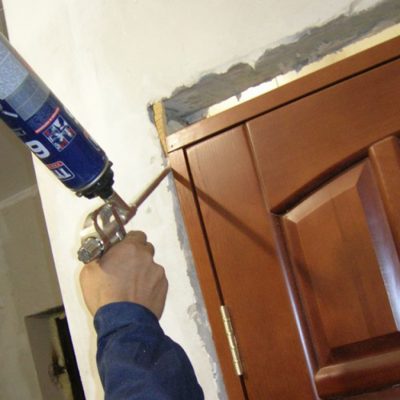

Fixation with polyurethane foam
Next, the canvas is hung. They control the size of the vertical and horizontal gaps between the canvas and the box. If everything is done correctly, there should be no problems when opening or closing the sash. To prevent accidental displacement of structural elements relative to each other, cardboard of the same thickness is inserted between the canvas and the box. After that, the space between the box and the wall is foamed, and when the foam dries, it is fixed with special hardware. After that, all that remains is to install the platbands.
Installation of MDF doors can be done in-house. It is enough to prepare the tool, familiarize yourself with the sequence of work, and then complete the installation in accordance with all the rules. In this case, the installed structure will turn out to be beautiful and durable.
Voted over 252 times with an average rating of 4.8
The working process
We will divide all work into three parts: collecting the necessary materials and fixtures, exposing the box and fixing the structure.
Materials and tools
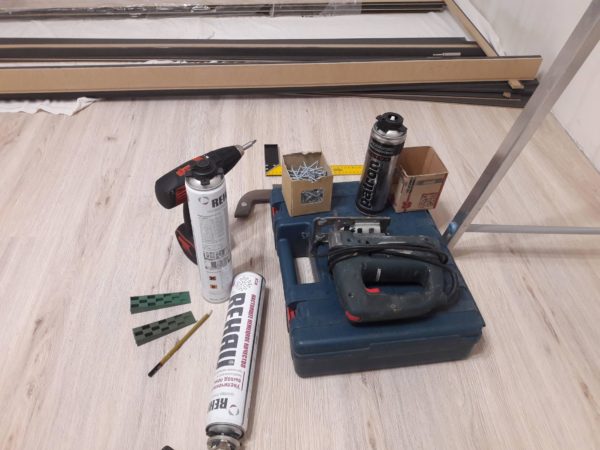

This is what a set of everything you need looks like.
All information on the components we need is presented in the table.
| Name | Description |
| Doors and box | Everything is clear here: it is impossible to put doors if they are not there. I do not recommend assembling the box on your own without skills and special tools, so immediately order the assembly of the structure and insert hinges and handles |
| Polyurethane foam and a gun to it | We will fix the structure on polyurethane foam, it is better if it is a professional version. It is much more convenient to apply the composition from a pistol, but if you need to put 1-2 doors, then you can do with the household option with a straw |
| Jigsaw and hacksaw | If you need to cut something in the process, you can use a hacksaw or jigsaw |
| Measuring devices | This includes a pencil, a square and a building level, most often we will use the last fixture. |
| Screwdriver | It can also be used for different jobs, with us it was mainly used for installing the handle and wrapping |
| Flushing | In order not to spoil the pistol and, if necessary, quickly wipe off the foam, we will need a special composition |
| Wedges and plates | Used to position the door and frame in the desired position and fix the elements until they are fastened |
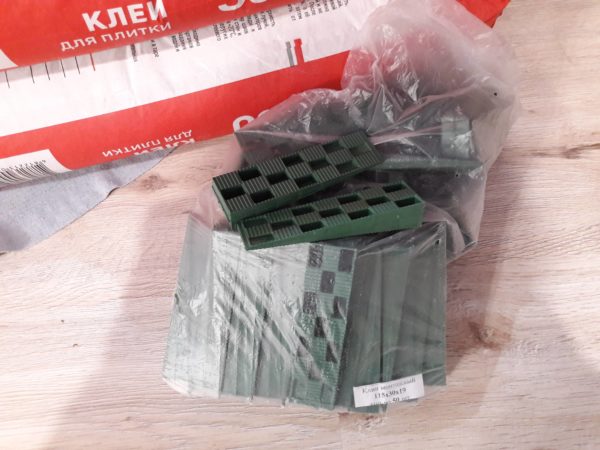

Assembly wedges - irreplaceable elements when installing doors and windows
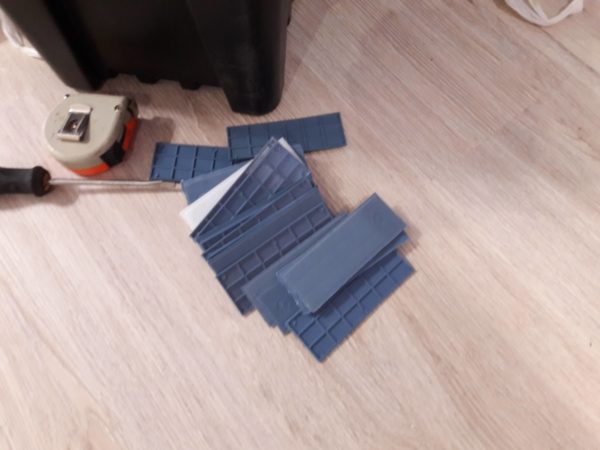

Plates allow you to precisely set the position of the door leaf in the frame before fastening
Exposing the box
The box is assembled, which greatly simplifies the workflow, the curtains are already embedded in it, so you can start working right away. If you have a choice, it is better to purchase a thicker version, the stronger the structure, the better.
The instructions for performing the work look like this:
- The box is neatly located in the opening, here it is important to immediately decide whether it will stand flush with one of the walls or will be located inside the opening, then you decide. First of all, plates or other elements are installed under the lower part in order to level the horizontal plane, the position is checked with a level;
The shape and dimensions of the structure
The base frame must match the dimensions of the door (width and height) in order to provide full coverage and support of the structure. An important nuance regarding the canvas is the purpose of the room for which it is intended. Because ventilation requirements will depend on this. In steam rooms and saunas, doors must provide reliable thermal insulation, so the opening is sealed as tightly as possible.
The bathroom, on the contrary, needs to be well ventilated so that excess moisture does not accumulate and mold does not appear. Therefore, the gap between the box and the door should be slightly wider. And also good ventilation is required for rooms in which gas equipment is installed.
To provide reliable protection against heat leakage, a rectangular frame is constructed from four bars, which will serve as a door frame. The vertical posts will become the hinge and mock element, and the transverse ones will become the upper support and threshold.
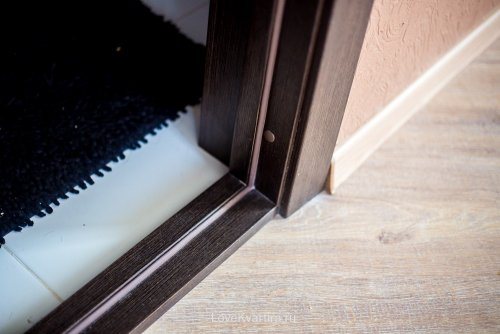

For free movement of the curtain, the gap between the door and the uprights should be about 3 mm. In cases where an air flow into the room is required, the box is assembled from three bars, and a gap of about 10-15 mm is made at the place of the threshold. A standard distance of 3 mm is left along the uprights and lintels.
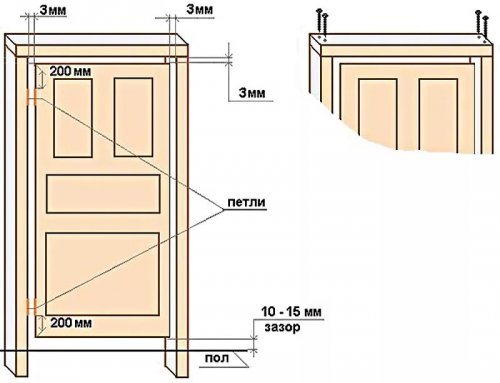

The assembled box is slightly higher than without
The difference is about 20 mm. It is important to take this nuance into account so that you do not have to shorten the door. Because the canvas can only be adjusted if it is made of wood.
The gap between the door frame and the opening must be at least 10 mm on each side, so that the structure can be easily installed and fixed.
Preparatory stage
Before starting the installation of the door frame, carefully measure the parameters of the opening, which are determined after the old frame has been completely dismantled.
Attention! The quality of the installation depends on how correctly the dimensions are taken.
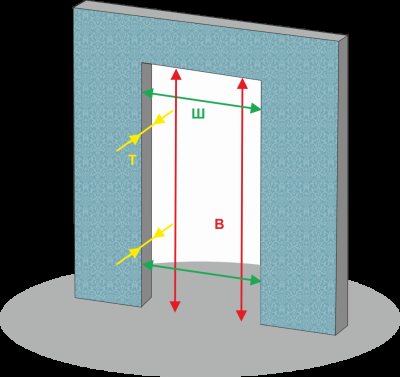

Determination of geometric parameters
You will need to know:
- Depth. This parameter is equal to the wall thickness. The thickness of the box directly depends on it;
- The width on which the dimensions of the box and the canvas depend. 8-9 cm are allotted for the installation of the trap.A standard MDF box has an average thickness of 2.5 cm.Taking into account that it is mounted on both sides, it turns out 5 cm.A minimum allowance is provided to ensure free movement of the sash (about 3 mm on each side ). The width of the door leaf depends on the dimensions of the opening. A 60 cm wide door is purchased for the bathroom, and 90 cm for residential ones;
- Height. This is the distance from the floor surface to the top of the doorway. This parameter affects the dimensions of the structure (standard height 2 m) and the design features of the box itself. The box is mounted with or without a threshold. In the first case, the calculation of the dimensions is carried out by analogy with the calculation of the width of the box. In the absence of a threshold, a 3 mm gap is provided between the upper end of the sash and the frame and 1 mm from the bottom.
When determining the dimensions, first check the verticality of the walls. Given that the thickness of the wall can vary in height, measurements are taken at several points. Focusing on the dimensions obtained, they make a choice in favor of one or another door structure and suitable fittings.
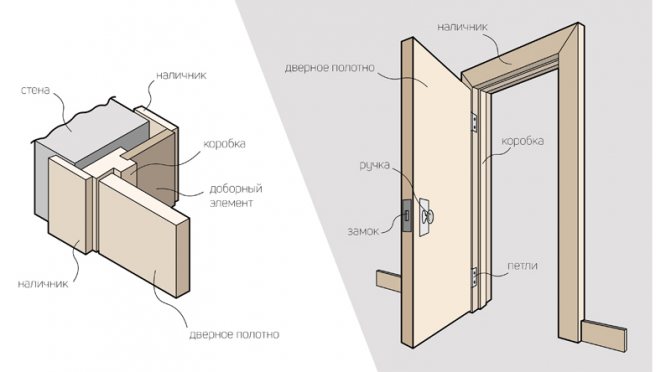
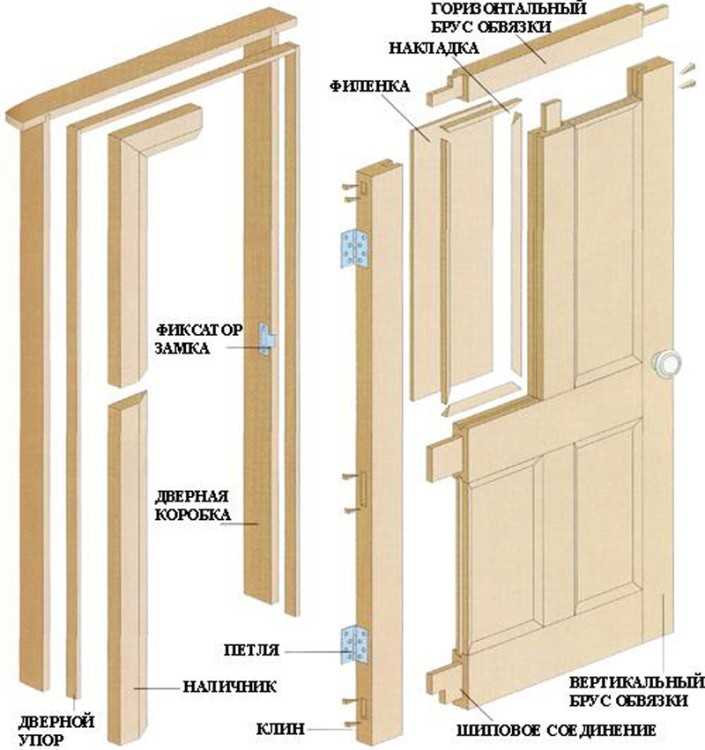
In the most general case, a MDF door frame consists of two vertical beams and at least one horizontal one. If a threshold is mounted, then two horizontal bars are provided.
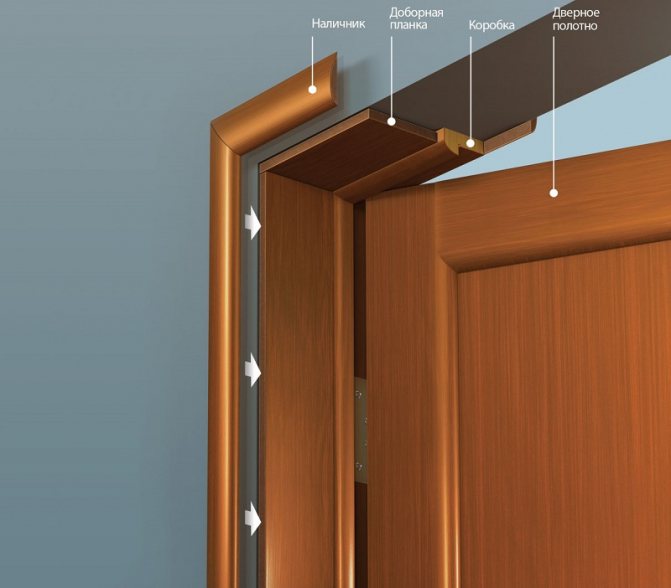
The structure consists of the following elements:
- Door leaf;
- Boxes;
- Rack of the vestibule;
- Additional planks;
- Fittings.
Features of frames for metal doors
To install an entrance door, you need a box that is responsible for strength, reliability, functionality and burglary resistance. It is a fixed part of the door block and is built into the wall opening. Externally, it is a frame structure with hinges for hanging the canvas, platbands and additional fittings. The door frame is a multifunctional element. Fulfills a practical and aesthetic role, protects the door from burglary, penetration of cold, noise and odors.
There are several types of boxes, depending on the installation method.
- Corner - mounted in a cover plate on the opening. Has an external platband for hinges.
- End or internal - located inside the opening and attached to the prepared wall surface. The construction has no platbands.
- Covering or telescopic - used in premium door designs. It is completed with external and internal platbands that simplify installation and hide wall irregularities.
Foaming
When installing interior doors on your own, do not forget about the need to isolate the elements of the door frame, platband and threshold from moisture, regardless of which room this door will be used in. If you do not protect the parts from moisture, their lower part will gradually deteriorate. To avoid this, it is required to continuously apply silicone sealant along the entire length of their contact with the floor.
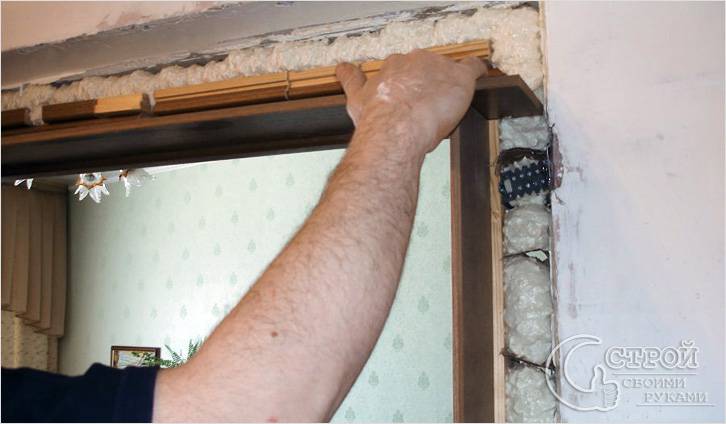
The slotted hole that has formed between the wall and the box is filled with special foam. In order for the foam to polymerize well, the surface of the wall must be sprinkled with water. Spacers can be used to avoid deformation. At the end of the foam polymerization, the spacers are removed.
Installation of the box in the opening
So, after the assembly of the box is over, it's time to start installing it in the doorway. For this, the block is inserted directly into the opening and fixed with wedges. Experts recommend inserting no more than 2-3 for each vertical post and 2 wedges on the top bar.
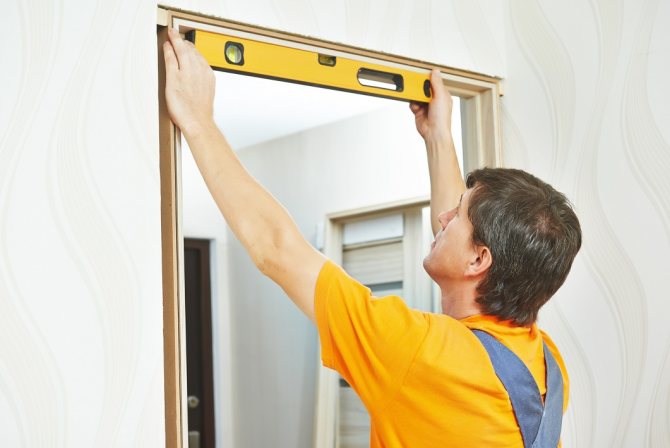

Then the box is aligned on the vertical and horizontal axis. The tilt adjustment process is easily accomplished by hitting the wedges with a hammer. After the door block is perfectly positioned, the frame is secured. Using a drill or punch, a hole is drilled in the box and wall. Using dowels, the box is installed in the opening.
A set of necessary tools
Do-it-yourself installation of interior doors is, although not particularly difficult, but a responsible and painstaking process that will be very difficult to carry out without the appropriate tools. For the accurate and fast execution of all work, you will need:
- an electric drill or hammer drill (depending on the material from which the walls are made);
- drills or drills for 4 and 6 mm;
- hand saw with fine teeth;
- drill for wood with a diameter of 4 mm;
- chisel;
- screwdriver or Phillips screwdriver;
- tape measure and building level;
- miter box;
- quick-assembly dowels with a length of at least 75 mm and wood screws 3.5x60mm;
- polyurethane foam.
Features of installing a box with a threshold
Such a frame is required for bathrooms and toilets and to a lesser extent for other rooms. The floor level in the bathrooms is often higher than that of the adjacent room, therefore the installation of a box with a threshold is also necessary to protect against water ingress on parquet, linoleum or other coating. Fastening parts of the box with a threshold should be done with galvanized screws.The gap for opening the door leaf is made an additional 4 mm larger than that of the version without the bottom strip.
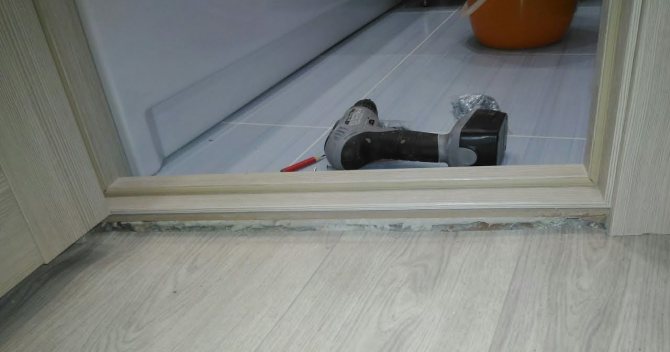

Threshold door frames are more robust, so they can be installed in places where there is a high level of vibration, such as next to railway tracks. Installing a frame with a bottom bar may be required in rooms with a high level of noise pollution. In addition to the soundproofing function, the threshold is able to act as a seal: to prevent air outflow and, as a result, heat loss.
Advantages of door frames with a threshold:
- partially solve the problem with drafts;
- protect from dust and smoke.
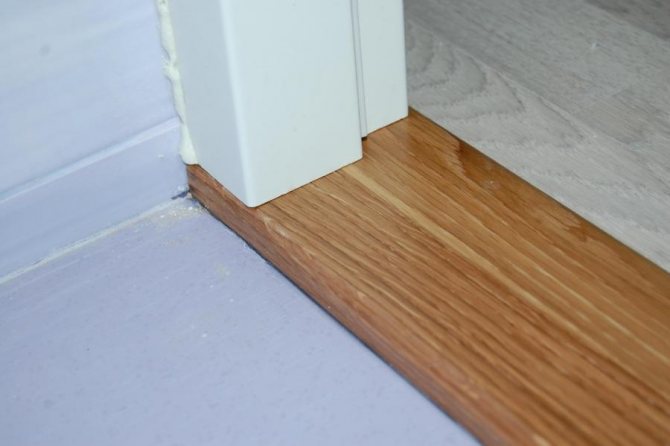

We fix the door frame
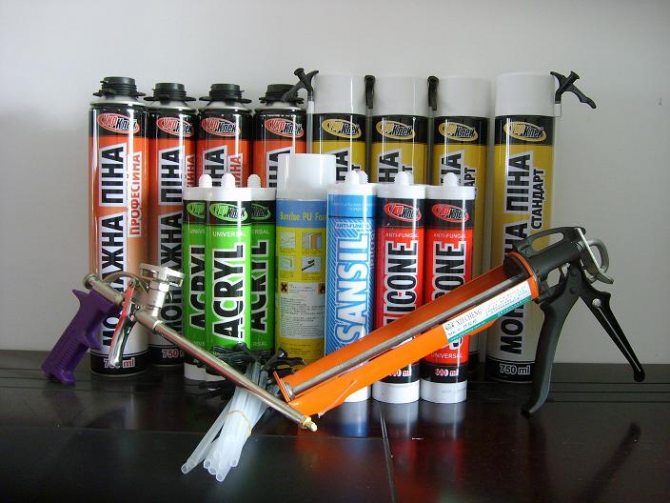
The next step in how to install an interior door is to secure the box. The gap that exists between the opening and the door frame is usually filled with polyurethane foam. This is done to fix the door block and increase sound and heat insulation. Polyurethane foam perfectly fills even the smallest defects, cracks and cracks. This material is easy to use and works well with any type of surface.
The box must be closed before filling the gap to prevent foam from spilling onto it. To do this, it can be pasted over with masking or construction tape, or film. If a little foam has already hit the surface of the box, then while it is fresh, it can be easily washed off with solvents or alcohol. If the foam has already hardened, then it can be quite difficult to remove it in this state - it is possible only mechanically, which leads to inevitable scratches.
One of the properties of foam is that it can grow significantly in size. This must be taken into account when applying. Sometimes it happens that the door frame is simply deformed - this happens for those who do not know how to correctly insert the door frame and interior door. To prevent this from happening, cardboard spacers are usually used. They are installed between the uprights. Also, thick cardboard can be laid between the closed opening and the box.
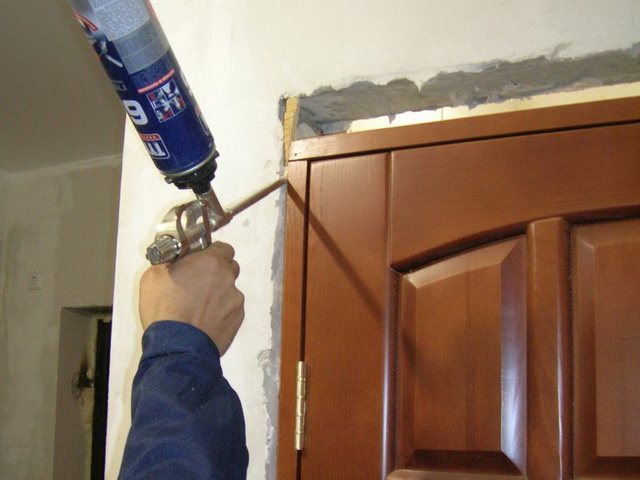

Before starting to work with the container, it is recommended to shake well its contents for a minute. In order for the foam to better connect to the surface, it is advised to moisten the opening a little.
In order to prevent distortions of the box, the foam is applied in two steps. At the first stage, the application is spot-on. Then, after cooling, fill in whatever remains. Excess material is cut off with a sharp knife.
https://youtube.com/watch?v=Djm04M2CVEE
Then it remains only to complete the installation of platbands and fittings. To do this, they are cut to the height of the box at an angle of 45 ° for horizontal and universal strips. Fasteners can be carried out with nails or glue.
Here's how to insert an interior or any other door with your own hands. Our detailed instructions will help the home craftsman, and in the video you can watch the entire installation process from A to Z.
