Today, PVC window sills are gaining more and more popularity, the advantage of which is moisture resistance and a coating that does not need to be painted. Moreover, the width of such window sills is up to 1000 mm. both colored and white, with a matte and glossy surface, this makes it possible to set Pvc window sills to any window.
As for the installation process, there is nothing complicated here, but nevertheless, before installation, you need to read the detailed instructions.
Correct installation of window sills
Installation of window sills during a major overhaul of an apartment, an inevitable operation. Even if your new apartment has window sills from the developer, then with a high degree of probability these window sills you still have to replace: careless installation, the window sill itself is of poor quality, damage during the delivery of the apartment.
In most cases, the customer prefers inexpensive PVC (plastic) window sills of white matte color, which are unpretentious in operation. This option is acceptable for budget repairs if your windows do not face the sunny side or if you are planning blind curtains. Otherwise, under the influence of sunlight, the budget windowsill will quickly lose its presentation: temperature deformations, fading of plastic (yellowing, etc.). installation of a window sill not always materially justified.
With a high-quality renovation of an apartment for yourself in the long term, it is better to give your preference to better quality window sills (Moeller, Danke, Werzalit). It is no longer just plastic painted in bulk, but windowsills made on the basis of wood-polymer pulp from environmentally friendly materials with various acrylic coatings, imitating the texture of wood or marble of various colors, allowing to please the refined tastes of any client for the implementation of his design project. In addition to decorative qualities, such windowsill has high torsional rigidity, durability and wear resistance, high-quality geometry. When installing a window sill, you must be guided by certain technologies.
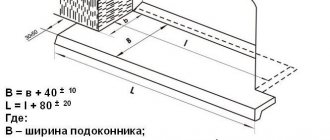
When purchasing a window sill, you need to take off the dimensions in advance and understand how it will be located with you. Since the store will cut you the required length for ease of transportation, and the width of the window sills is available in multiples of 5 cm. (20.25.30 cm, etc.). If the window sills are installed correctly, it is necessary to agree with the customer about the window sill departure relative to the wall. The “flush” option (flush with the wall) is shown in Fig. 1; this option for installing the window sill is preferred by those who plan to hang curtains and tulle to the floor so that the protruding window sill does not interfere. Those who plan the functional use of the window sill (storing decorative items, flower pots or making a window sill-countertop) prefer a large window sill overhang (Fig. 2).
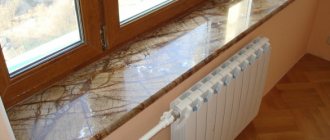
It should be borne in mind that the large ledge of the window sill in further operation will interfere with the convection of hot air from the heating radiator upwards in order to create a barrier for cold air that enters the apartment through double-glazed windows. To improve convection in the protruding part of the window sill, it is necessary to make ventilation holes or mount a ventilation grill (Fig. 3), which will not impede the ascent of hot air.
For the correct installation of the window sill, it is necessary to make a groove in the slope (if it has already been made), where the ends of the window sill will fit to create additional rigidity of the structure in the hitch. On the lateral edges of the part that will go into the groove of the slope, make a cut of the window sill (Fig. 4). at the end of the installation, special end caps (sold separately from the window sill) will be mounted on the remainder of the end face.
The window sill can be installed on an assembly or plaster mortar. For better adhesion to the adhesive, screw small self-tapping screws (25 mm) into the smooth back side of the window sill (not the front side) (by 1/3 of the length) in a checkerboard pattern (Figure 5.6), which, after the solution (or foam) hardens, will provide reliable bonding.
Blowing out the foam of the window sill during installation should be done with good foam, giving preference to proven brands. In this case, you can be sure that the foam will not inflate and will not make your newly installed window sill "humped". Using a professional foam gun will allow you to spend 2-3 cylinders on installing window sills throughout the apartment.
Source: remont-norma.ru
Why are the window sills not made flush with the wall? Why window sills with a ledge?
A battery is installed under the windowsills, as a rule, and in order to cut off the heat from the battery to the window, a ledge of the window sill is made, otherwise the heat will go to the glass and condensation will form on the glass, the windows will flow. This is my guess.
I think it's for practical reasons.
1st reason - Human physiology is such that he has a lot of protruding body parts. For example, when he stands in a relaxed position, his legs are very slightly, but slightly bent at the knees. It's more comfortable to stand this way.
If the window sill were flush with the wall, then everyone would hit the wall, going to the window.
2nd reason - Do not flood the wall and wallpaper on it with water. Many have potted flowers on the windowsill, or in winter the windows “cry”. There would be no ledge - all the water would flow down the wall, but here on the floor, which is much easier to wipe.
Warm air from the battery to the window should flow "with cut-off" and not directly.
The role of the same "cut-off" (obstacle) is performed by the window sill, or rather that part of it that is not flush with the wall.
The protruding part of the window sill protects the upper edge of the wall under the window sill from mechanical damage.
Plus a decorative component.
It is simply not aesthetically attractive to hide the junction of the window sill and the wall under it, with some kind of cover strips.
Due to the protruding part, the width of the window sill increases and, accordingly, its area.
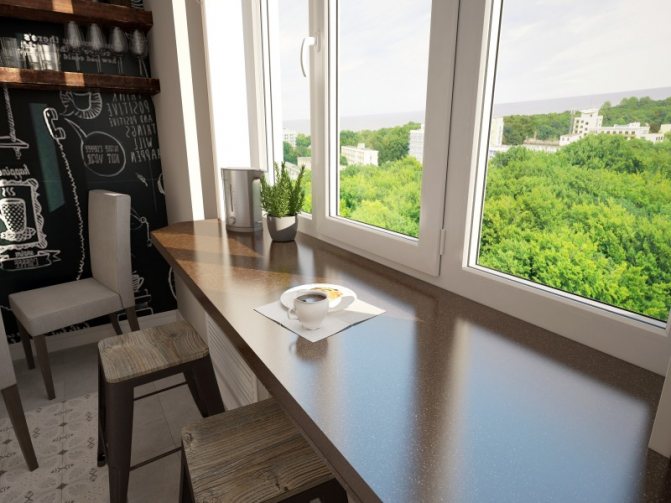
The area can be useful, many keep flowers on the windowsills, or even make an extension of the kitchen table (countertops) from the windowsill.
That is, the wider the sill, the better.
The size of the platform for the window sill can be extremely small 10 cm, for example, the width of this part depends on how the window was installed and how thick the bearing walls are in which the window opening is.
The width of the site is increased by the same protrusion, that is, here, too, the aesthetic component is in the foreground, and not only practical.
And by the way, they make window sills flush with the wall, like on this
The width of the site is significant, there are no heating radiators under the windows, the window sill is flush with the wall under it.
That is, this is a working version and is being done this way.
If you have a very wide opening (window), make the window sill flush, this will not be a kind of violation of the rules, requirements, rules.
Especially when it comes to a PVC window sill, somewhere in the office (they are often sat on).
The larger the area of contact between the window sill and the platform, the less likely it is that the protruding part of the window sill will be broken.
Home and Garden
Stylish and comfortable home
And your windowsills are eared?
Recently, Dmitry Sivak had a blog post about window sill ears.
In short:
The ears appeared at a time when there was an internal trim around each window, so this is normal for traditional styles. But if you are a design rebel or an art revolutionary, then feel free to make a window sill not only without side protrusions, but generally flush with the window opening.
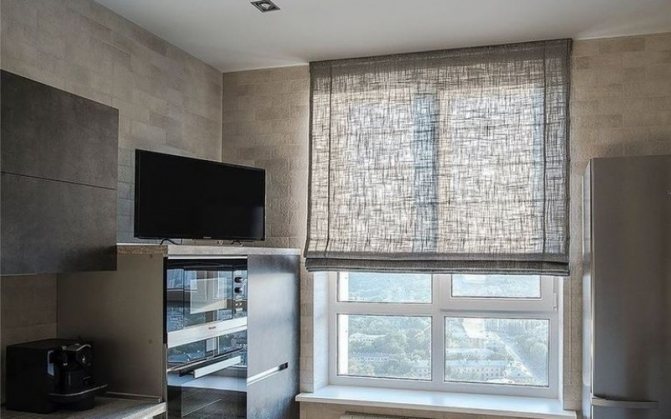
One moment that confuses me in all this. With roll curtains and Roman curtains, everything is clear if they are located on the window itself or along the width of the window opening:

But if they are dark, then the light from under them into the gap will break through.
But what if the curtains are hanging on the wall?
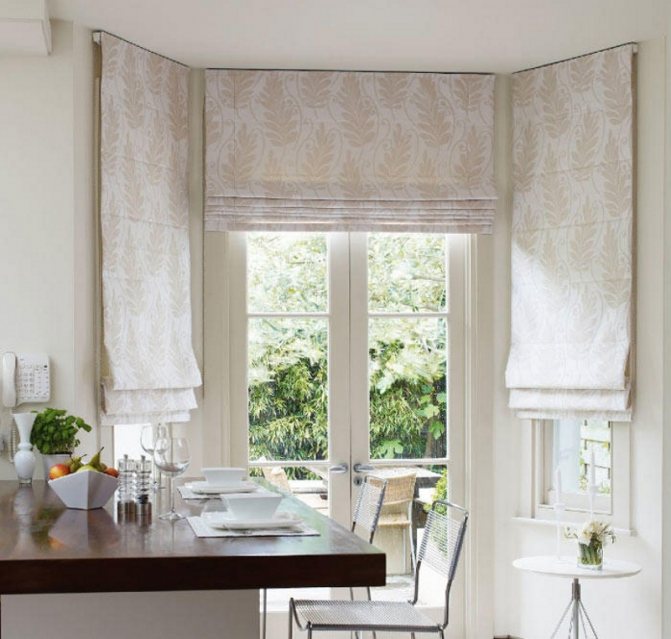

If you make the sill narrower, they will dangle around the edges:

The topic of huge ears is also not disclosed:

What do you think? Have you ever thought about windowsill ears? How are you?
Information about this community
- Placement price of 50 tokens
- Number of readers
- Duration 10 hours
- Minimum bet 50 tokens
- See all Promo offers
Social capital9 185
- —
- leave a comment
And in all apartments in the Russian Federation and in the Netherlands - everywhere they are lop-eared :))))
By the way, I didn't think that such a photo could ever come in handy, so I didn't. When the windows and window sills were changed in our stalinka, there was almost a rail for the window sill in the walls right up to the frame, well, it doesn't matter that the groove in the slopes along which it was literally inserted there (we had granite window sills in the original).
Decorating slopes and window sills without plastic - is it possible?
Good day! We have reinstalled windows in our new building, where renovations are in full swing. Now you need to trim the slopes, but I really don't want to make plastic sandwich panels with terrible plastic corners. I talked to the workers that for plastering, you need to cut a lot on the sides of the window openings (the masonry walls are made of foam blocks from the developer, uneven, with protruding fittings and, most importantly, with cracks! It's blowing from there!). Is it possible to independently plaster the slopes with a thin layer so that it stops blowing from the cracks between the blocks? How to do this, you have to smear with silicone sealant? and the second question arises from the first - is it possible to make window sills flush with the wall, without protruding the window sill by the obligatory 5 cm? I don't like it visually. I remember about the battery and the movement of air masses, but how critical is it? I really want to put something inexpensive on the windowsill and a mosaic on top, it's such a dream)) but at the same time I want the windowsill to stick out. Are these 5 cm worth of such torment, or is there a technological need for the bulging of the windowsill?
Answers (12)
Your reply
Similar questions
Tell me how to fix the error when leveling the walls - the surface began to crumble! Thanks in advance!
Features of the walls: brick leveled with cement and painted with something white. In order to remove irregularities, we covered with Rotband Knauf universal gypsum plaster, without priming the walls. The plaster is dry and when you push the hand over it with pressing, the roughness crumbles and the hand turns white. The master who made the ceiling advised us to prime it and plaster it again. What do you recommend? And can acrylic primer be used both between plaster layers and under the wallpaper? Thank you so much!
Side-by-side refrigerator, how many centimeters from the wall do you need to open the door?
Good afternoon, members of the forum. I'm a newbie here, just a few days after I found out about the existence of this forum, I really liked it here, I decided to register. And this is my first question. We want to buy a side by side refrigerator for the kitchen, the family is small, only 4 people, but three of them are men, a dad and two sons, so we need a big refrigerator) I planned the kitchen long ago, it's good that I haven't ordered yet, and now Today I read on another mom's forum that these refrigerators take a huge distance from the wall for the door to open. We, of course, did not even know about it, we calculated everything in grinding, now we have to redo the kitchen project. Happy owners of such refrigerators, please tell me how many centimeters should be left from the wall so that all doors can open and drawers can be freely taken out. And what kind of models do you have?Thank you all in advance!
Can I paste wallpaper on a painted wall?
I painted all the walls in the kitchen with Tikkurila Harmony on fiberglass. Boring and monotonous. Asks to paste over one wall with printed wallpaper. Vinyl wallpaper on a paper basis. You can simply glue them onto the paint, i.e. on the wall painted by Tikkurila? Or do you need to clean something up beforehand?
Please tell me how long the curtains should be: BEFORE the floor or should the curtains lie on the floor?
I don't know. What length of curtains to make: cut to the floor or let them lie on the floor? And if they are on the floor, then how many centimeters?
Source: ideas.homechart.ru
Technical value
The windowsill is not just a whim or someone's desire to increase the usable area of the room with its help. It has a very specific technical purpose.
In fact, the window sill is an artificial barrier for warm air rising from heating devices. It does not allow it to instantly mix with the cold outside, scattering most of it around the room.
For reference: It is considered an insulator that helps maintain a normal room temperature.
How to prepare the walls
Before properly installing the plastic window sill, the place for it must be cleared of irregularities and debris. To remove dust, it is best to moisten it with water, then the solution or polyurethane foam will have better adhesion to the wall.
According to the rules, the window sill should go into the side walls of the window block (slopes) by 2-5 cm on each side. Therefore, it is necessary to make the appropriate indentations with a puncher.
Tip: if the walls are perfectly flat, it can be installed flush with the plaster, if not, push it forward by 1-3 cm.
REQUIREMENTS FOR THE QUALITY OF PERFORMANCE OF WORKS
The composition of the monitored indicators, the volume and methods of control must comply with the requirements of SNiP 3.01.01-85 * “Organization of construction production”, GOST 23166-99 “Window blocks. General technical conditions ”, GOST 30971-2002“ Seams of mounting assemblies for joining window blocks to wall openings. General technical conditions ”and technical recommendations TR 152-05“ Technical recommendations for ensuring the quality of installation of window and balcony blocks ”.
Quality control of construction and installation works should be carried out by specialists or special services that are part of construction organizations or are attracted from outside and equipped with technical means to ensure the necessary reliability and completeness of control.
The window sill is brought under the frame to a depth of about 1 cm. If the gap between the window sill and the lower part of the opening is too large, it is partially filled with cement mortar, leaving a gap of 5-10 mm. The edges of the window sill must necessarily go into the wall by about 1.5-3.0 cm.
Installing a plastic window sill
Today, PVC windows are becoming more and more popular, at the same time, the demand for plastic window sills is increasing. To install the latter, you do not have to be a professional, a craftsman can do it with his own hands, even without training.
To do this, you will need a certain construction tool and a plan for performing the work. But, if you are not confident in your abilities, it is best to take a few lessons from the masters. The instructions below will tell you the main points of the process.
General installation plan
Tools and materials
Before you install the plastic window sill yourself, you need to prepare:
- Angle grinder ("grinder") or jigsaw, but you can also limit yourself with a hand file for metal;
- perforator with attachments for working on stone;
- building level, preferably 1 m long;
- polyurethane foam;
- gun for polyurethane foam;
- wooden wedges;
- construction knife with replaceable blades.
Work order
Installation is carried out in several stages:
- product selection;
- fitting the window sill to the desired size;
- installation of a window sill;
- laying gaskets;
- checking deviations;
- fixing the plastic block.
Below we will tell you how to install a window sill on plastic windows in more detail.
How to choose a PVC window sill?
You can buy it today at any hardware store. The standard length of the product varies from 1.5 to 3 m, width - 0.15 to 0.60 m.
The length of the window sill is selected based on the width of the window opening plus an additional allowance (at least 30 mm on each side). The width of the plastic block is selected depending on the depth of the window opening - the distance from the window profile to the wall, taking into account the allowance for the window sill deepening (about 20 mm) and the window sill protrusion from the opening.
It is important to remember that the window sill should not completely cover the heating device, otherwise the circulation of the heat flow will be disturbed, which will lead to the formation of condensation and the appearance of ice on the windows. If this happens, then in some cases you will need to replace and repair plastic windows.
The allowed projection size is 50 to 70 mm. In some cases, it may be completely absent..
Flush-to-wall installation
Caution: The overhang may obstruct natural air circulation. If this happens, the windows will fog up.
Fitting the plastic block
- Trim the window sill if its parameters exceed the required dimensions in length and width.
- Remove those parts of the plastic block that prevent it from entering the window opening.
- Use a power tool (grinder or jigsaw) to cut plastic.
Installing the window sill and laying the gasket
- Clean the place of installation of the plastic block from debris and dust with water.
- Insert the prepared workpiece into the groove provided under the window profile to a depth of about 20 mm.
- Place wooden wedges under the windowsill, with a distance between the bars of about 400 mm. Wooden wedges-supports will not only help to correctly position the window sill and firmly press the block against the window frame (for example, a balcony), but will also take on the entire load.
Checking deviations
Using the building level, they determine the correct installation of the plastic block. The level must be met in all directions.
Building level check
If there are irregularities, the situation is corrected by selecting the thickness of the wooden wedges-supports. Do not forget about the slight slope of the window sill towards the room.
Fixing the window sill
Before fixing the window sill in the opening, make it heavier. For this, various objects are used, for example, bottles or jars filled with water. After that, the presence of deviations is checked again and the product is fixed.
Fixation with polyurethane foam
The PVC window sill is fixed using a spray can with polyurethane foam installed in a special gun. In addition, from the outside of the window, it is pressed against the frame using self-tapping screws. After a day, the load is removed from it, and the excess foam is cut off with a clerical knife.
APPLICATION AREA
1 AREA OF USE
Installation of a window sill
and low tide
is the final stage of installation of plastic windows.
Fig. 1a. Plastic window construction
A variety of standard sizes allows you to select and mount a window sill for any window opening. The window sill is easy to assemble and dismantle, practical and easy to use.
Methods for attaching plastic window sills
In cement masonry
Installation of PVC window sills does not require special skills and special tools. Sawing a plastic window sill can be done with a wood saw. It is necessary to be careful and cut without much pressure to avoid scratches on the surface and chips at the cut of the PVC window sill.
After sawing off, the ends of the plastic window sill are closed with decorative plugs, which can be purchased when placing an order. Caps for PVC window sills are selected in length depending on the place of installation and the method of fastening. The lower surface of the plastic window sill has special grooves of the “dovetail” type (as it is called in Russia, there is also the name “gabelin-leaf trident”) to facilitate installation and improve the fastening of the PVC window sill in the window opening.
Plastic window sills can be laid on a cement mortar, glued with liquid nails to the horizontal surface of a window opening, and mechanically attached to nails or self-tapping screws using a metal profile, which allows them to be installed in rooms of any purpose and with any type of external walls.
It is recommended to leave at least 10 cm between the PVC window sill and the upper edge of the radiator.
End caps for plastic window sills are made in universal length with two side edges or across the width of the PVC window sill. In the event of a change in the installation location, the length of the plug can be easily reduced by yourself by cutting off the protruding end with ordinary scissors.
